So here’s the thing about me. When I go to a store, I am pretty much constantly scanning the aisles for things that I can recreate myself at home. As much as I love shopping, I love even more to see something I love in a store or online and figure out a way to make it myself for a lot less. A few weeks ago, I was at HomeGoods and saw this skull candle holder.
I loved it, but it was $19.99, which I didn’t want to spend on a candle holder. So naturally, I had to try to figure if I could make it myself. {Spoiler alert: I did.}
I had some little plastic skulls from Target {here are some similar ones from Amazon}, so I knew I could use those, but I was trying to think of what I could use for the base and the candle holder part. I thought about a wood block and a little dish, but I couldn’t find anything that was perfect.
Then, a few days later, I was at Michael’s, and inspiration struck: terra cotta saucers!
I bought two of them {I got the 4″ size”} for about $1 each. Then I set to my task.
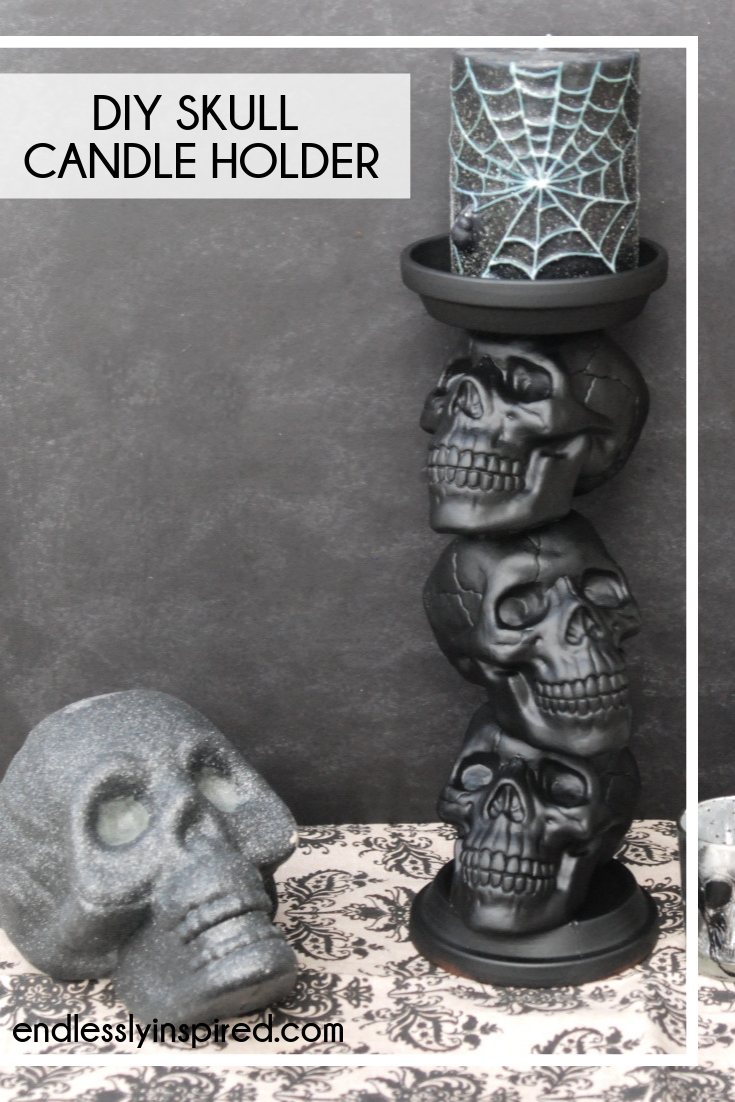
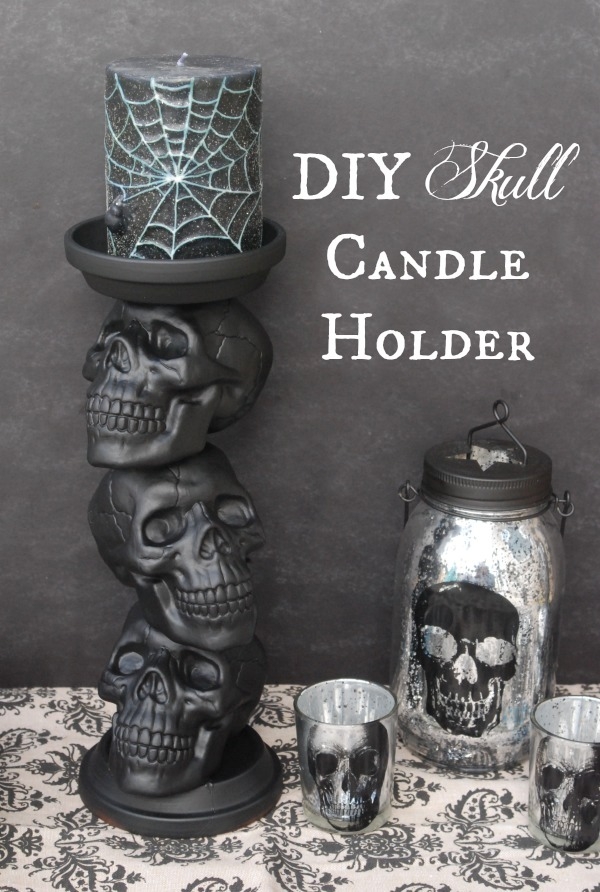
Start by flipping your bottom saucer upside-down. Use a lot of hot glue {this is my favorite hot glue gun ever — and it’s cordless!} to stack the skulls together and attach them to the bottom saucer. Then glue the other saucer on top, making sure it is level.
Hit the whole shebang with some flat black spray paint, and there you have it: your own spooky-cute skull candle holder!
I think the skulls look even better painted black than they did originally.
Look at how clearly you can see the cracks and other features! I also love how it kinda looks like the guy on the top is wearing a little top hat. Adorbs.
Disclosure of Material Connection: Some of the links in the post above may be affiliate links. Among others, we are a participant in the Amazon Services LLC Associates Program, an affiliate advertising program designed to provide a means for us to earn fees by linking to Amazon.com and affiliated sites. As an Amazon Associate I earn from qualifying purchases. This means if you click on the link and purchase the item, I will receive an affiliate commission. Regardless, I only recommend products or services I use personally and believe will add value to my readers. I am disclosing this in accordance with the Federal Trade Commission’s 16 CFR, Part 255: “Guides Concerning the Use of Endorsements and Testimonials in Advertising.”


I like yours better, hah! You did an excellent job. I need to grab my glue gun and get cracking. I hope you’ve had a great Wednesday!
This is absolutely amazing! Definitely pinning for next year!
Beth at LWC Wonderland
This is amazing! I’m definitely going to have to make this! Are you worried about it collapsing if there is too heavy of a candle on it or do you think it’s sturdy enough?
Mine collapsed and I didn’t even get to put a candle on it. 🙁
That’s one of the nicest Halloween ideas I’ve seen so far. I shared it on reddit and I’m picky about what I share. 🙂 Thanks!
Nancy
Cool!!! Inspired Again! You are so Awesome! Thanks for sharing!
Where can I get these skulls
Love the idea. I am in the same position where I travel store to store for inspiration then go home and design with what I have. Now I have another great idea to use. Thank you.
Ran across this and thought it was great! Pinning so I can try my hand at this for my grandkids. They will love this it. You did an Awesome job!!!
How did you make or buy the other things in the pic.–Candle with blue web, small candle holder with skulls and the Jar??
Hi Donna! I didn’t actually make any of the other items in the photo — I’ve had the candle forever, so I’m not even sure where that came from. The votive holders and jar both came from Michael’s a few years ago.
Ok visually this is at first an impressive effort. But I can tell you first hand functionally this is not at all worth the time and effort. It’s a horrible idea as a matter of fact. FYI I as well as 2 other friends have tried this technique using the exact as well as variances of the items above.
Hot glue does not at ALL adhere the skulls to each other NOR to the terra cotta. Not even close. Once it dries you absolutely can not pick this thing up other than using both hands forcing it to stay together. I even tried E6000 glue and had the exact same luck. We tried variances of plastic skulls both from Target as well as Michaels as well as the exact terra cotta saucers from Michaels. Also tried 2 different types of hot glue in addition to E6000 glue.
I wish the original creator of this posting had been forthright about the functionality of this creation and not just boasted about the looks.
I’m sorry you had so much trouble, but I’m not sure why this didn’t work for you. I made this guy two years ago, and as you can see from this photo that I just took, it is still staying together just as well as it did in the beginning: http://bit.ly/2dhpjLD. Weather conditions and curing time can have a big effect on adhesives, so maybe one of those was the issue? Feel free to email me (https://endlesslyinspired.com/contactme/) with a bit more information on exactly what you tried and I will try to help you figure out the problem. Thanks for your feedback!
It’s a shame that yours didn’t work. I have tried this and it worked perfectly. I’d like to thank the creator of the post for providing a great tutorial, my kiddo loved it and i love not spending all the $$. Sometimes it’s as simple as user error.
You know what I wish? I wish that people whom are unskilled at using a glue gun would utilize and appreciate the opportunity to learn from those who are in lieu of declaring something (beyond their skill set) nonfunctional.
Great post and awesome job!
Mine won’t stand up. The glue holds but will not stand upright because the skulls are too flimsy. Any ideas?
Oh no, Jenn, I’m sorry to hear that! The skulls I used were made of pretty hard plastic, so mine held together just fine. Maybe you could try finding some more substantial skulls or just try using two layers instead of three? Hope you figure out a way that works!
To deal with the weight of the candle, I bought a LED candle. It works great and is very light.
That’s a great idea!
I made these after seeing this post. I loved the idea!! However I didn’t follow it exactly. Which is probably why mine didn’t work out all that wonderfully. First I had skills from the dollar store. Maybe the plastic is too thin and light. I glittered mine. (Don’t recommend, it was a glitter nightmare!!) it also made the skulls heavier with the layers of glue, glitter and I originally spray painted them black. THEN I thought I could get away with smaller pot saucers. I had to play around a whole lot, curse and maybe cry a bit, but at the end I still think it’s cool. I added river rocks into the bottom of the skulls for weight by cutting a hole into them, adding stones then flying to base. Otherwise they wouldn’t stand up straight and kept falling backwards. Woo- one problem solved. Alas they were still too fragile for candles. Really disappointed with that because I wanted pillar candles like yours. I settled for the bigger tea lights. I will probably attempt this again minus the glitter and bigger bases. I’d attach a picture but I don’t know how!
I made a version. I’d love to show you but I don’t know how to post a pic. It was fun to make, too! Thank you for the idea.
I just made these last night and OMG are they amazing! Mine also broke apart, but to be honest, that is something I anticipated happening anyways because Plastic is smooth and its hard to for any adhesive to attach to smooth surfaces. I am going to try and peel the hot glue off and try sanding the surface rough and try re-attaching.
My bottom base broke off as well, but I used little glass saucer bowls instead of terra cotta, which I really thought would be lighter. Again… too smooth.
I got red crayon and melted it and let it drip on the skulls. It created a wicked cool dramatic blood effect. Super creepy, and the red crayon is so bright against the black. I love this design, I love the look and so does my boyfriend. It is definitely worth the tweaking and fixing.
I had some hiccups top, but I managed to get round the problems. The skulls I bought were already painted, so the glue adhere to the paint and didn’t hold. Instead I cut a small hole in the top and bottom of each skull, and threaded them onto a wood chopstick, glueing each layer (and between) so that chopstick acted as a support. This worked great and seems secure. I will spray paint them today, so fingers crossed. Thank you for this tutorial, I am delighted with the look of them already!!!!