I have been crafty pretty much since birth. I’ve mentioned before that my mother is an amazing seamstress, so I think it’s in my blood, because I grew up loving to make things. One of my earliest craft-related memories is making a disco ball with my sister out of a styrofoam ball, pins and silver sequins. We hung it in our room and used a flashlight that had a flashing orange safety light on the side to make our room a dance club. Where we danced to Lionel Ritchie and Duran Duran and DeBarge.
Yeah, we were awesome. Try not to be jealous.
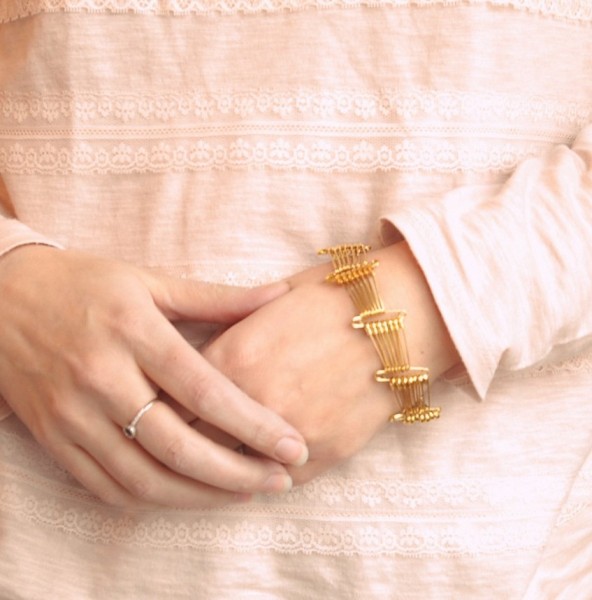
Another thing we used to make were safety pin bracelets. I’m not sure if my sister came up with the idea or if she saw it somewhere, but I still love them. I think they’re edgy and cool, and I haven’t seen a tutorial for one like this before.
They’re super easy to make, and there are all sorts of fun customizations that you can do. You could get different color safety pins {this would look really cool in black} or even spray paint whichever pins you have. Or, thread seed beads on the pins after they’re strung together.
But for this tutorial, I’m just going to show you how to make a basic bracelet and let you go nuts from there.
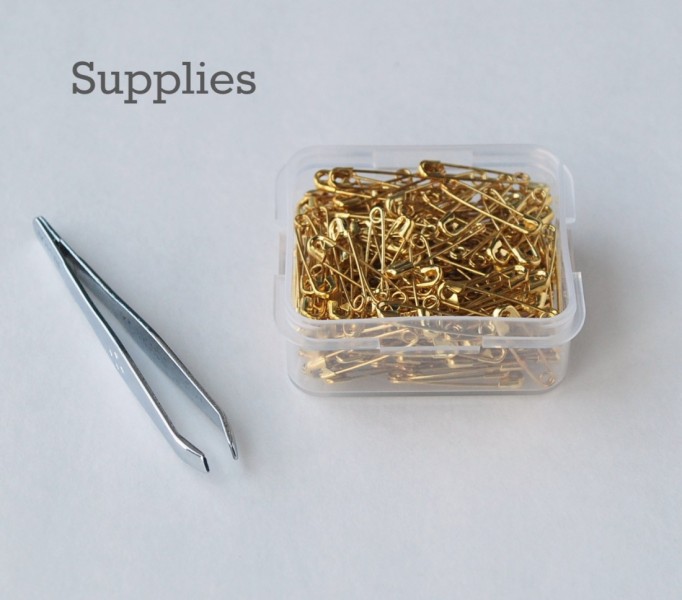
First, you need to gather your supplies.
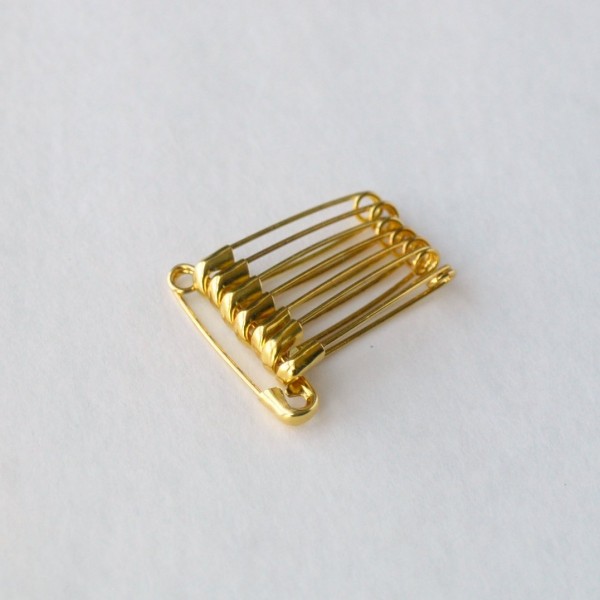
You need safety pins and a pair of tweezers. {Told you it was easy.} For my bracelet, I used size 0 safety pins, which are 7/8″ long. If you use a different size, the counts may be slightly different for your bracelet, but the steps are all the same.
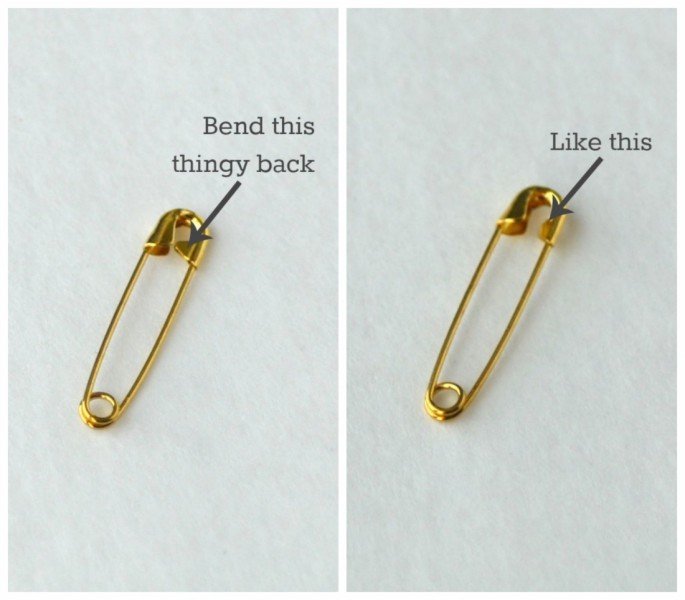
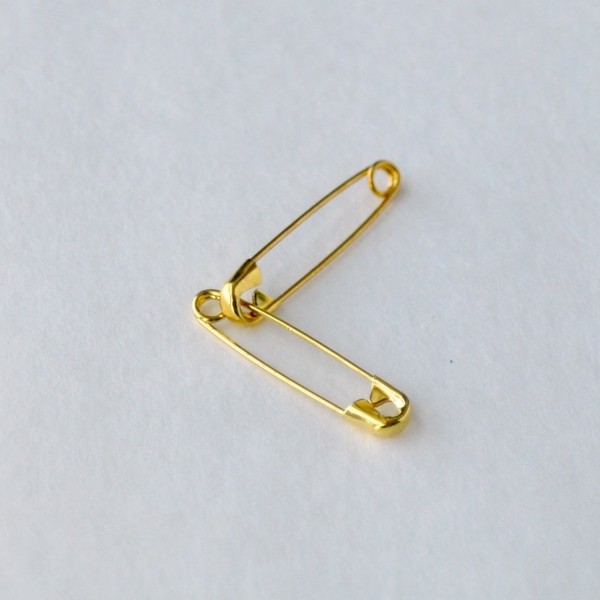
The first thing you need to do is use your tweezers to bend back the thingy {yep, technical term} in the clasp. Once you’ve done that, hook the pin onto another pin.
You want to hook it to the fixed side of the new pin, not the side that opens. Once it’s hooked on, use your tweezers to bend the middle thingy {seriously, it’s a technical term} back to normal.
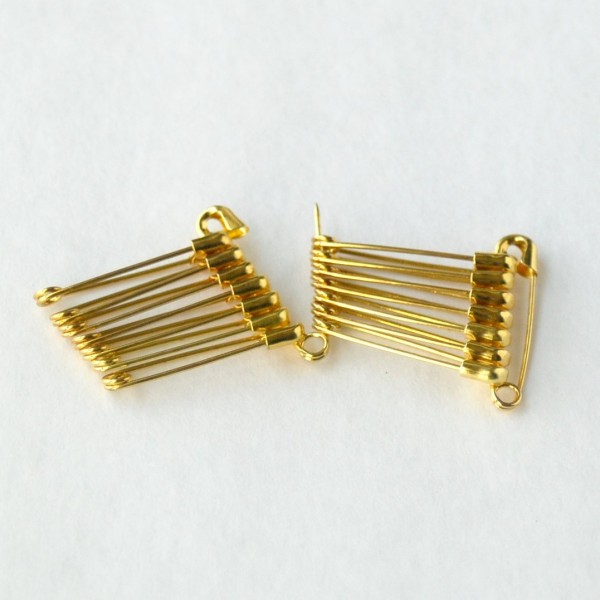
Repeat these steps until you can’t fit any more on the fixed side of the new pin. For size 0, that is 7 pins.
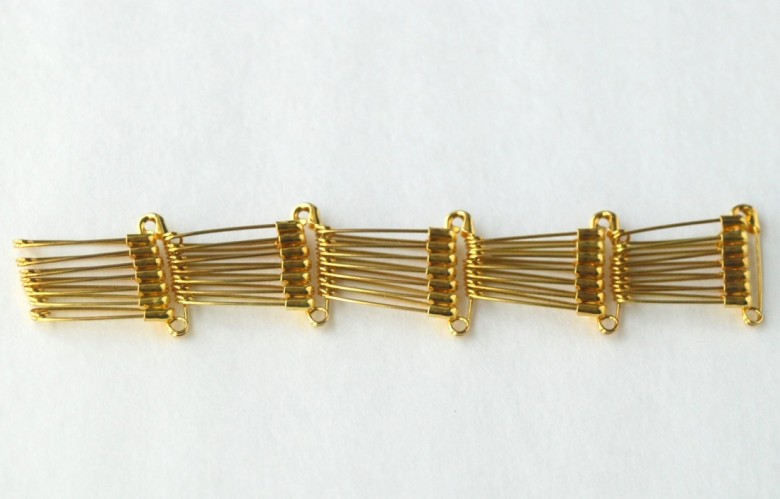
Make another pin with 7 pins attached to its fixed side. Once you have two sets completed, attach them together by threading the pin from one set through the holes on the ends of the 7 pins of the second set. Close the pin.
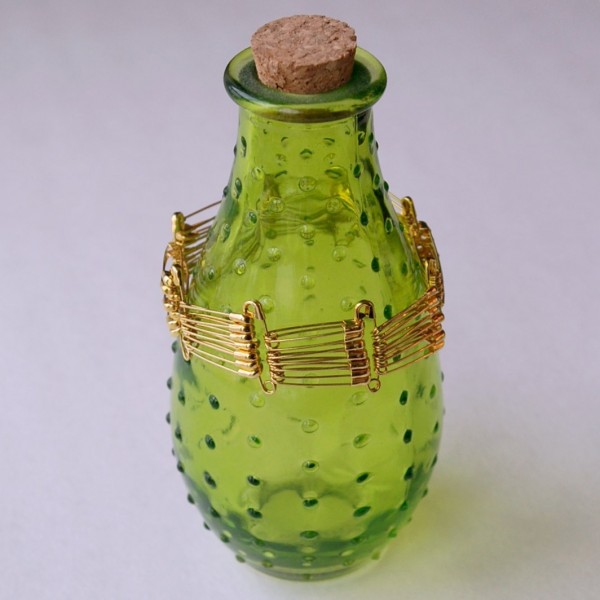
Continue repeating these steps until you have a bracelet that fits your wrist. The standard size for adult bracelets is 7-1/2″ long. Since I used size 0 pins, each individual set was approximately 1″ long, so I needed 8 sets {I tried to put it on after 7, and it was too small}. To put it on, just thread the first safety pin through the holes in the last one, just like when you were connecting the sets together.
That’s all there is to it!
I think it’s so cool that from far away, it just looks like a regular old bracelet, but once you get up close, you can see that it’s made from safety pins. Plus, it looks way harder and more complicated to make than it is.
Were you crafty when you were little? What were your favorite things to make?
Disclosure of Material Connection: Some of the links in the post above may be affiliate links. Among others, we are a participant in the Amazon Services LLC Associates Program, an affiliate advertising program designed to provide a means for us to earn fees by linking to Amazon.com and affiliated sites. As an Amazon Associate I earn from qualifying purchases. This means if you click on the link and purchase the item, I will receive an affiliate commission. Regardless, I only recommend products or services I use personally and believe will add value to my readers. I am disclosing this in accordance with the Federal Trade Commission’s 16 CFR, Part 255: “Guides Concerning the Use of Endorsements and Testimonials in Advertising.”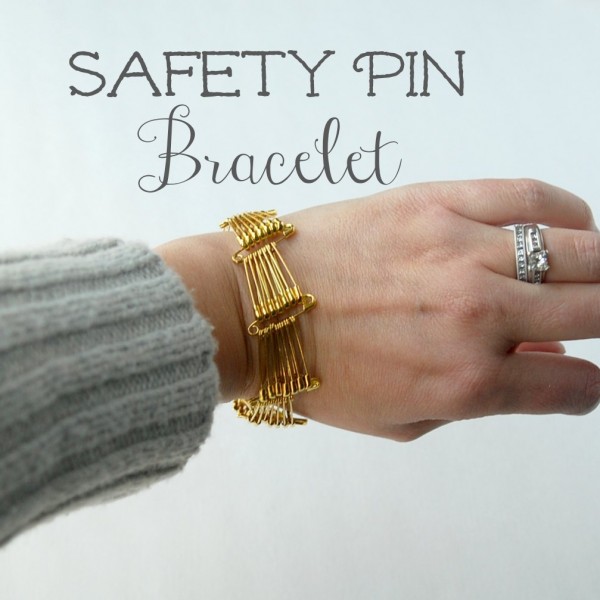
My older kids would probably love something like this! Pinning! 🙂 Dee
Thanks for sharing at the Foodies & Crafties Blog Hop! I can’t wait to see what you link up next week! #foodiescraftiessoiree I’m your newest follower on Pinterest. I would love for you to hop over anytime to Apeekintomyparadise.com and link up with the parties I co-host throughout the week!
Have a terrific weekend!
Cathy
APeekIntoMyParadise.com
Oh this is too cute! And you’ll never be without a safety pin if you need one.
What a fun project! I love this! I am always looking for guest bloggers on my website Blissful and Domestic. My blog is about creating a beautiful life on less and this post fits right in with that 🙂 Check out my blog and see if it would be a good fit for you. I’d love to have you!
Danielle@ Blissful and Domestic
http://www.blissfulanddomestic.com
blissful_and_domestic@yahoo.com