I have been baking pretty much my entire life. Some of my earliest memories involve being in the kitchen with my Grandma, making icebox cookies or penuche fudge, or my mom, making apple pie. {Side note: I have STILL not mastered the art of a pie crust. Some things should just be left to your mom to make, even when you’re almost 41 years old.} But the thing is, even though I love to bake — it’s my stress reliever, my happy place — I don’t necessarily consider myself an amazing baker. Like I said, I can’t make a decent pie crust to save my life, and I’m constantly over- or under-baking things. And holy hell, I have had some full-blown kitchen disasters in my day.

So many people are intimidated by baking, or say the only thing they can do is bake up refrigerated cookie dough {not a problem, btw, keep reading!}. But I firmly believe that by following these few tips that I’ve learned throughout my more than 30 years in a kitchen, even the most hopeless of you can fake your way to being a great baker. I have focused mainly on cookies {and holiday cookies in particular}, but these tips could be used for many other types of baking as well.
What is your favorite baking cheat?
Three words: Vanilla. Bean. Paste.
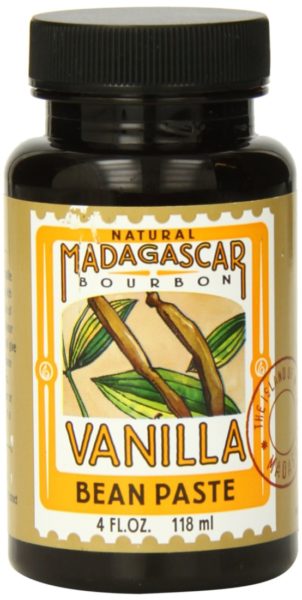
I can hear right now {not really, that would be creepy, like I’m bugging your house or something. I’m not. Just so you know.}: What the heck is vanilla bean paste? It sounds too fancy for me.
First of all, vanilla bean paste is similar to vanilla extract, but it’s more of a syrupy consistency, and it’s packed with teeny tiny little vanilla bean seeds — the same ones you find inside a vanilla bean pod.
It is a bit more expensive than regular vanilla, but I personally think it is worth absolutely every penny. You can find it in a lot of grocery stores {my local Wegman’s carries it}, but I recommend buying it somewhere like Michael’s or Hobby Lobby. They sell a 4 oz bottle for around $9 or $10, so if you use your 40% off coupon, it works out to be pretty close in price to vanilla extract.
I have several reasons I love using it instead of extract {just substitute it in equal amounts}. First, the vanilla bean seeds make those super fancy little flecks throughout whatever you’re making — I especially love it in cakes, cookies and frostings. Second, it gives a much deeper, richer vanilla flavor to whatever it is you’re making. And personally, I can never have too much vanilla flavor. I even add it to store-bought ingredients to fancy them up a bit.
Which brings us to my second tip…
Go partially homemade
There is no rule that says all of your baking has to come from scratch. I feel like people don’t think twice about using a boxed cake mix, but turn their nose up at using a cookie mix from a package.
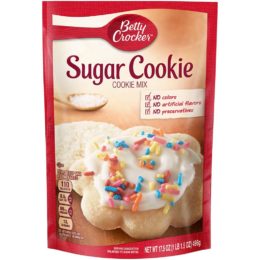
Here’s the thing: you can so easily jazz up store bought cookie mixes {or even the cookies themselves!}, no one will ever know that they weren’t 100% homemade.
{Side note: did any of you ever watch Semi-Homemade Cooking with Sandra Lee? That woman is a legit nutball, and has made some of the most horrifying desserts ever — I swear I just lost about an hour of my life watching hilarious YouTube videos of her show — but I do like her general idea of using store-bought ingredients to help make things a litle easier. Although now, as I’m writing this post, I keep second-guessing myself, thinking things like, “is this an okay shortcut, or is this like dumping cream of chicken soup into some Chicken Masala?”}
I made the cookies below with Betty Crocker Sugar Cookie Mix. You literally add in melted butter and an egg, scoop them out and then bake them. {Although naturally, I usually add some vanilla bean paste too.} That’s it. But to make them a little more festive, once they were cool, I dipped them halfway into some melted white chocolate and then added some fun Christmasy sprinkles. No one would look at these and think they came from a box! You could even use plain store-bought sugar cookies from the grocery store, too, if you wanted to REALLY cheat. I won’t judge, I promise.
I’ve also used store-bought sugar cookie dough for holiday cookies, like these Snow Globe Cookies and these White Chocolate Peppermint Cookies.
Dip stuff in chocolate
Have you ever noticed that stuff just seems fancier when it’s dipped in chocolate?
I mean, think about it: pretzel vs. chocolate-covered pretzel. Strawberry vs. chocolate-covered strawberry. Porsche vs. chocolate-covered Porsche. {I swear that last one is for real.}
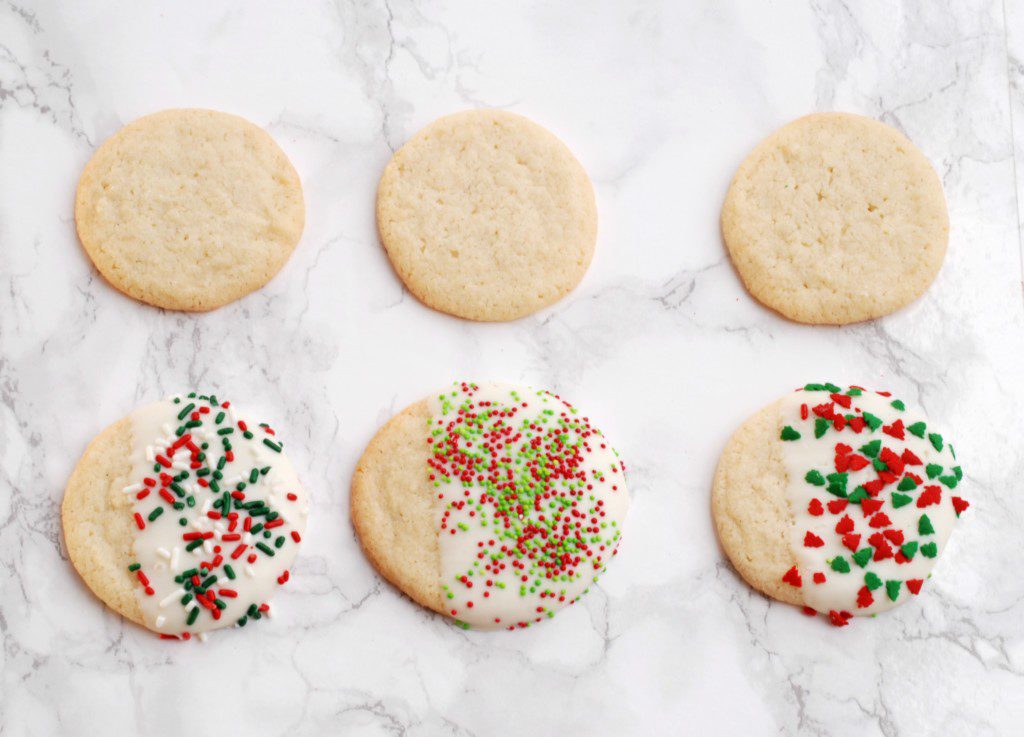
Like I said earlier, look what a difference it made with the sugar cookies above. Try dipping store-bought or homemade chocolate chip cookies in chocolate and sprinkling on some sea salt, crumbled bacon or holiday sprinkles. Oreos also work wonderfully, and if you’re worried about messing them up, they even make molds you can use. {Check out these super-cute ones with trees
and snowflakes
.}
If you are new to chocolate, I highly recommend starting off with candy melts or melting wafers
rather than trying to use blocks of chocolate, candy bars or chocolate chips. First of all, blocks of chocolate and candy bars would require tempering, which is a fancy way of saying melting the chocolate to the proper temperature, at the proper speed. Aka, a pain in the arse. Chocolate chips, on the other hand, have additives in them that are meant to make them keep their shape, even when they’re heated {i.e,. in chocolate chip cookies}. They will never melt perfectly, nor will they set up properly, so my advice is to just not use them.
Candy melts and melting wafers, on the other hand, are designed specifically for being melted and reset, so if you follow the instructions on the package, they should turn out splendidly. I get my candy melts {which are usually white or colored in various colors} at Michaels, Hobby Lobby, Walmart or Joann Fabrics, but you can also often find some basic colors at the grocery store. Real chocolate melting wafers can be a bit trickier to find, although Ghirardelli makes some excellent ones that you can sometimes find at the grocery store. Amazon Prime is also always your friend in situations like these.
Use pre-made icing decorations
Another fun way to make yourself look like a superstar cookie baker is to use pre-made icing decorations. I’m not talking about those old-school ones that you can get pretty much anywhere that look like they’re made up of a bajillion tiny little dots of icing. {Did you used to have those on pretty much every birthday cake ever when you were growing up, or is that just me?} I am talking about ones like these snowmen, these gingerbread men
, these trees
or these adorable little stockings
that even come with an edible ink marker so you can write people’s names on them.
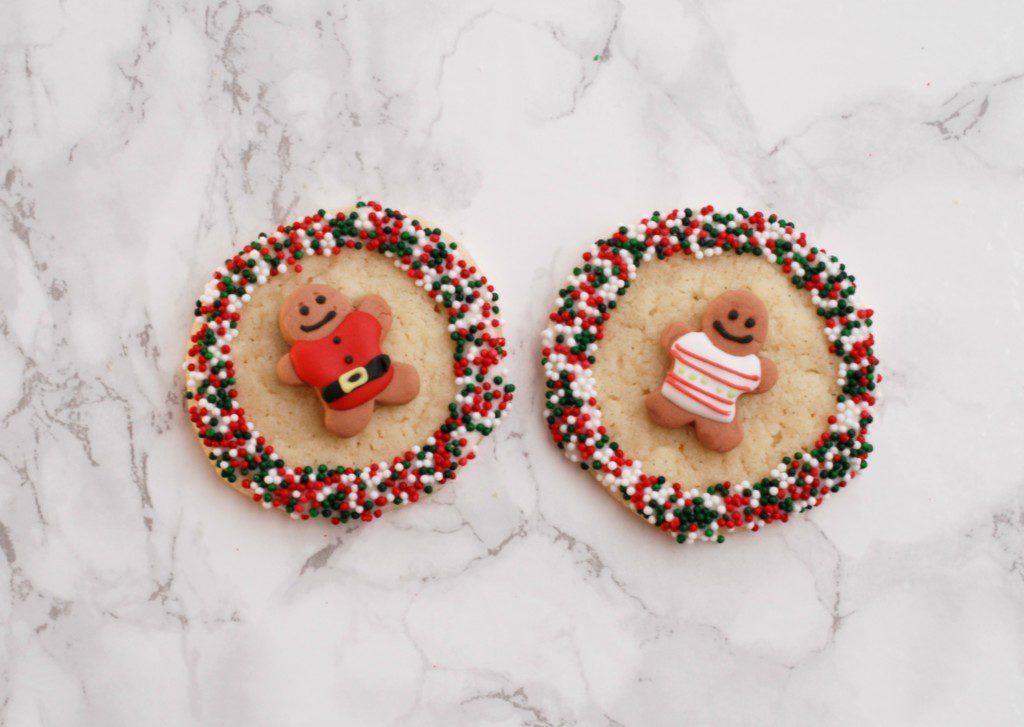
These little decorations look like you could have actually made them yourself — you know, if you were a crazy talented icing artist. They add so much to a cookie, even if it’s a store-bought sugar cookie. These can also be found at some grocery stores, most craft stores and sometimes even at places like Party City.
Use quality, fresh ingredients
This sort of goes along with my vanilla bean paste tip, but when you’re baking, don’t skimp on ingredients. I’m not saying you have to go out and spend $20 on five pounds of special fancy-pants unbleached artisan flour, but don’t always go generic, and don’t use the half-empty bag of flour you’ve had in the cupboard for two years.
Baking actually involves a lot of chemical reactions, so you want to make sure your ingredients are fresh and are actually going to work. Baking soda and baking powder, for example, are both important components in a lot of cookie recipes {but they are NOT THE SAME THING, so don’t think you can replace one with the other!}, so if your items are old, they may have lost their leavening power and your cookies won’t turn out the way they’re supposed to.
There are a couple of quick and easy tricks to test your baking soda and baking powder to see if they’re still good. For baking soda, put a small amount in a bowl and add a bit of vinegar. If it fizzes up like crazy {remember those papier mâché volcanoes from elementary school??}, then you’re good to go. If it doesn’t, toss it and spend the $.98 on a new box.
For baking powder, put 1/2 teaspoon or so in a heat-proof bowl and pour about 1/4 cup of water over it. Again, bubbles = good, no bubbles = bad.
Follow the recipe
Again, this is one of those things where you might say, “Well, duh,” but hear me out. I mean a few different things by this.
First, read the entire recipe all the way through before you start. I have made this mistake more times than I care to think about. Especially with cookies, for example, dough sometimes needs to be chilled for a while, and if you’re planning on just making the dough and slapping it onto a baking sheet right away, you might be unpleasantly surprised. {And whatever you do, do not ignore the instructions of chilling cookie dough. You will have a giant, buttery, melty mess on your hands. Again, this knowledge comes from direct experience.} You will also avoid the “Oh #$&*%, I don’t have enough eggs!” panic that has been known to happen from time to time, as well as having the opportunity to look up any unknown words or phrases that you might not fully understand.
Second, the order at which you add ingredients is really important in baking, so by following the recipe as written, you will get the best possible outcome. So if the recipe says to cream together the butter and sugar BEFORE adding the eggs and vanilla, trust it. Odds are, the person who wrote this recipe went through a boatload of trial and error when coming up with it, and this is the way that things work the best.
Use a cookie scoop
Have you ever made cookies and had some come out burned, and some underdone? Sometimes even off the same baking sheet? That’s probably because the cookies weren’t all the same size. Because that’s pretty much an impossible task if you’re using a spoon out of your drawer to scoop out your dough.
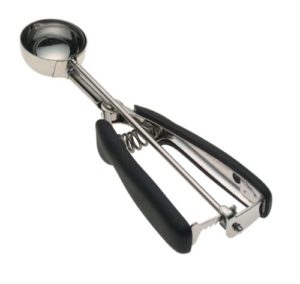
Which is why I pretty much never, ever make cookies without a cookie scoop. If you don’t know what it is, a cookie scoop is basically like a tiny little ice cream scoop that allows you to get the same amount of dough each time. They are one of those things that you’re like, “Ooh, this looks like it might be fun” when you first get it, and then once you start using it, you’re all, “Where have you been all my life??”
I have had a medium {1.5 tablespoon} scoop for years, but I recently also got a small {2 teaspoon} size, and I’m loving that one too. The smaller one is especially good for cookies you have to roll into balls, because: a. it’s already mostly a ball when it comes out of the scoop, and b. because I am apparently physically incapable of grabbing similar amounts of dough out of a bowl and rolling them into balls {seriously, I think there is something wrong with me}, I used to use the big scoop and split the dough ball in half. This eliminates that step.
It’s the little things in life, people…
Stick with the basics {but feel free to fancy them up!}
If you are a new or nervous baker, do yourself a favor and stick with the easier, basic recipes. Don’t try french macarons right out of the gate, because more likely than not, you’ll end up with a hot mess on your hands, feeling super discouraged and frustrated.
There is nothing at all wrong with chocolate chip cookies, my friends. Nothing at all. And you can easily take a basic chocolate chip cookie recipe and make it holiday-ish.
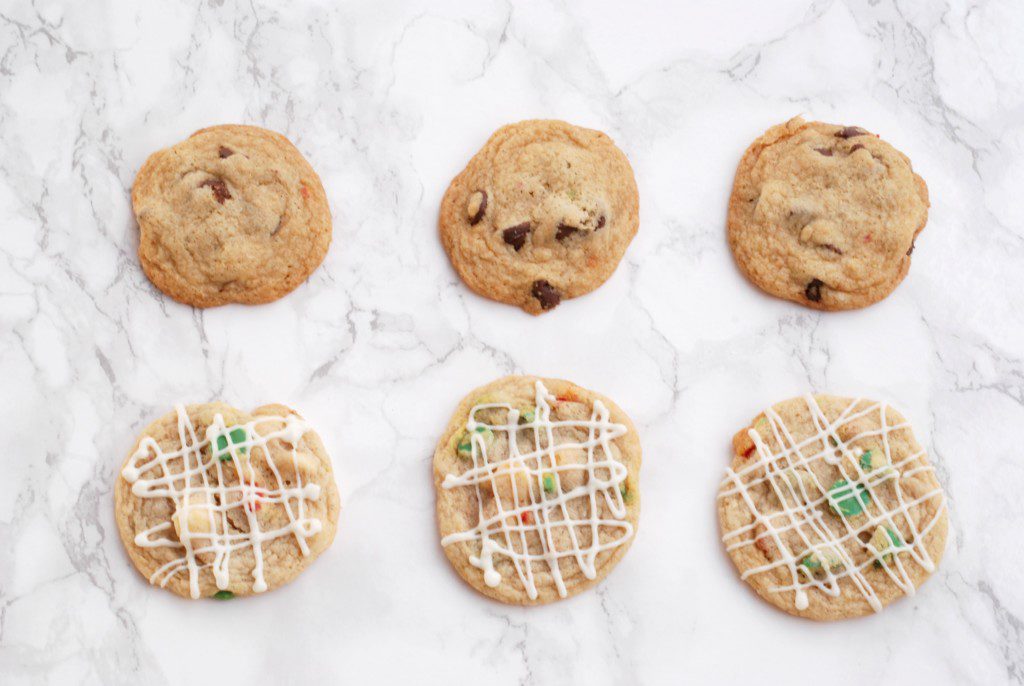
I mean, look at the difference here. These two cookies were made with the exact same recipe. {Literally. I took out a few spoonfuls of dough to make the regular chocolate chip cookies, and then added red, green and white chips to the rest.} I used a bag of Toll House holiday morsels that I found at Wegmans, and, because I’m me, picked out the semi-sweet chips that were in the bag and just used the red and green ones. I also added in a handful of white chocolate chips that I had in the cupboard. Then, once they were baked and cooled, I put a few white candy melts in a ziploc bag, melted them according to the directions on the package, snipped off a tiny corner of the bag, and drizzled it on the top of the cookie.
Bam! Super cute and easy holiday cookies made from one of the most basic cookie recipes out there.
Use quality baking pans {and parchment paper!}
The pans you use for your cookies make a huge difference. Cheap, flimsy pans can cook unevenly, scratch easily and, worst, do that super-fun twisty-popping thing where you’re reaching in to get your cookies out and it buckles, scaring the bejesus out of you, causing you to possibly drop the pan and/or burn yourself.
Do yourself a favor and invest in some quality baking pans. They’re not that expensive, and you will most likely end up saving yourself some money in the long run, when you’re not running out and buying new cheap pans every year.
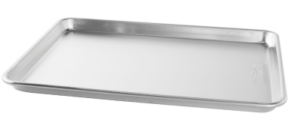
I use these ones, and they are awesome. They are sturdy without being insanely heavy, and they bake things remarkably evenly.
![]()
To go along with this, I never, ever, ever bake without using parchment paper. Parchment paper is amazeballs. It makes any baking sheet non-stick, so your cookies slide right off — even if they get a tiny bit burned or have toffee bits or other super-sticky ingredients in them — and it helps your cookies hold their shape and bake evenly. This is another how-did-I-ever-live-without-this item, trust me.
So there you have it! My ten tips to help you fake your way into looking like a better baker {even if you’re not}. What did you think? Which was your favorite? Do you use any of these or have your own tip? I’d love to hear about it in the comments below!
Happy holiday baking, friends!
Disclosure of Material Connection: Some of the links in the post above may be affiliate links. Among others, we are a participant in the Amazon Services LLC Associates Program, an affiliate advertising program designed to provide a means for us to earn fees by linking to Amazon.com and affiliated sites. As an Amazon Associate I earn from qualifying purchases. This means if you click on the link and purchase the item, I will receive an affiliate commission. Regardless, I only recommend products or services I use personally and believe will add value to my readers. I am disclosing this in accordance with the Federal Trade Commission’s 16 CFR, Part 255: “Guides Concerning the Use of Endorsements and Testimonials in Advertising.”