Macrame feathers are an easy, gorgeous way to add some DIY bohemian decor into your home. Learn how to make them in this easy, step-by-step tutorial.
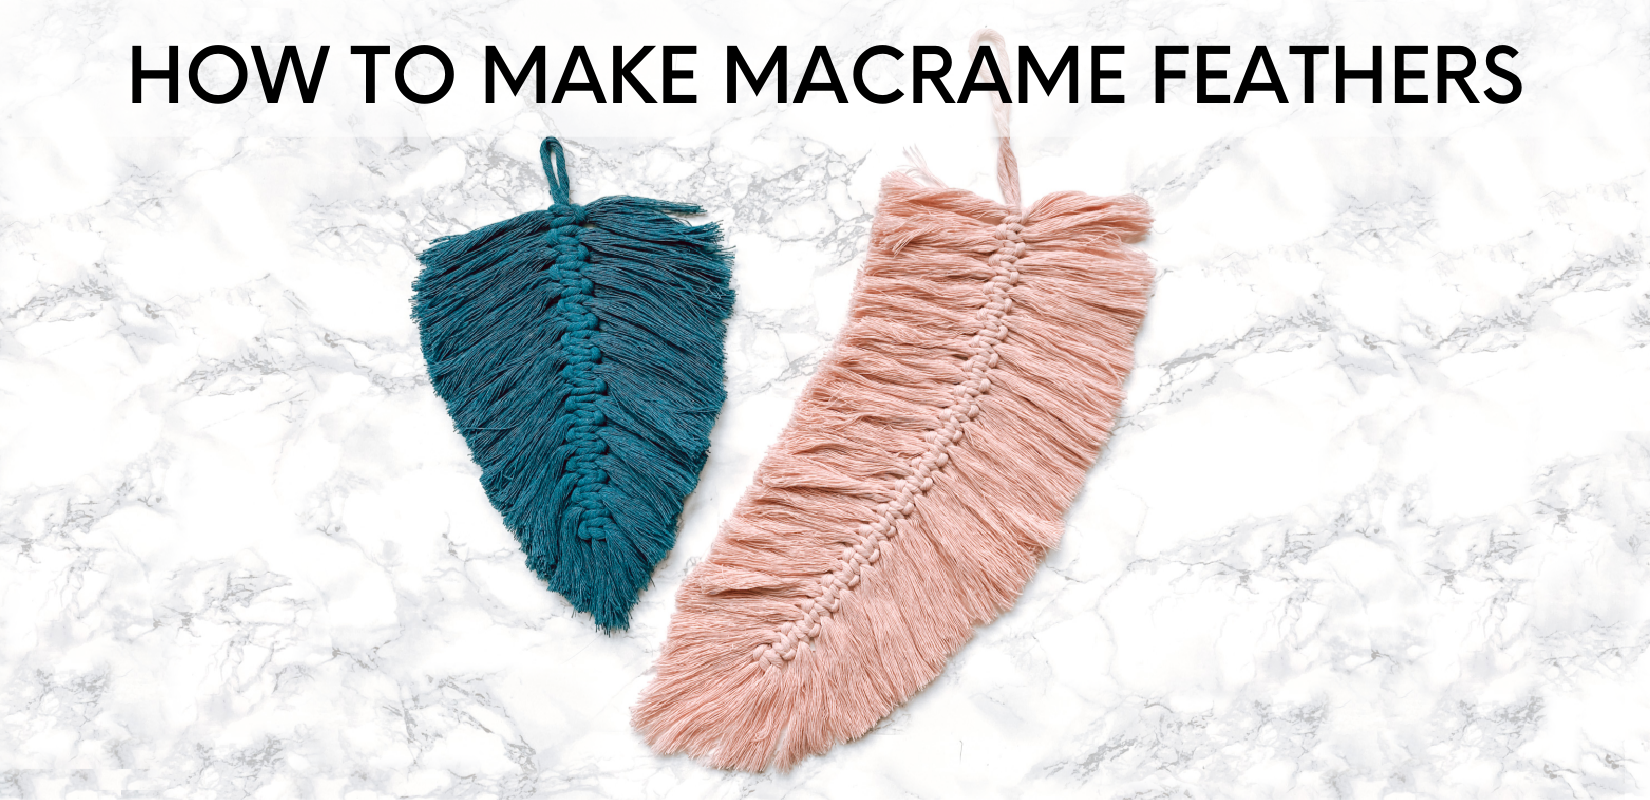
There’s no question about it: people are crazy about boho these days. And one of the most popular boho DIYs is macrame.
While the word “macrame” can bring to mind some flashbacks of 70s vests and owl wall hangings, things have changed. In today’s macrame, the colors are more muted, and a lot of the designs are simpler.
One of my favorite macrame designs — and one of the best macrame projects for beginners — is macrame feathers.
This post is all about macrame feathers.
How to Make Macrame Feathers
Macrame feathers are my favorite type of project: one that’s so incredibly simple, but looks like it took forever.
Once you get the hang of these, you can knock a bunch out while you watch TV one night. Grab a dowel from the craft store or a stick from your yard, make a handful of feathers, and you’ve got a DIY boho wall hanging.
What You Need
1. Macrame cord
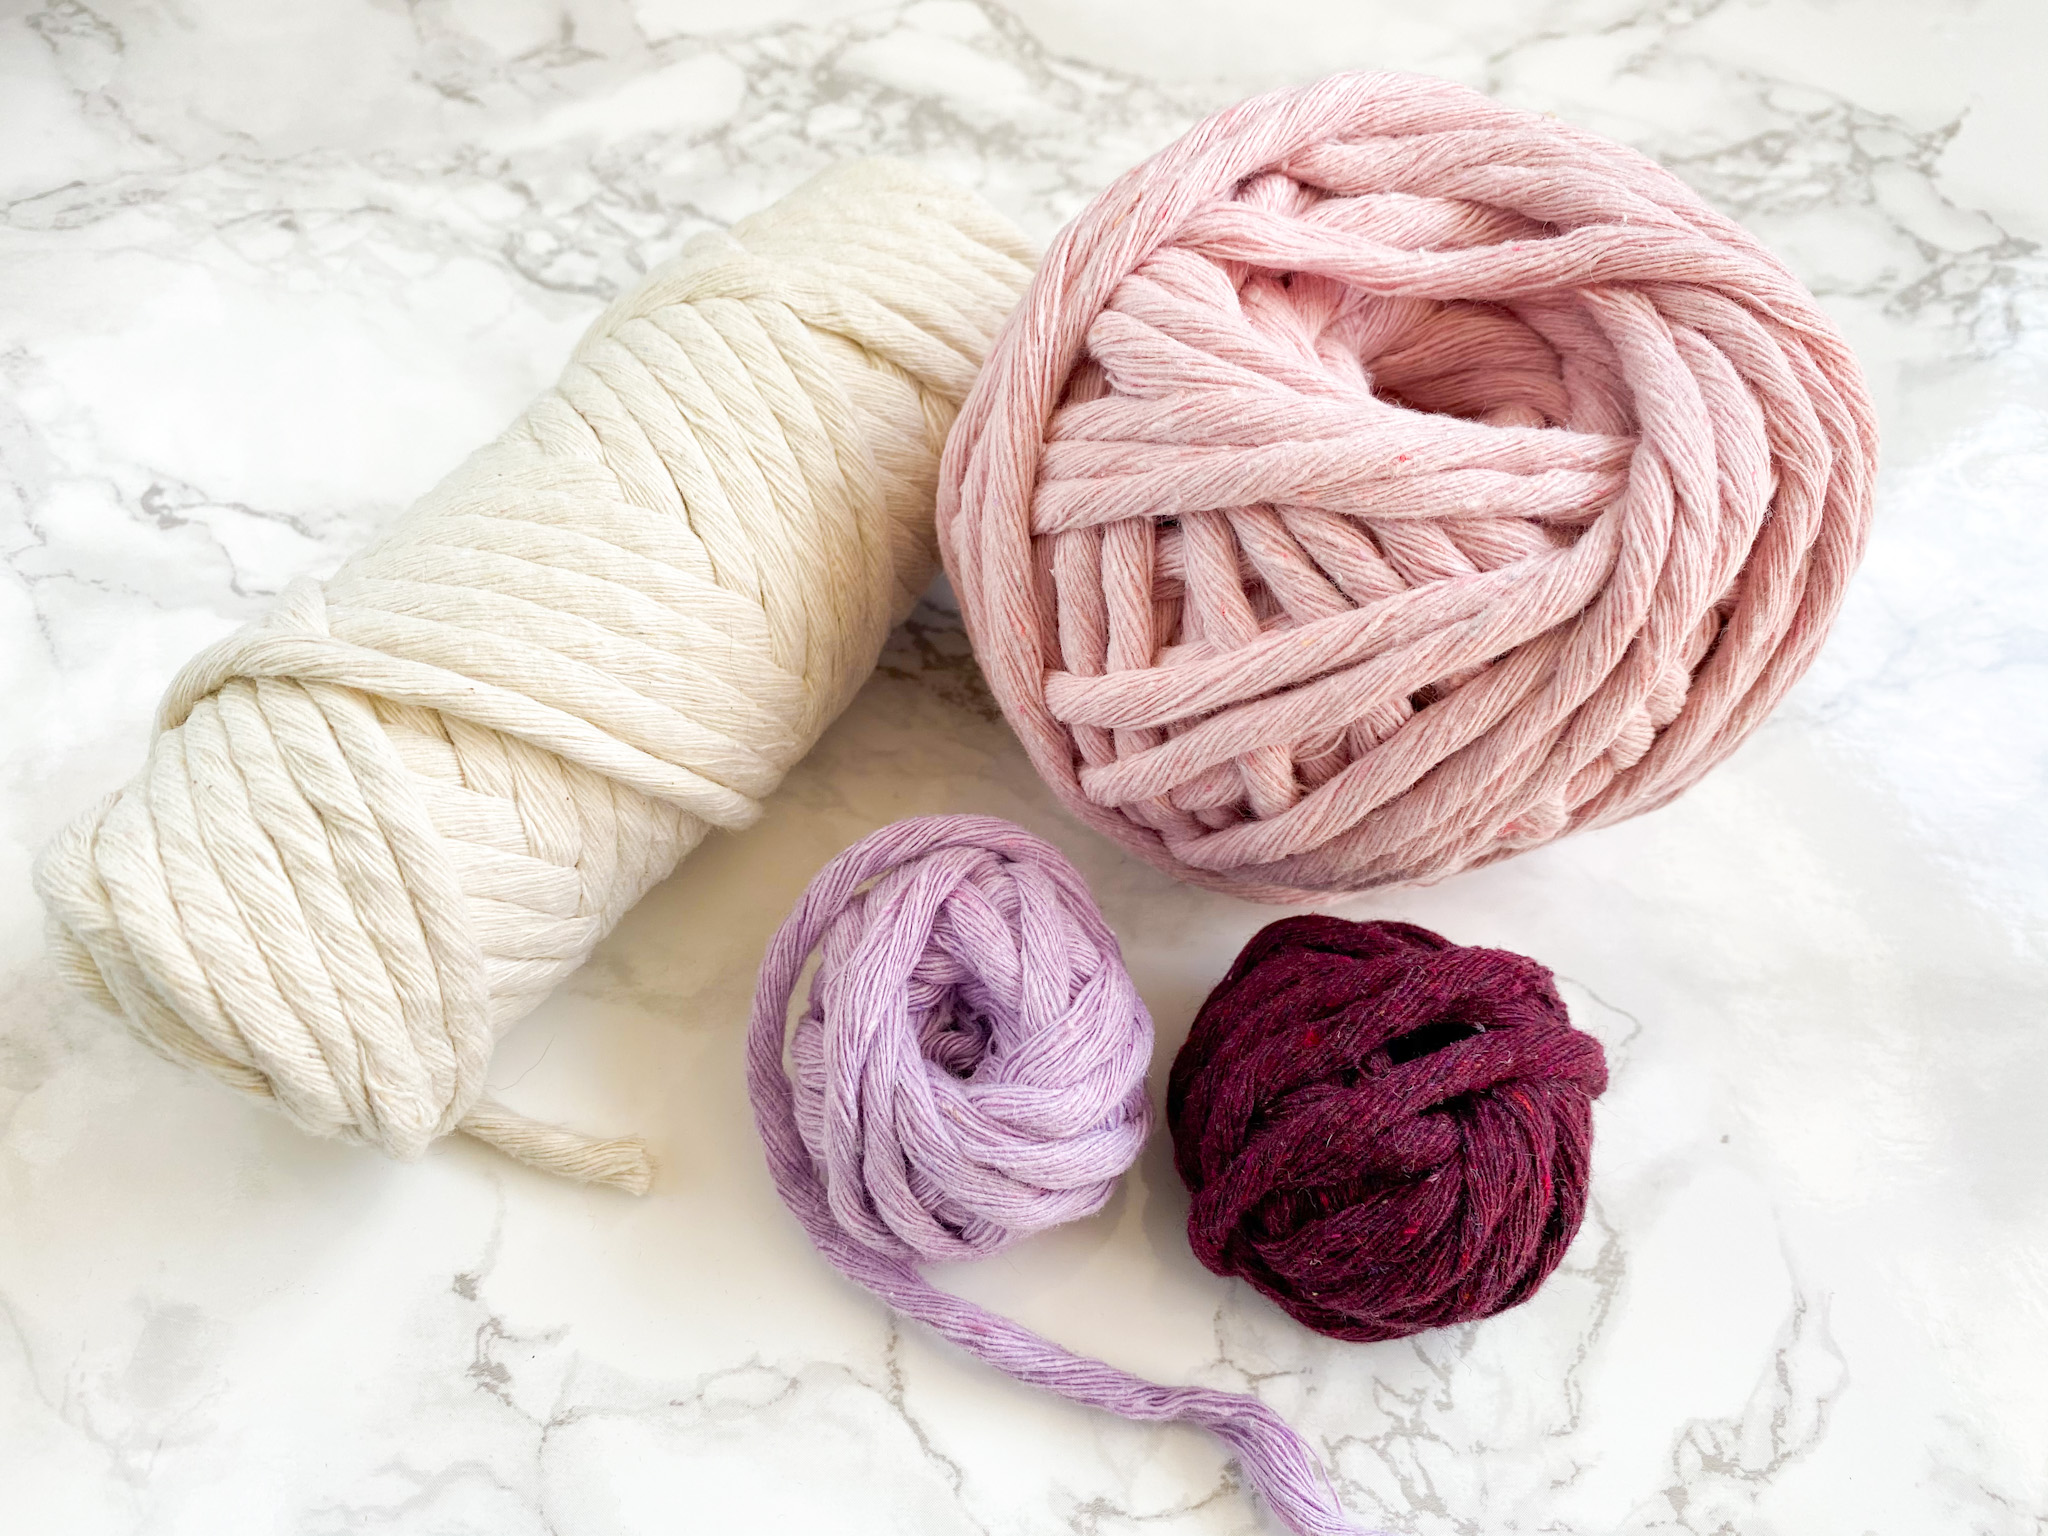
Obviously, macrame cord is an important supply when it comes to making macrame feathers. For this project you will need actual macrame cord, not clothesline or other cord. That’s because the key to macrame feathers is the frayed edges, so your cord will need to unravel.
I have purchased macrame cord from several different places, but my favorites are VeraZey on Etsy, RightRope, and Amazon.
With macrame feathers, the size of cord you use doesn’t matter, but it will affect the thickness of the feather’s center.
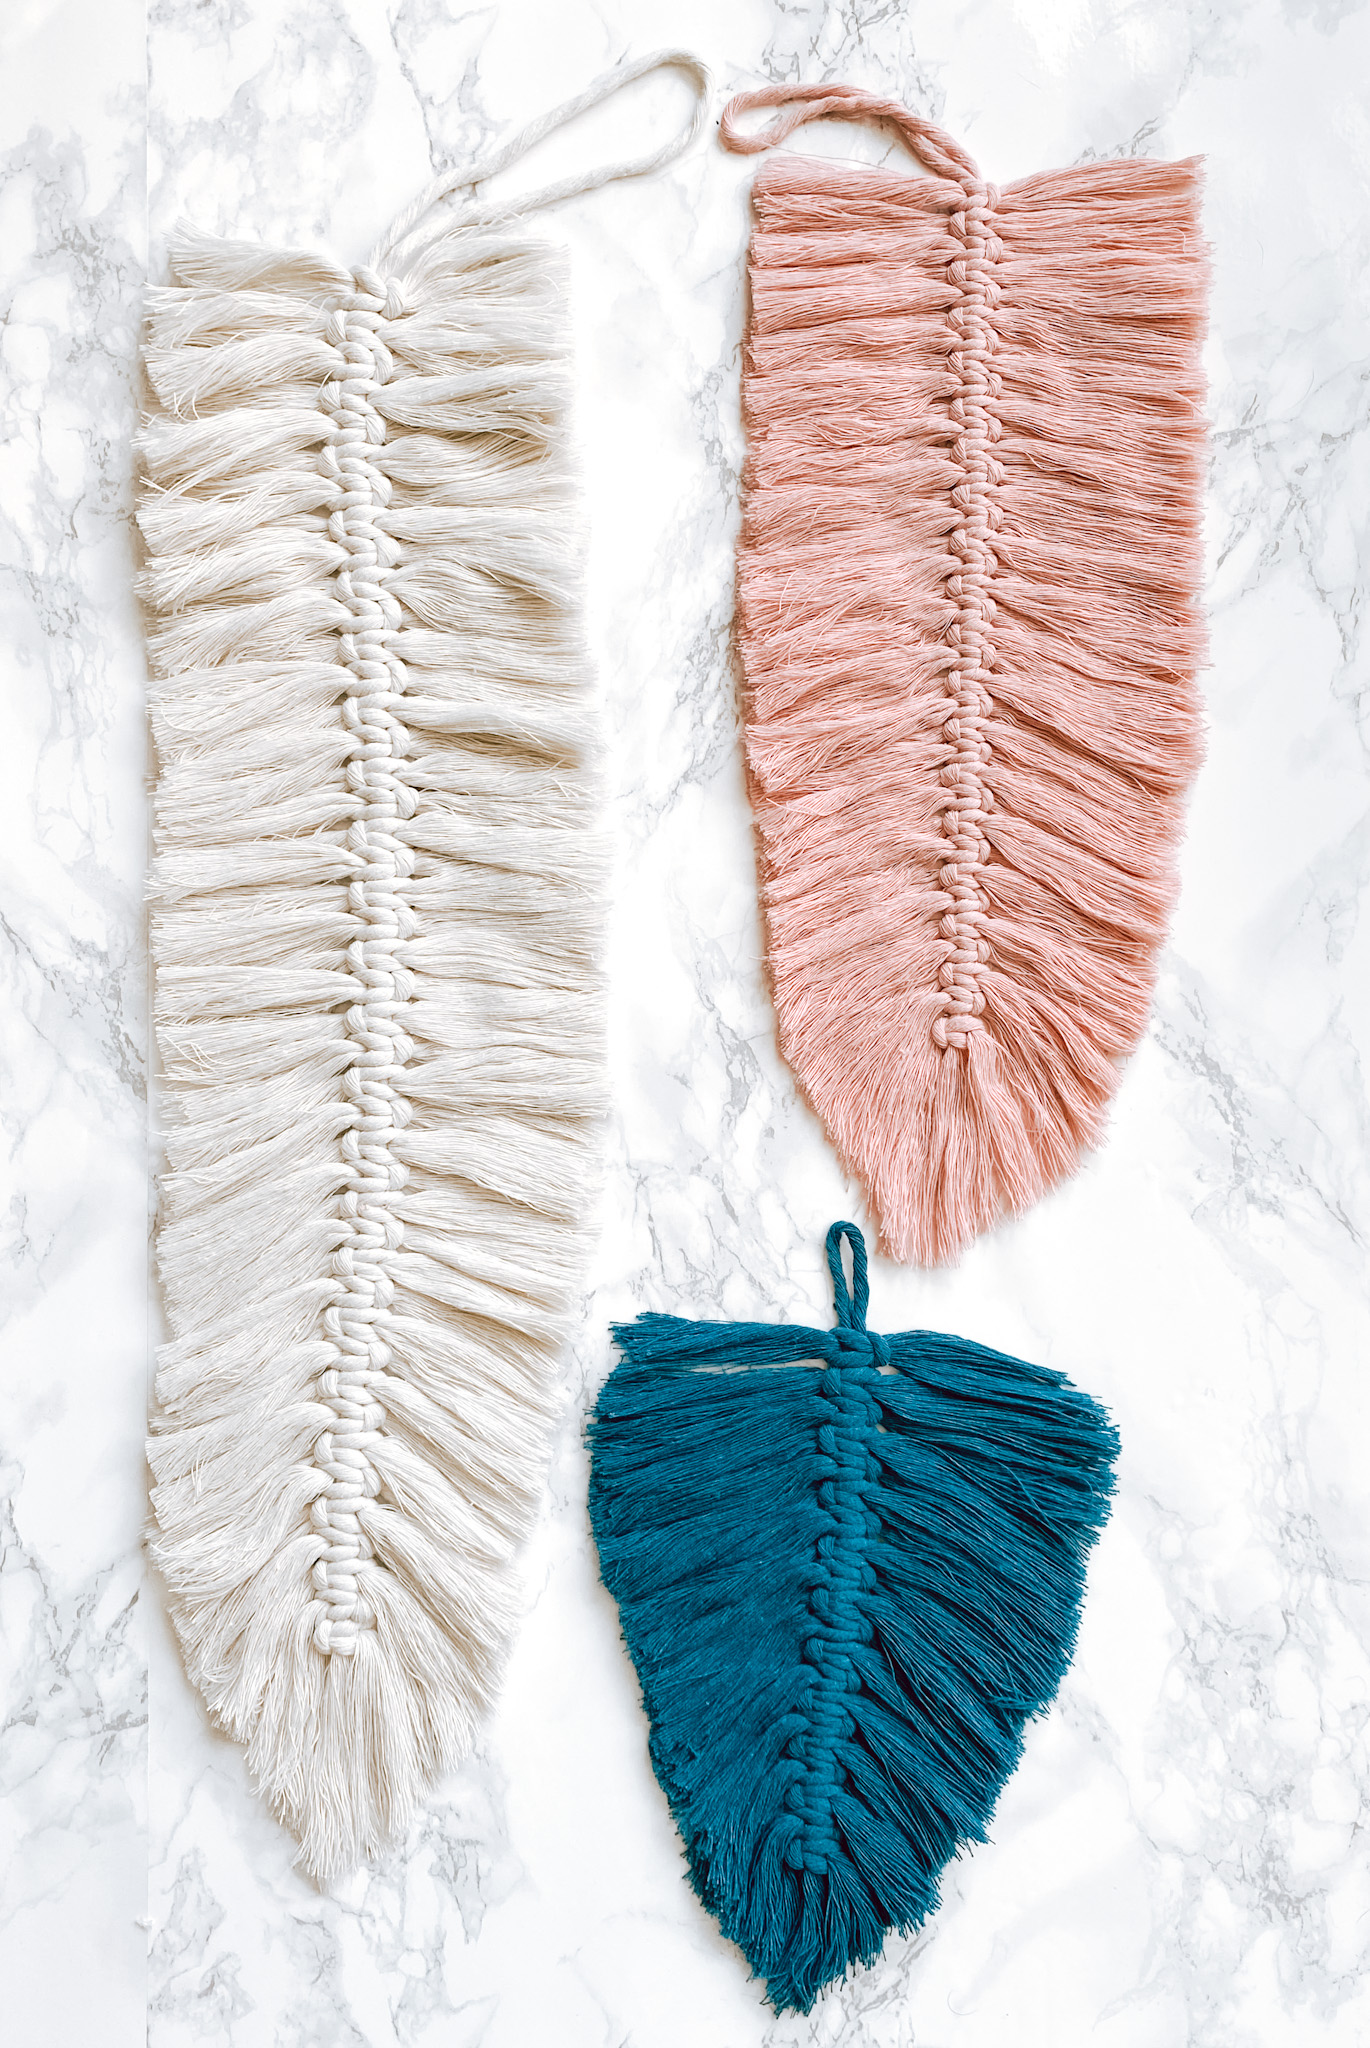
For the natural feather on the left above, I used 5mm single strand cord. For the blue and pink feathers, I used 3mm single strand cord. You can see that the center of the natural feather is slightly thicker than the pink and blue ones.
2. Sharp Scissors
I realize this is pretty obvious, but very sharp scissors are crucial when making macrame feathers. Macrame cord is somewhat thick, and especially when you try to trim the feathers at the end, dull scissors are going to cause you all kinds of problems.
I actually bought a pair of scissors specifically to use for macrame to make sure they stay sharp. I have the ones I linked below, and they are great.
3. Something to Measure With
That might sound kind of weird (like, why not just say you need a measuring tape?!?). As unusual as it may seem at first, I don’t normally measure my cord for macrame feathers. There are a couple of reasons for that.
First, if you are making one of the longer styles of feathers (like the natural or pink ones above) and decide to measure each individual piece, this will take FOREVER. Second, it’s much harder to get all of the pieces exactly the same size.
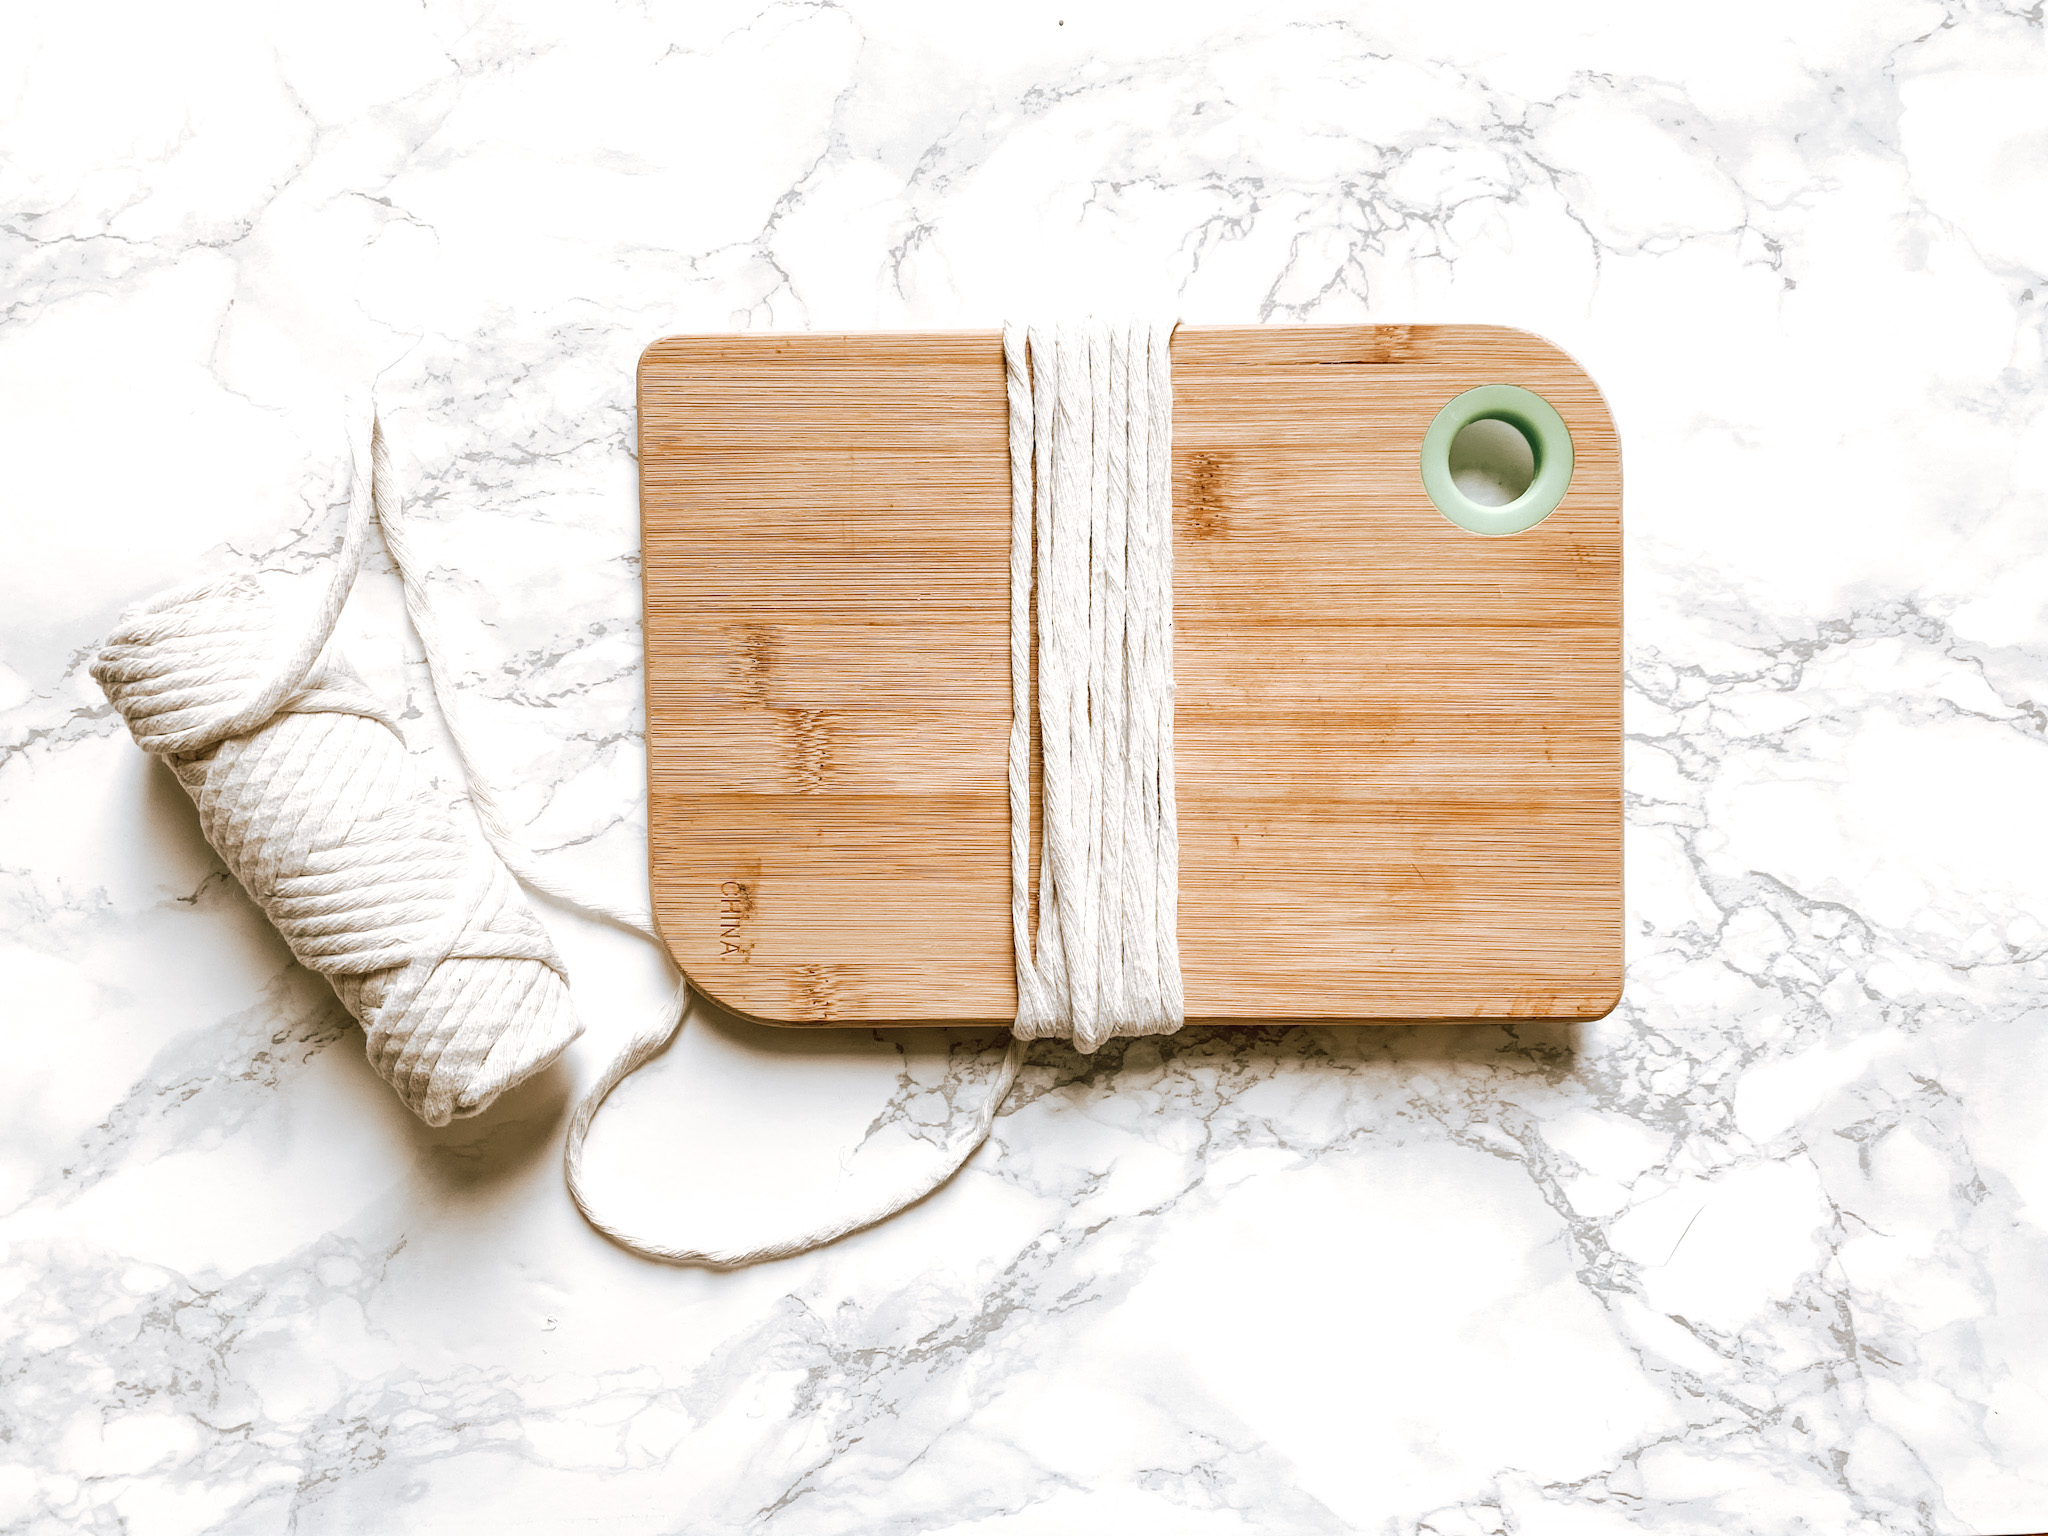
Instead, I recommend wrapping your cord around something the same size as the pieces you’re cutting. For the natural and white feathers, I used a small wood cutting board that was 7″ wide. Once I had enough wraps, I slid the cord off the board and cut it at the top and bottom. And I instantly had a whole pile of cord cut to approximately 7″. So, SO much quicker and easier!
If you don’t have a small cutting board, you can always use a piece of heavy cardboard or a book. Anything sturdy enough to wrap cord around will work.
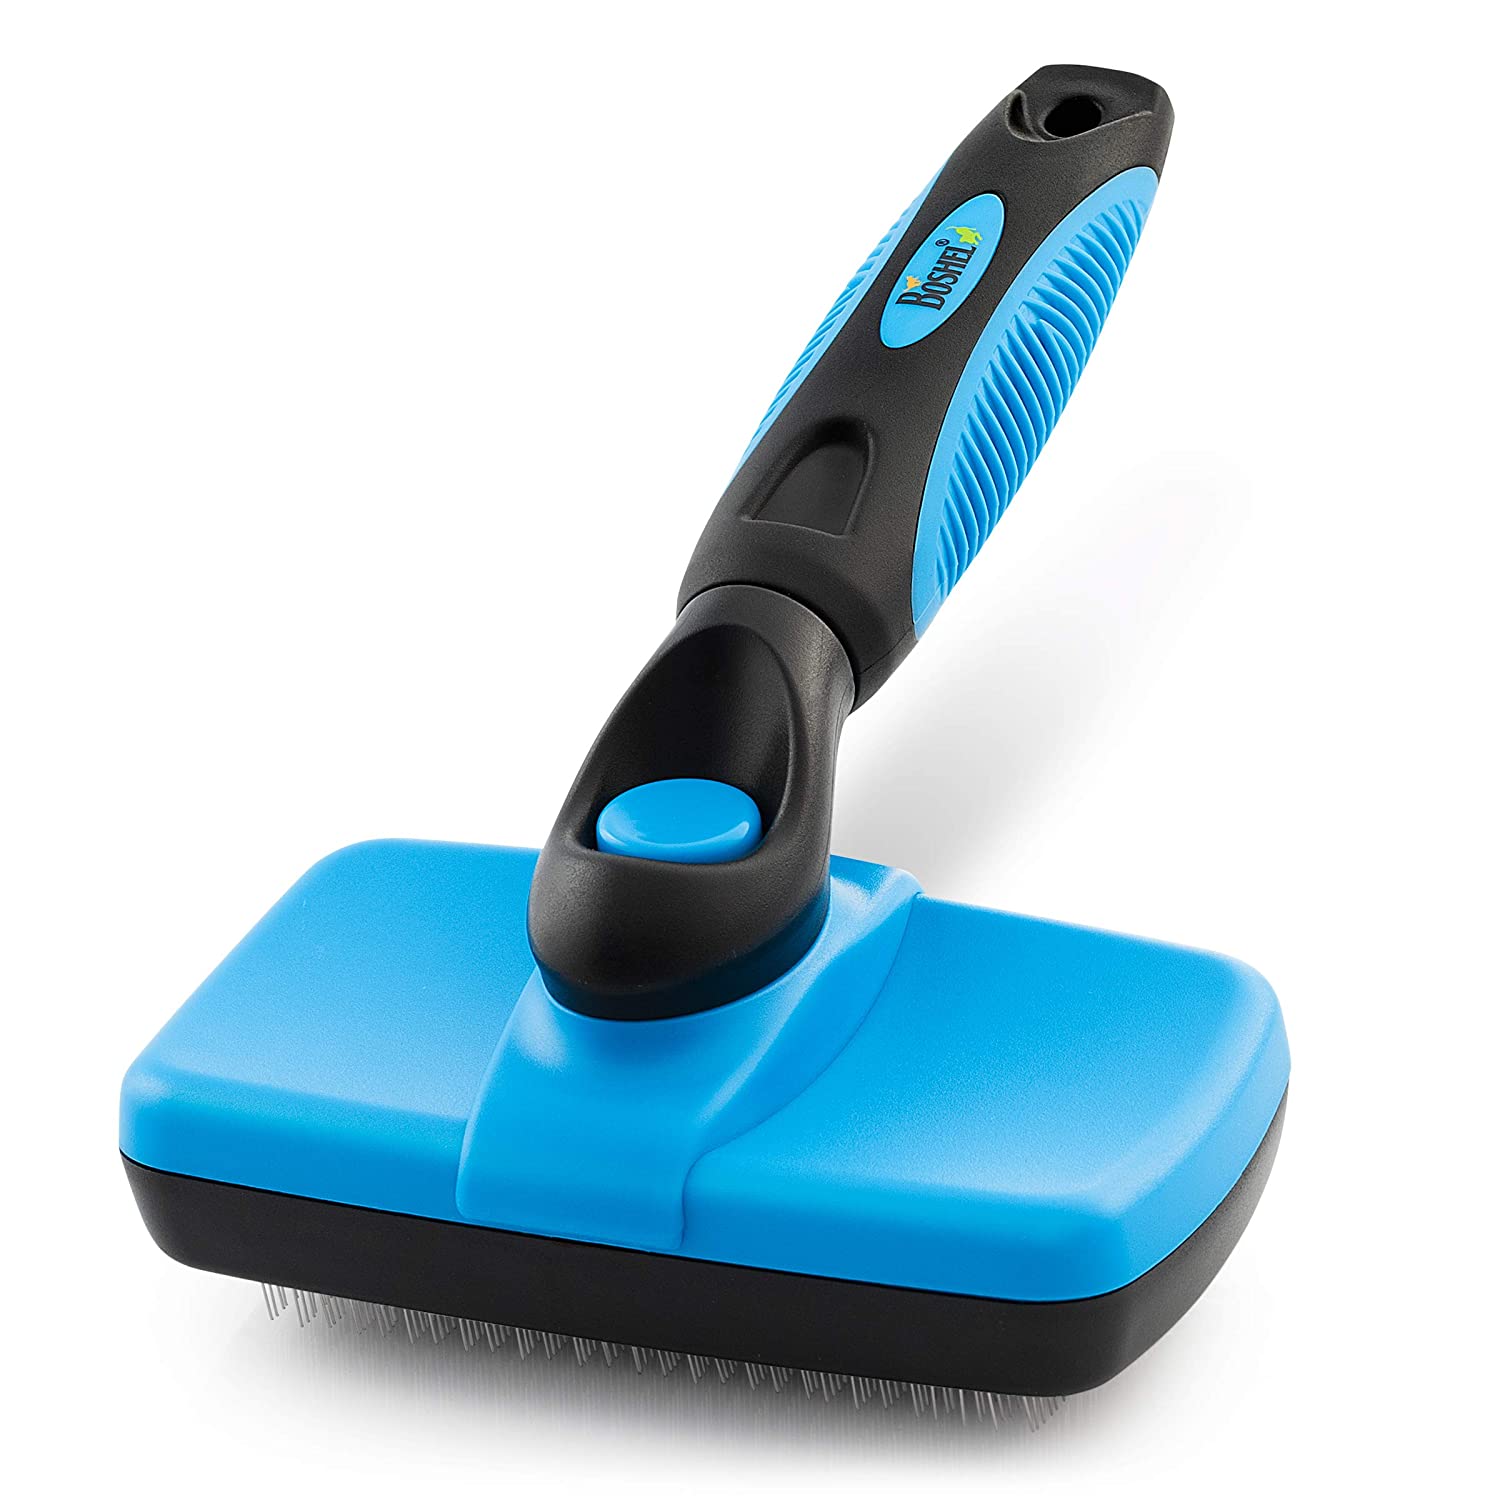
4. Wire Pet Brush
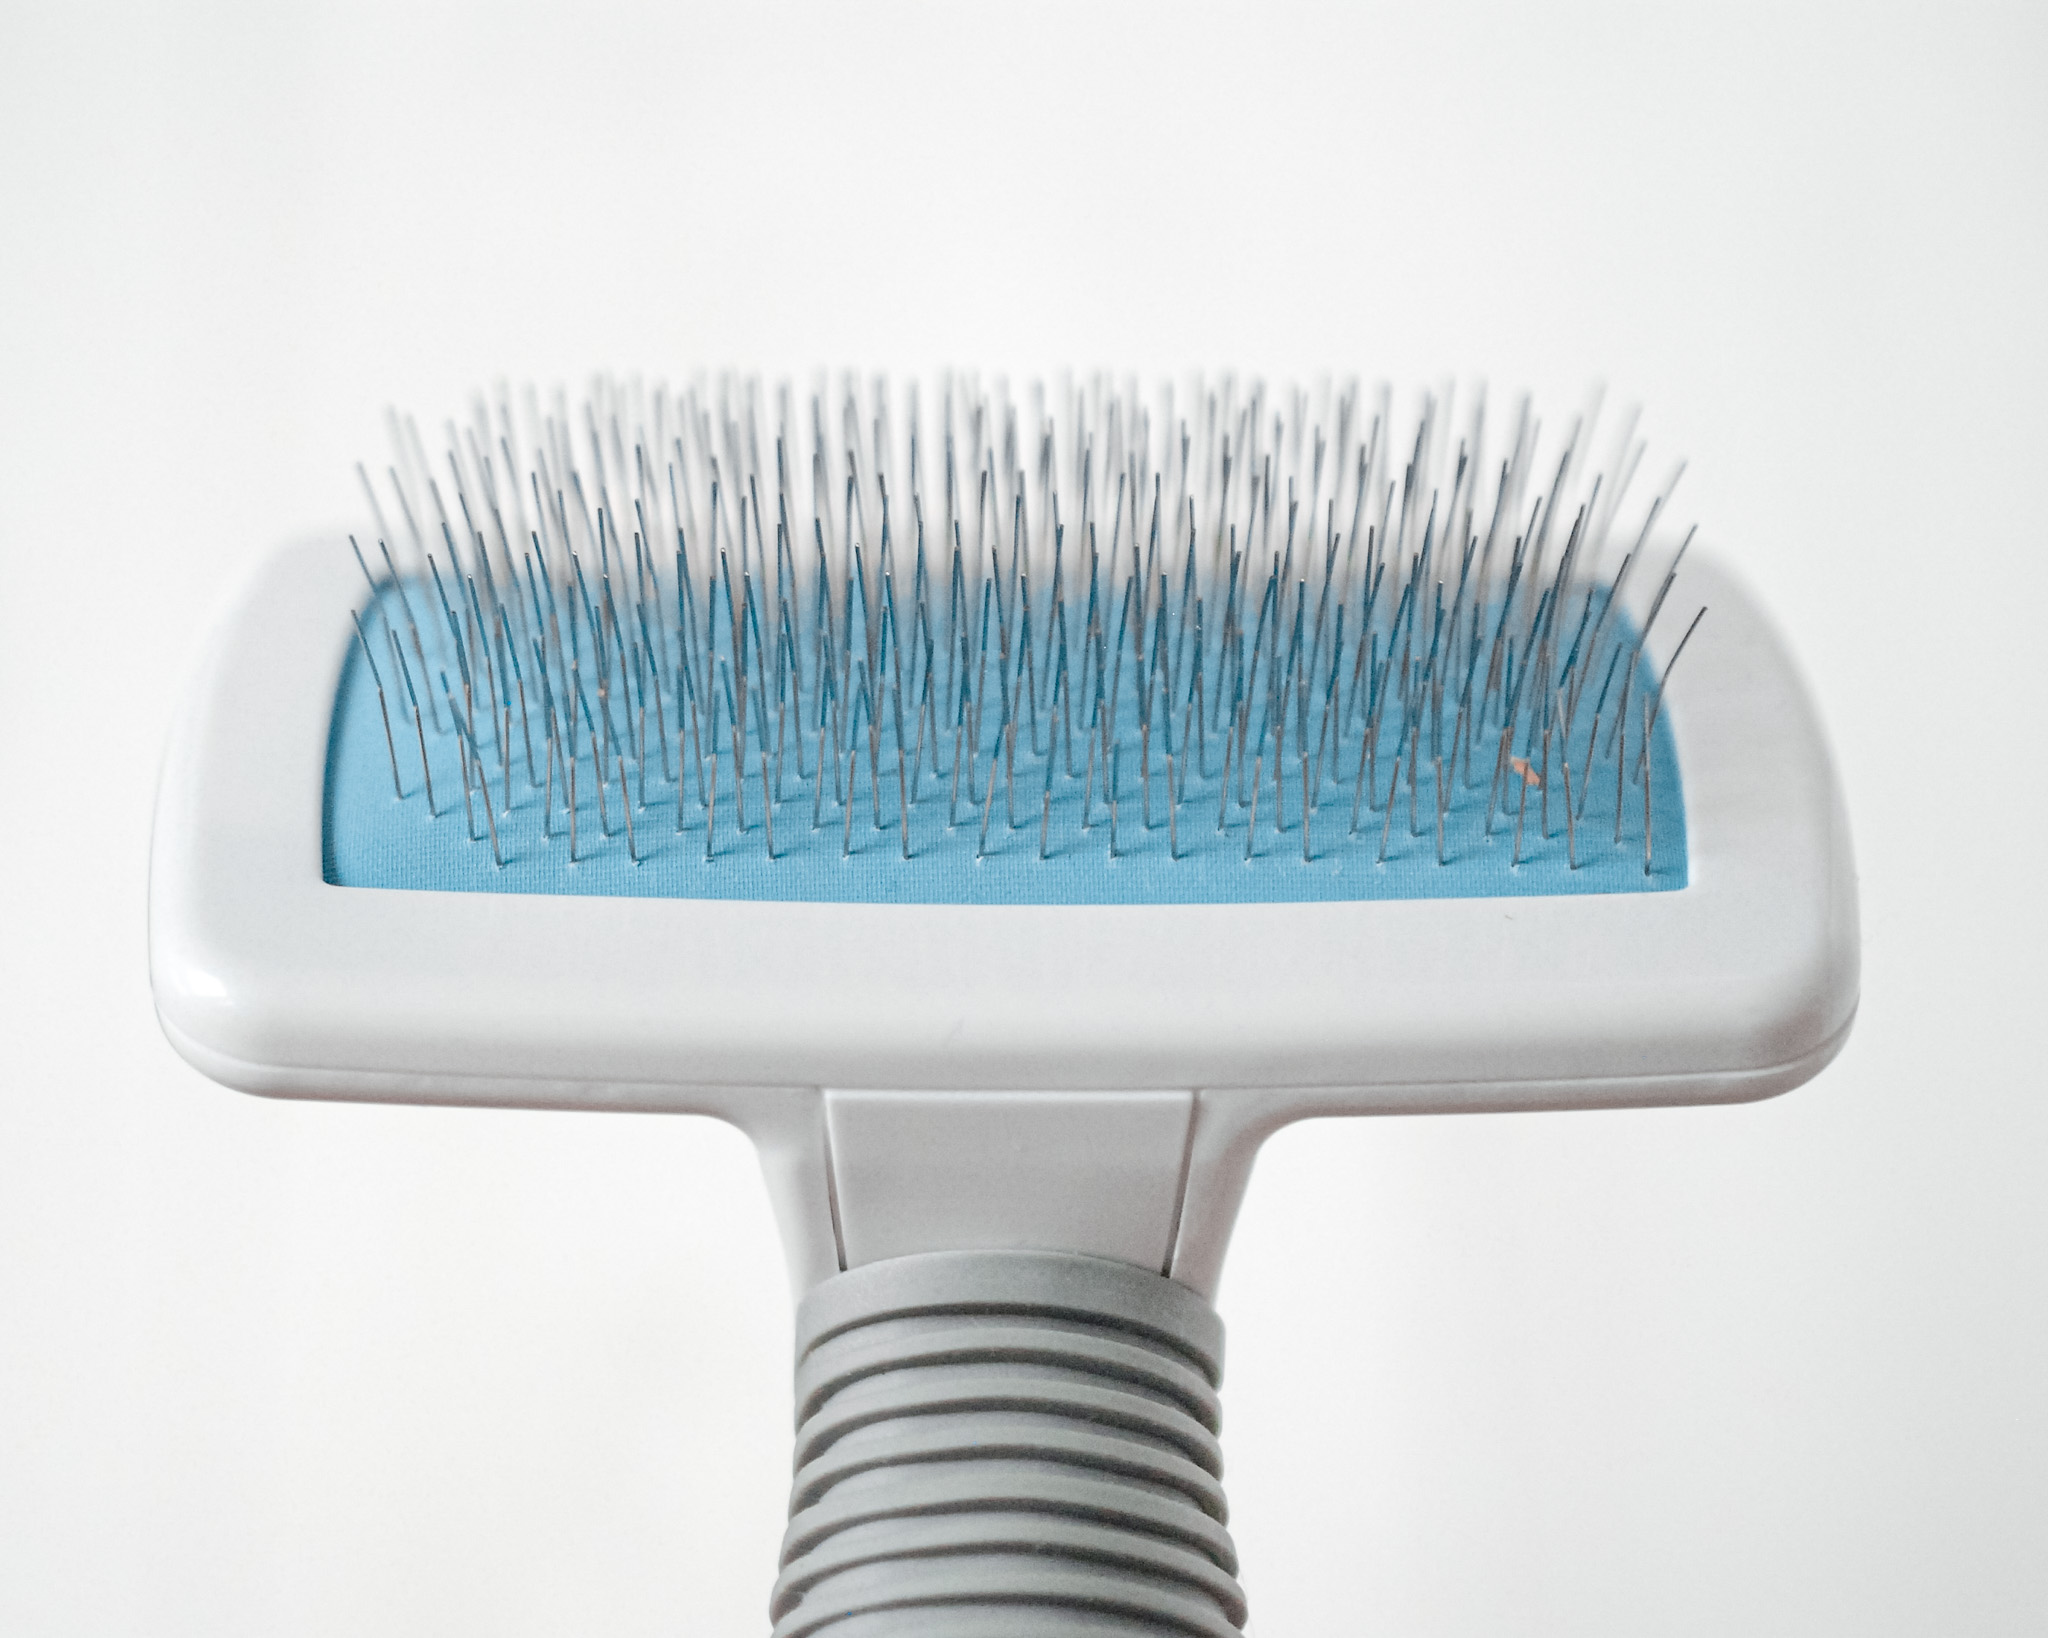
As weird as it sounds to have pet products on your macrame supplies list, you need a brush or a comb to brush out the edges of the feathers so they look wispy. While you don’t absolutely need a pet brush (a regular old plastic comb will also do the trick), I have found that a brush like this one will give you the best results.
The good thing is, wire brushes like this (they are also sometimes called slicker brushes) are very easy to find and are super inexpensive — usually under $10.
5. Fabric Stiffener (optional)
Depending on your cord, the final size of your feathers, and how you like your feathers to look, you may want to spray them with fabric stiffener when they’re completed. Some cord is softer than others, so it can flop down when you hang up your completed feather. I used fabric stiffener on the blue feather, but not the pink and natural ones.
Some people using hairspray on their completed feathers, but I personally have never tried this, so I can’t attest to whether or not this would work. I would be concerned that it would still be sticky, but feel free to try it if you’d like.
You can find fabric stiffener at craft and fabric stores, and of course on Amazon.
How to Make Macrame Feathers
Now it’s time to start creating!
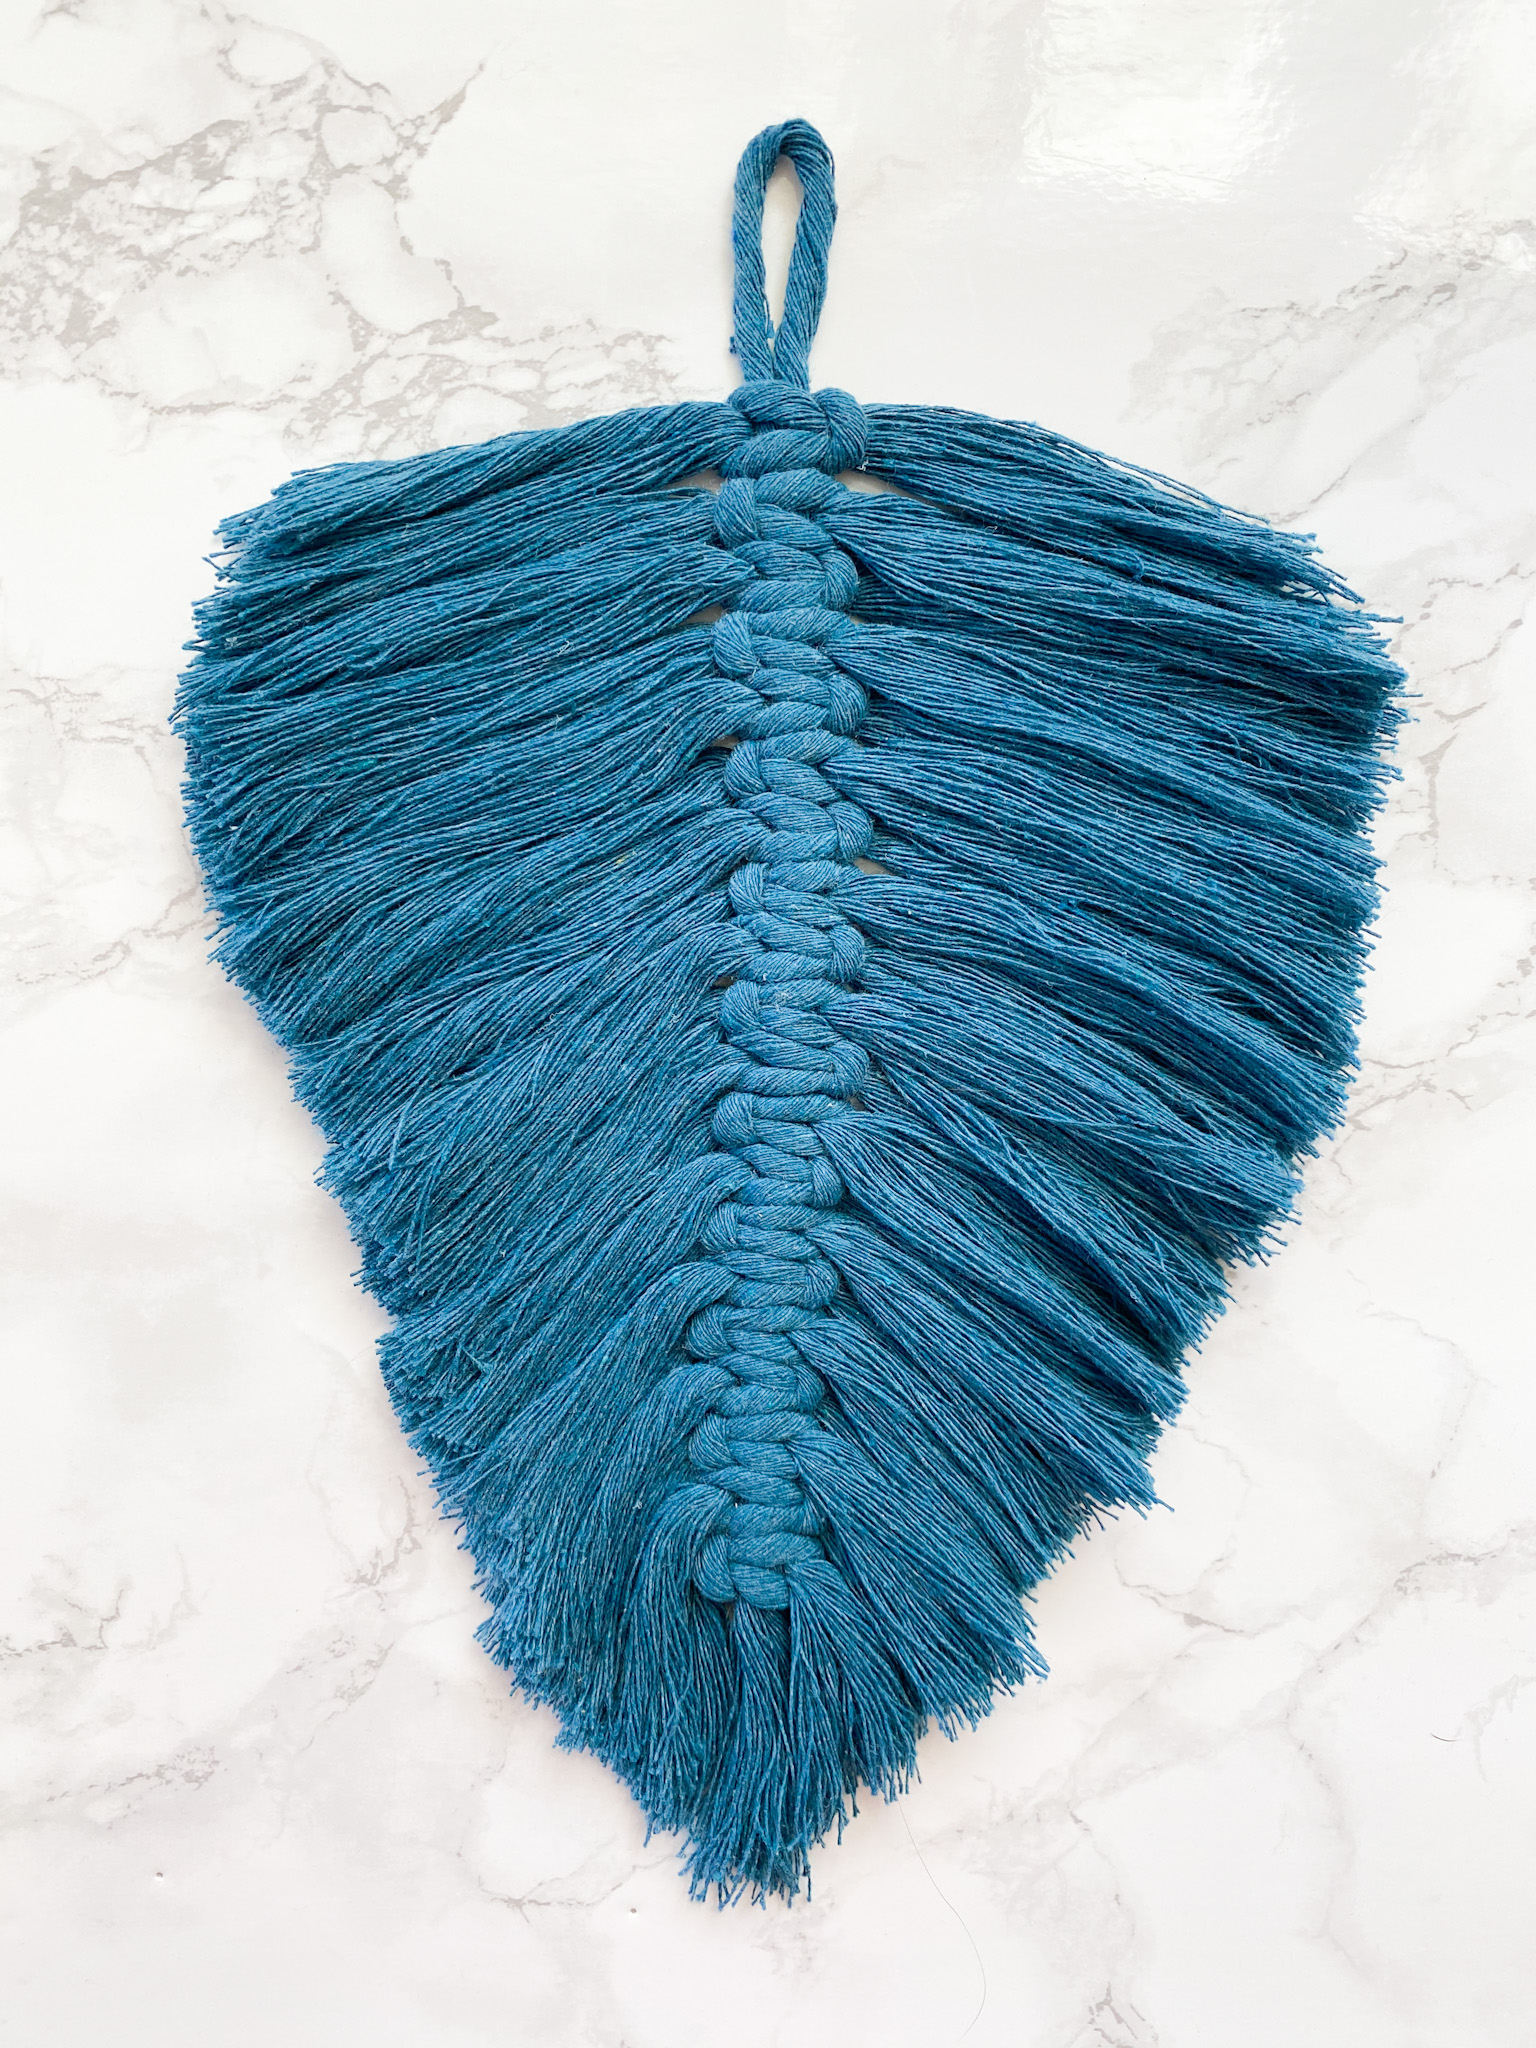
I am going to show you step-by-step how to make this tapered blue feather, but the steps are the same for the other two feathers pictured in this post.
To begin, you will need to cut your macrame cord. You will need one long piece for the center and a bunch of shorter pieces for the edges. What size to cut those depends on how large you want your completed feather.
To determine how long to cut your pieces, decide first how long you want your feather to be. You will cut your long piece to be approximately twice the length you want your feather to be, plus several inches. It’s always better to have it be a bit too long than a bit too short, so err on the side of caution here.
For the short pieces, again you will determine what you want your final feather to look like. If you want a tapered feather, like this blue one, you will cut your cord to three different sizes. If you’d rather have a more straight feather, like the natural and pink ones above, you will cut all of your edge pieces to the same size.
My completed feather is approximately 11″ long and about 8″ wide at its widest point. So I cut all of my cord to the sizes listed below:
- One center piece at 28″
- 16 edge pieces at 10″
- 14 edge pieces at 8″
- 12 edge pieces at 6″
- 2 end pieces at 12″
Step 1: Start Your Center Piece
If you are planning on making a wall hanging, you can begin by attaching your long center piece to a dowel or a piece of wood. You can do this by making what’s called a lark’s head knot.
(If you aren’t sure what you’re going to do with your feather, or if you don’t want to use it for a wallhanging, you can skip down to Step 2.)
A lark’s head knot is one of the easiest and most basic macrame knots. In fact, you’ve probably tied tons of them in your life without realizing it.
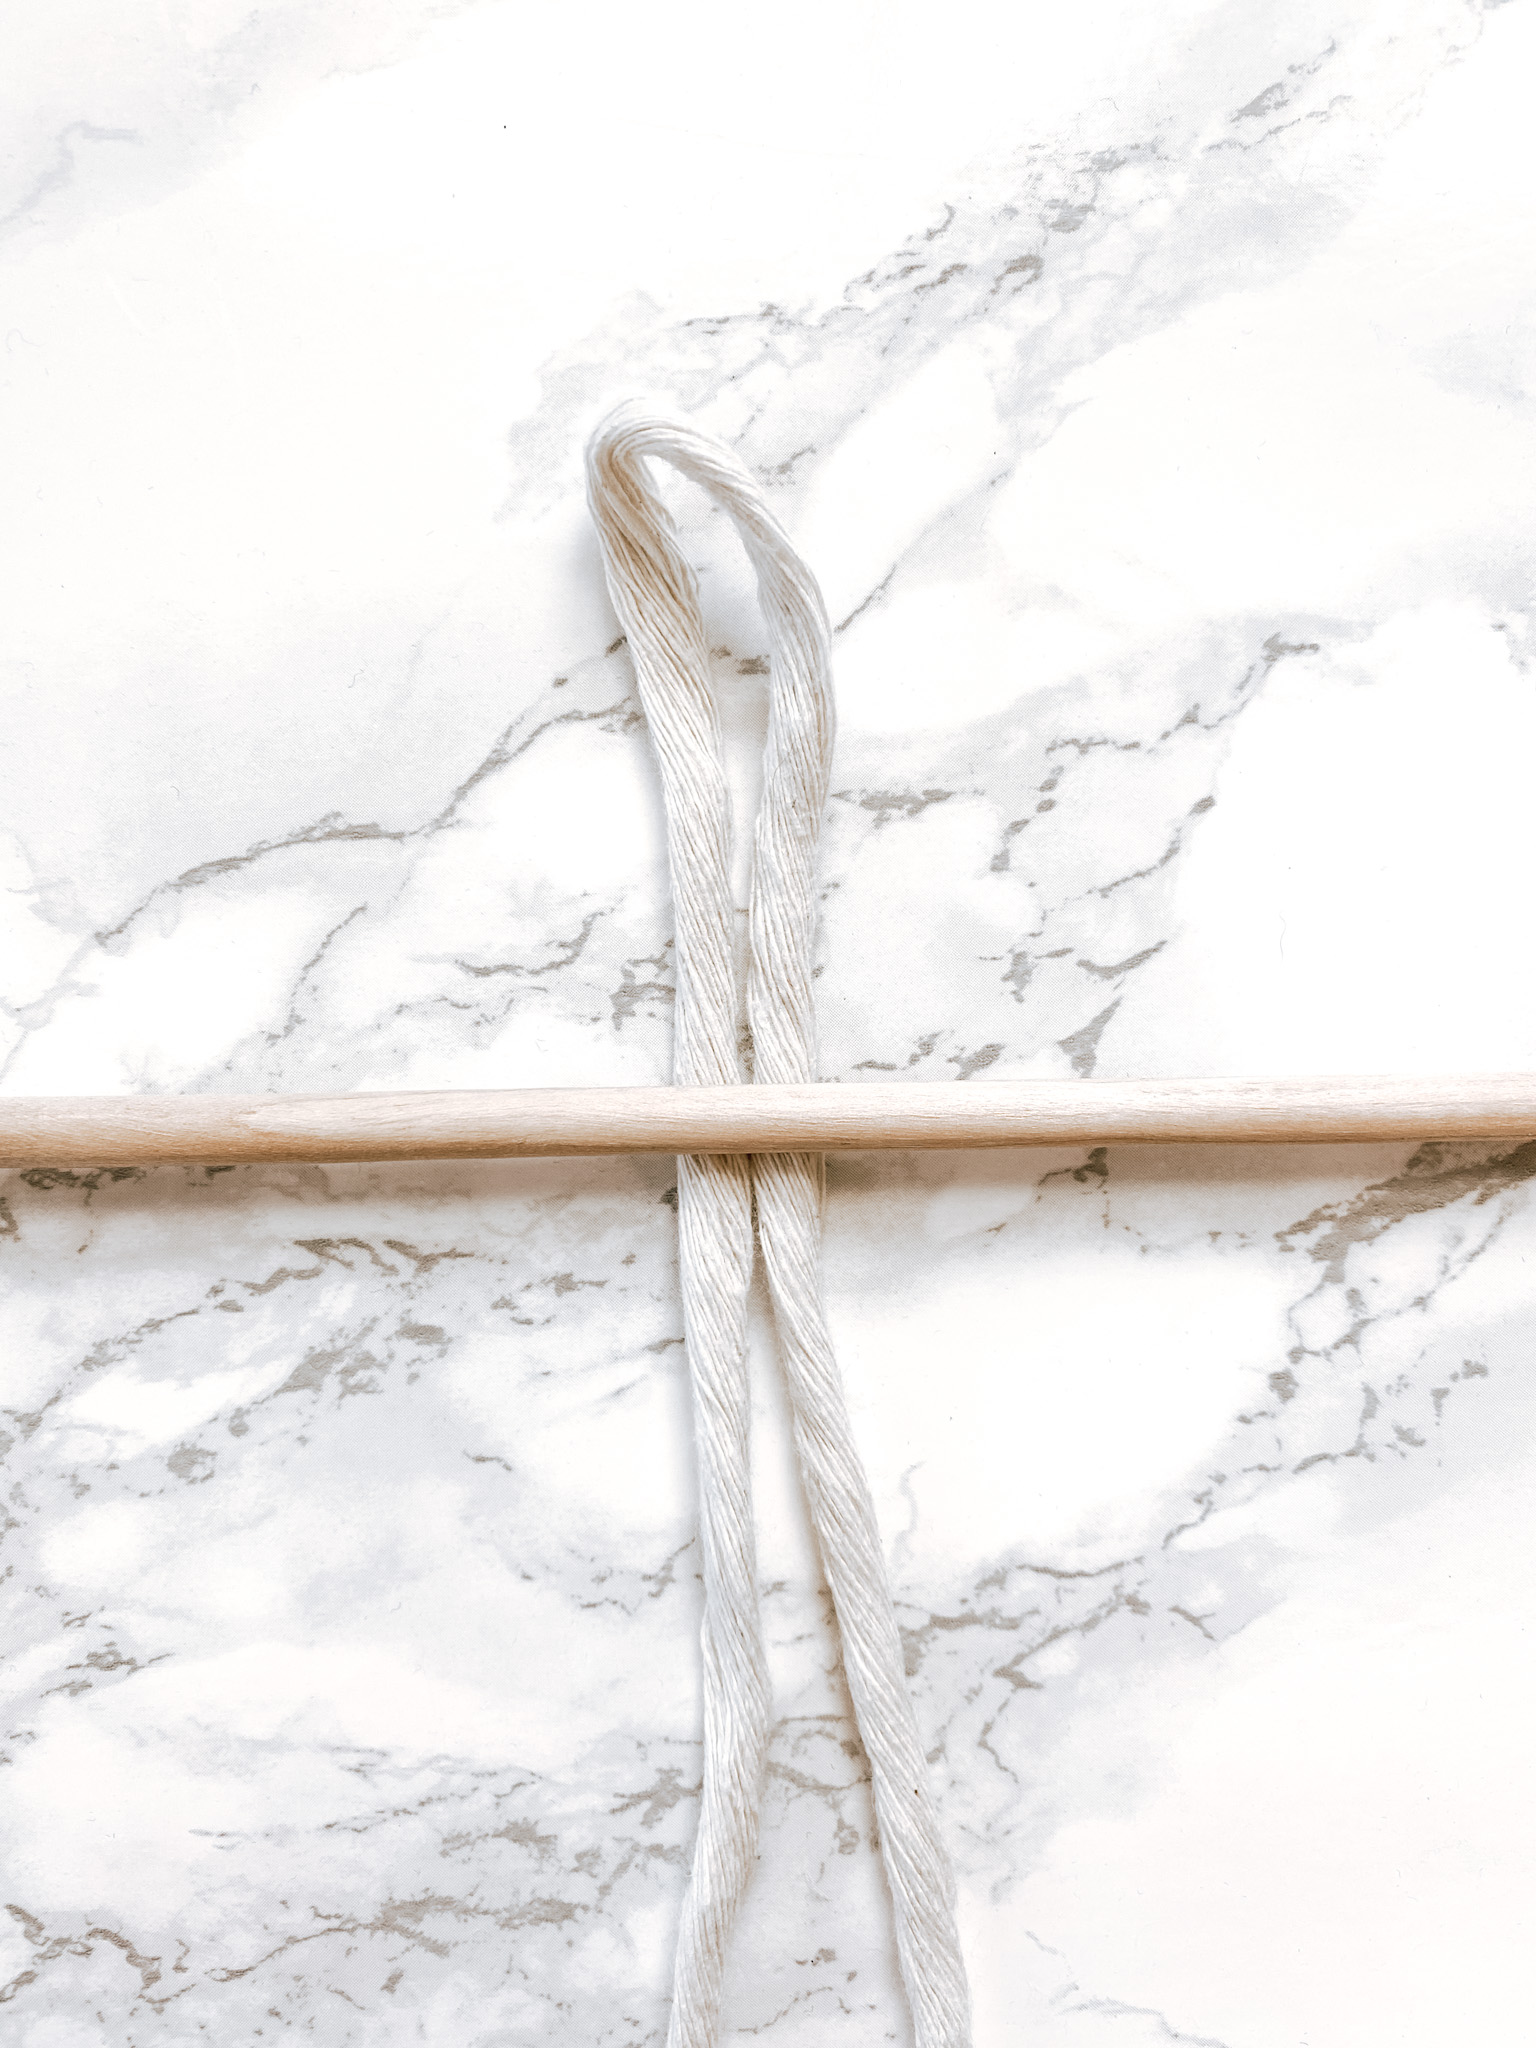
- Fold your long piece in half and place it under the dowel.
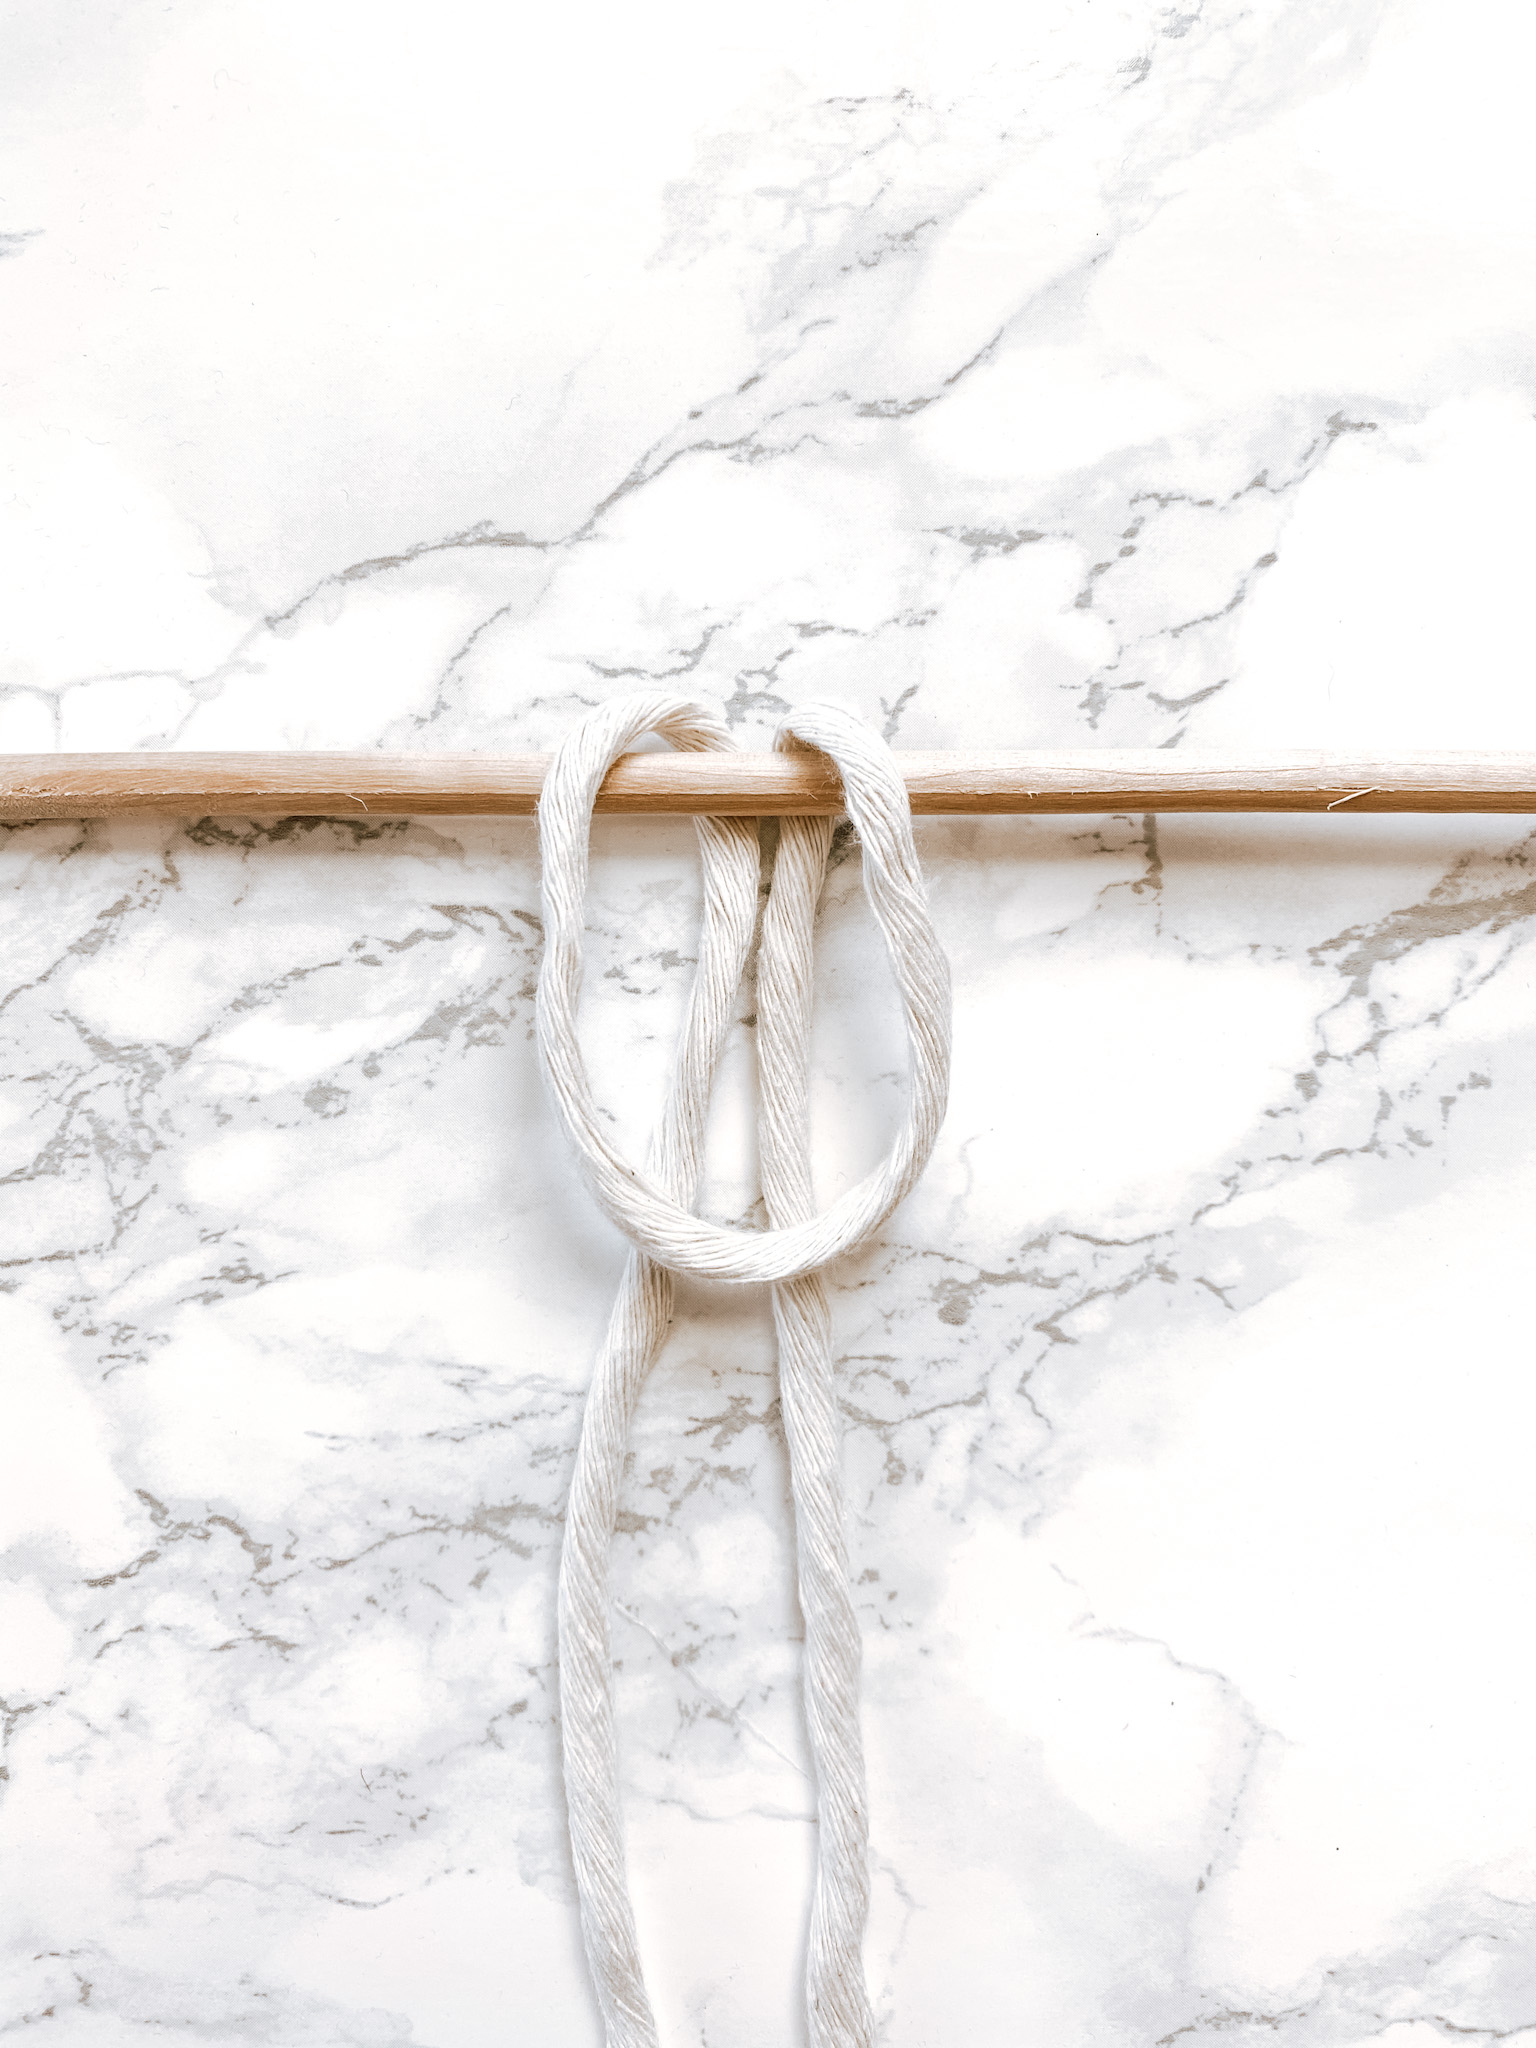
2. Fold the folded part of the cord down over top of the dowel.
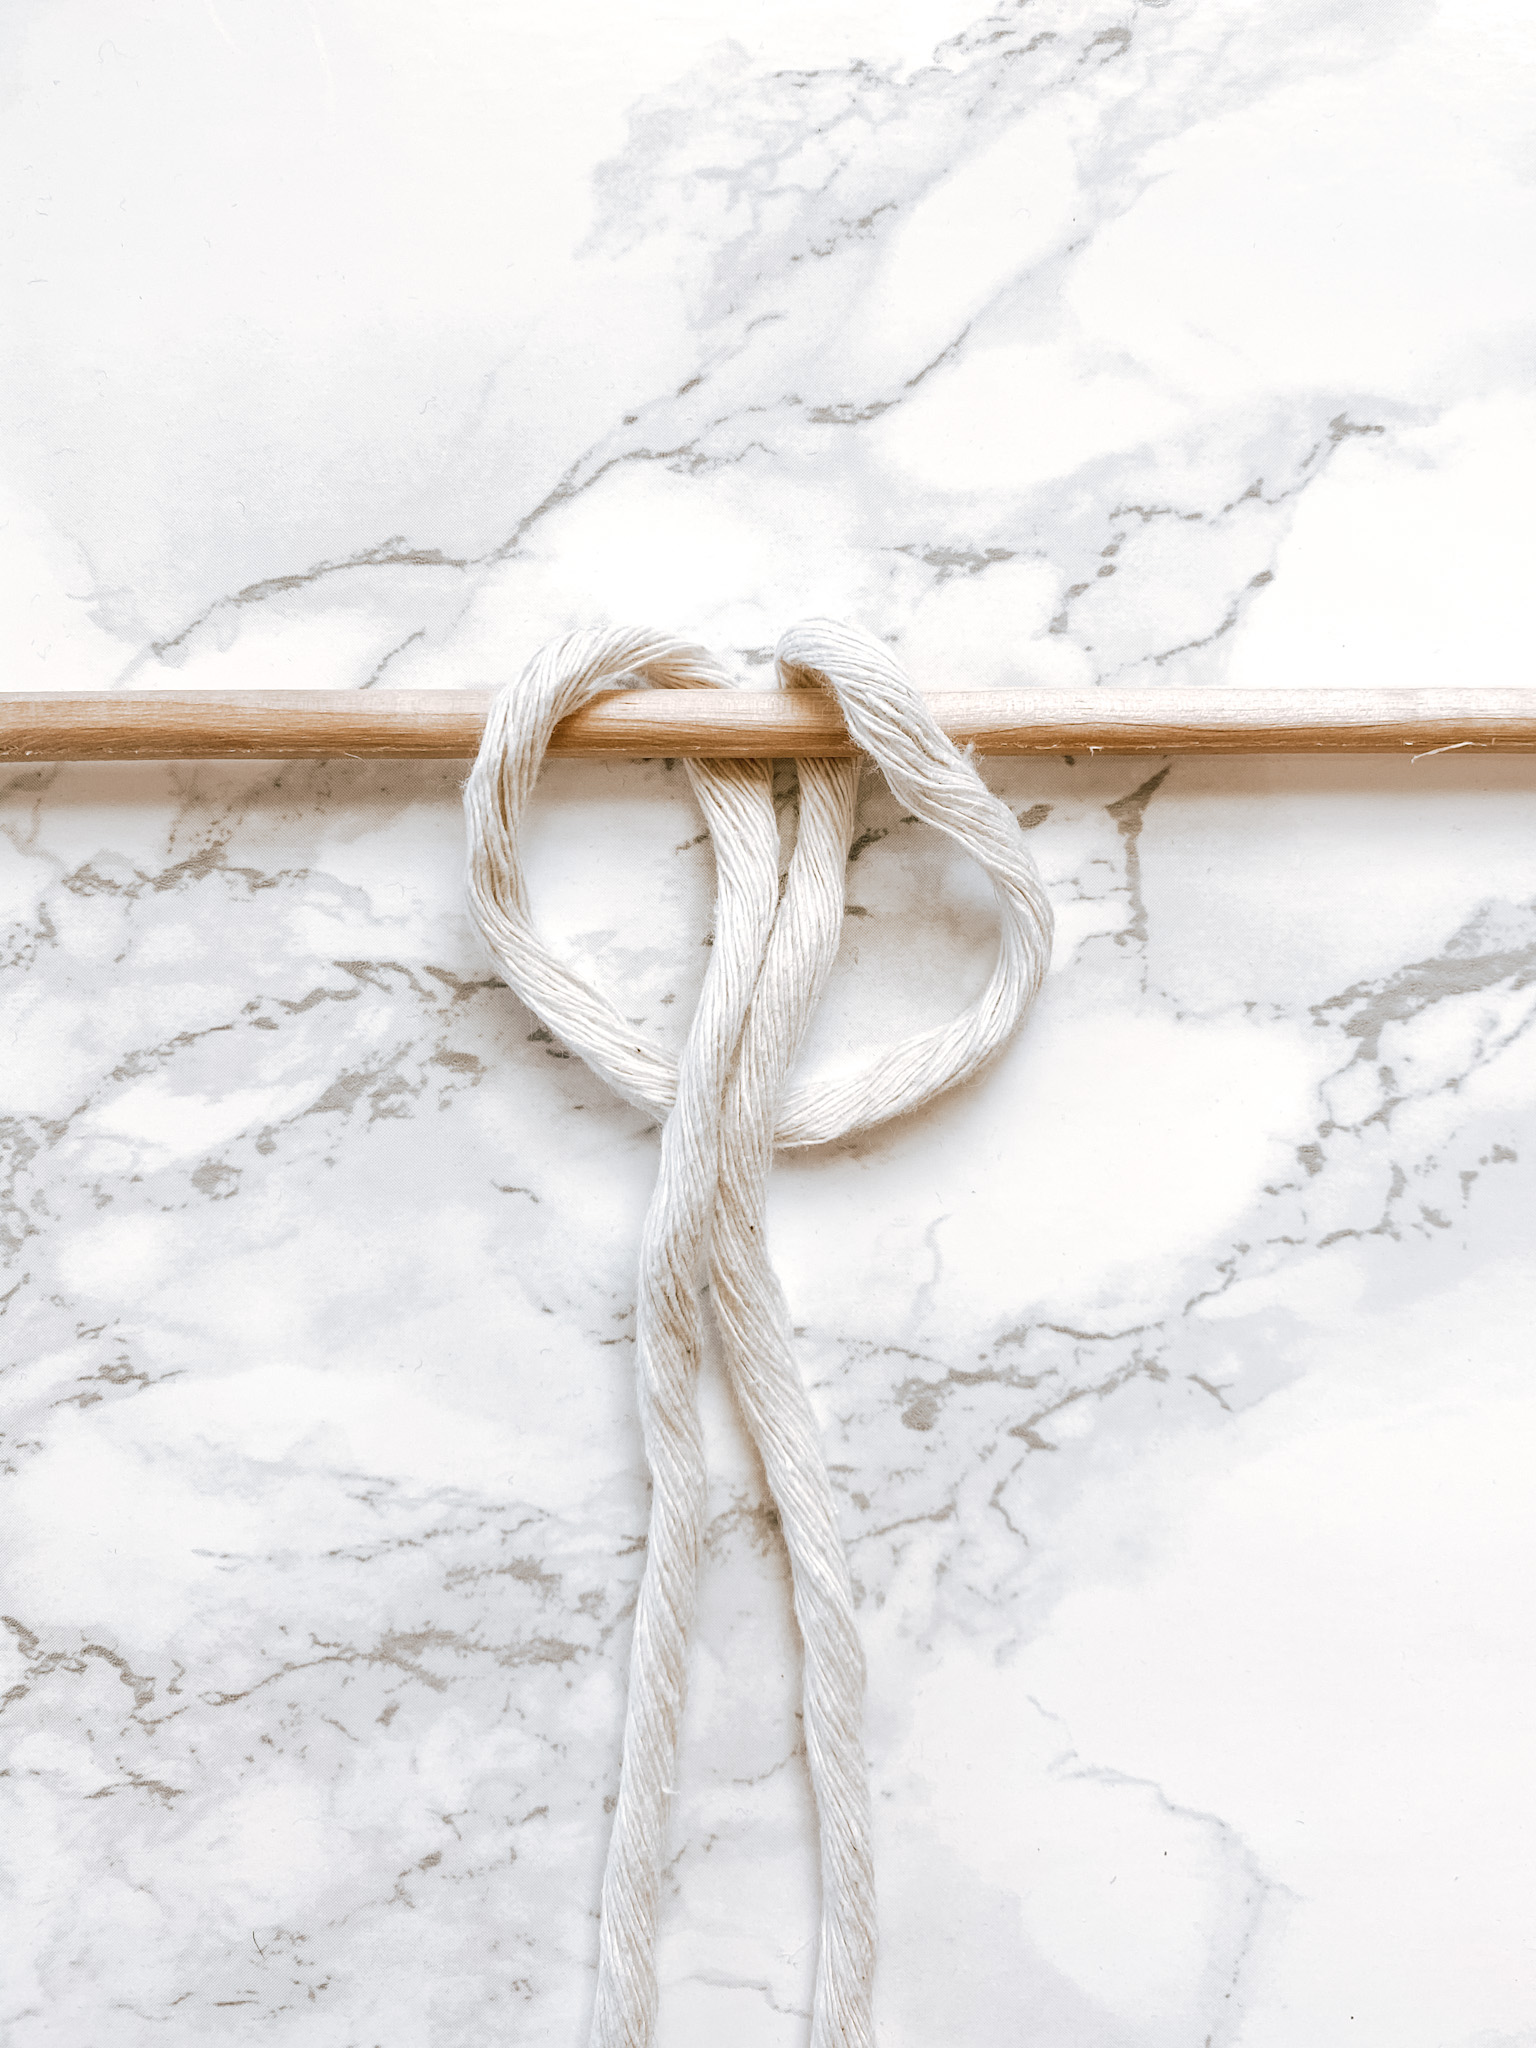
3. Pull the cut ends up through the fold.
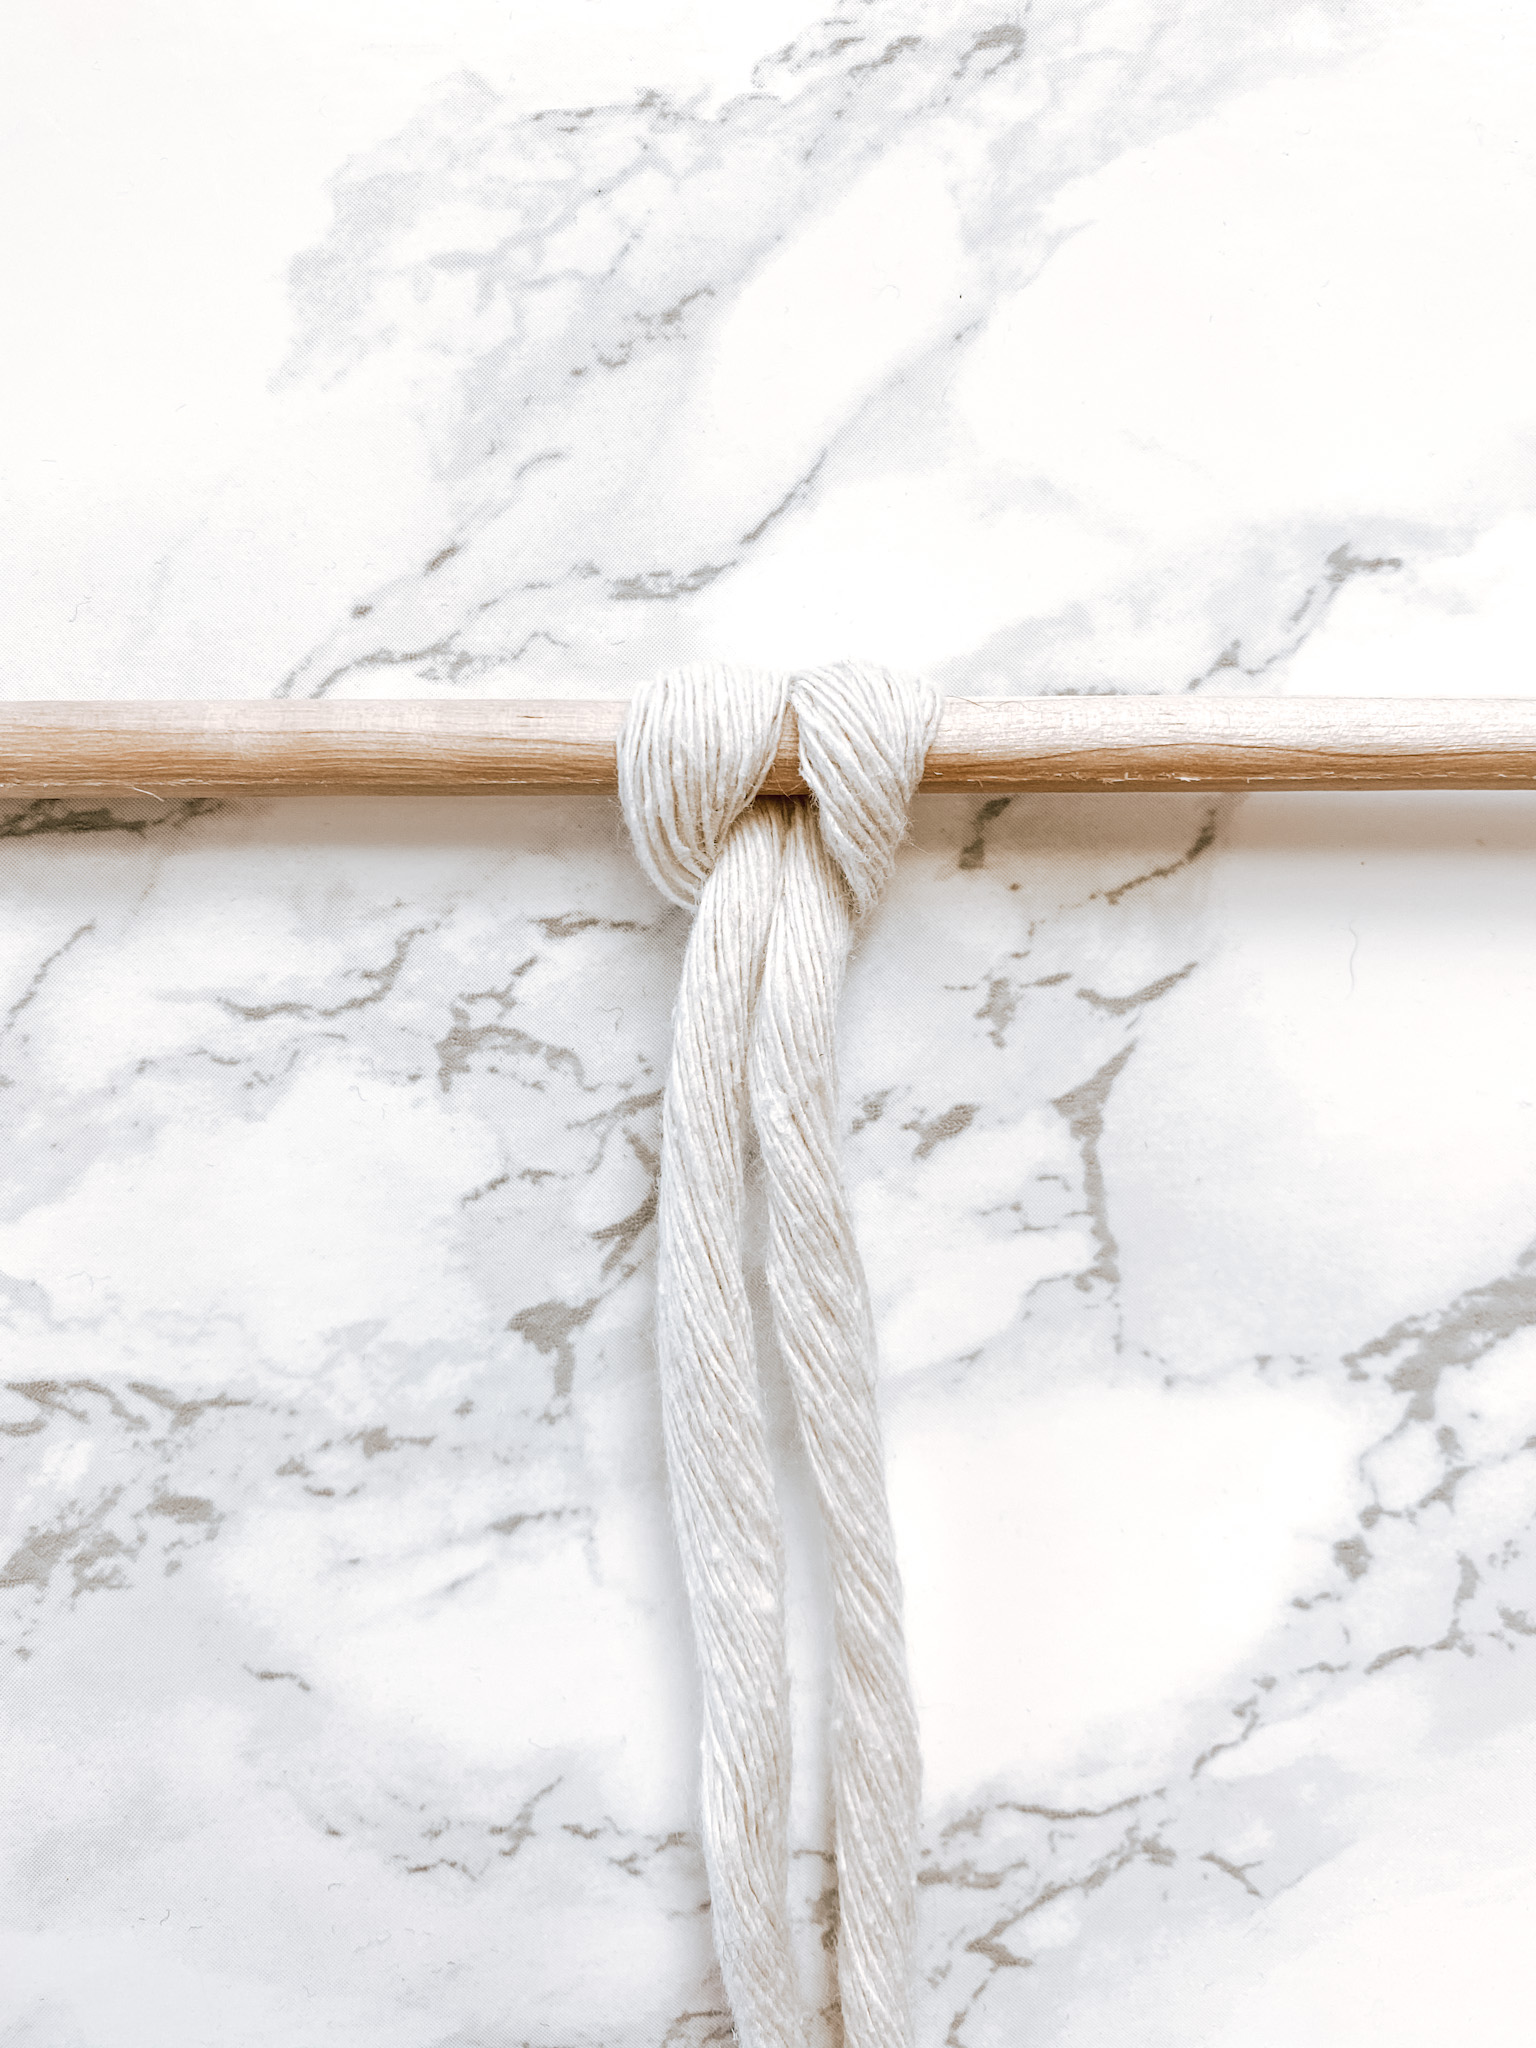
4. Pull tight.
As pictured above, this is called a reverse larks head knot. If you flip the entire thing over, as pictured below, it would be a standard larks head knot.
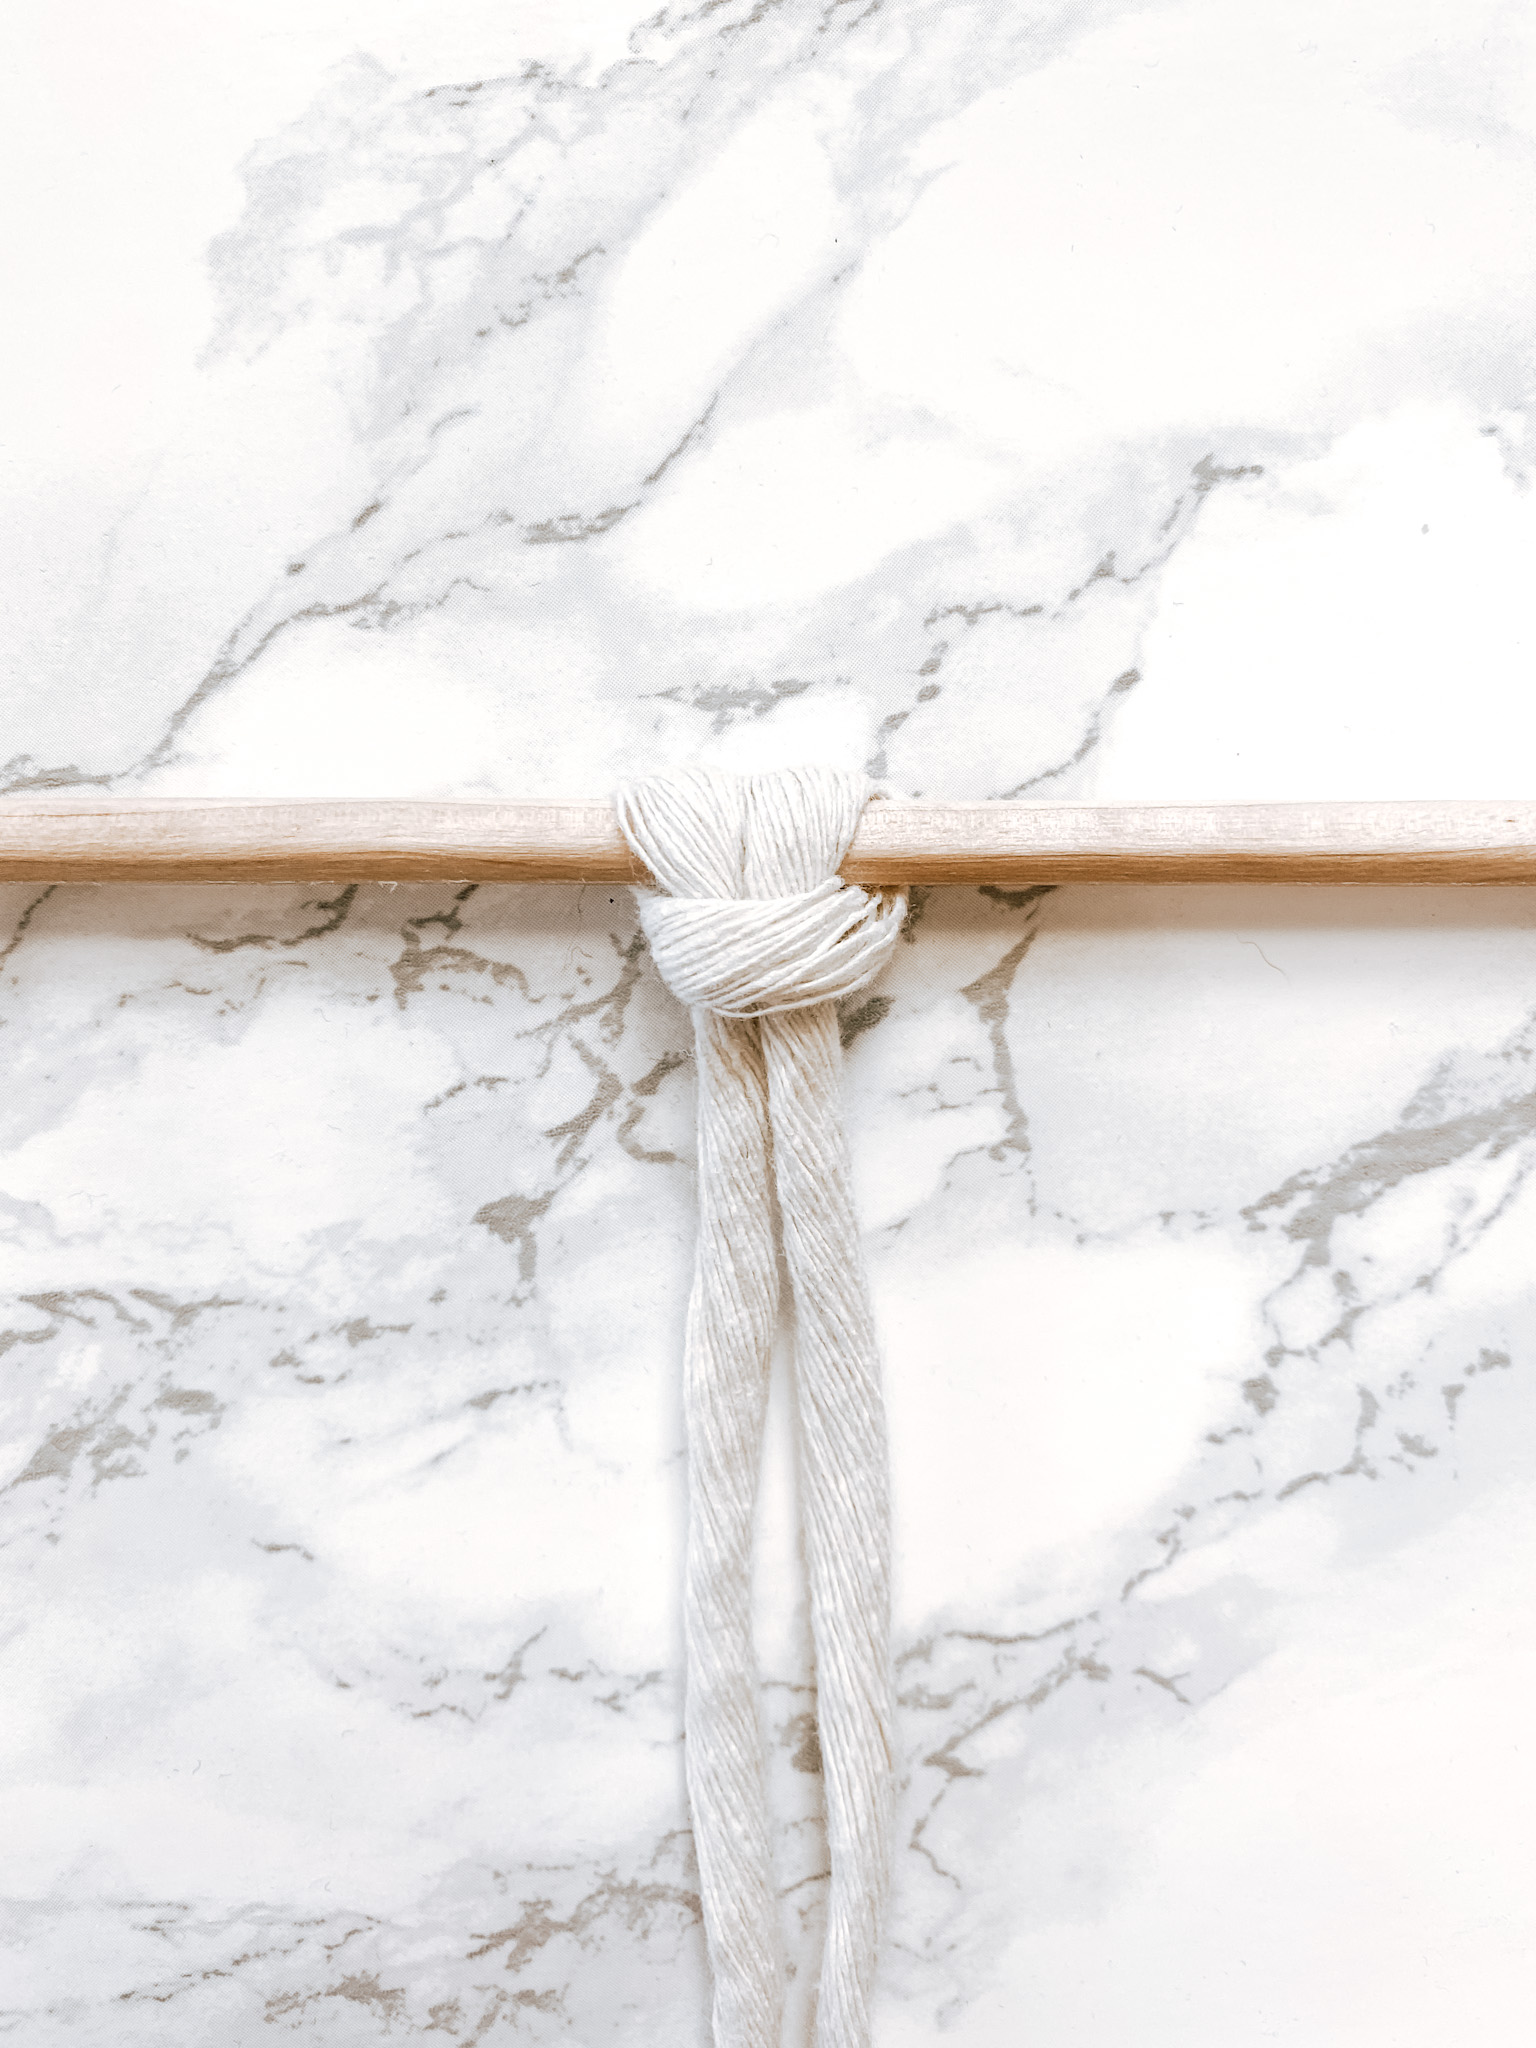
There is no difference, and it’s just up to you as to which one you prefer the look of.
Step 2: Tie on Your Cords
Now it’s time to start tying on your edge pieces.
If you haven’t attached your long center piece to something in Step 1, just fold it in half and place it down on your work surface.
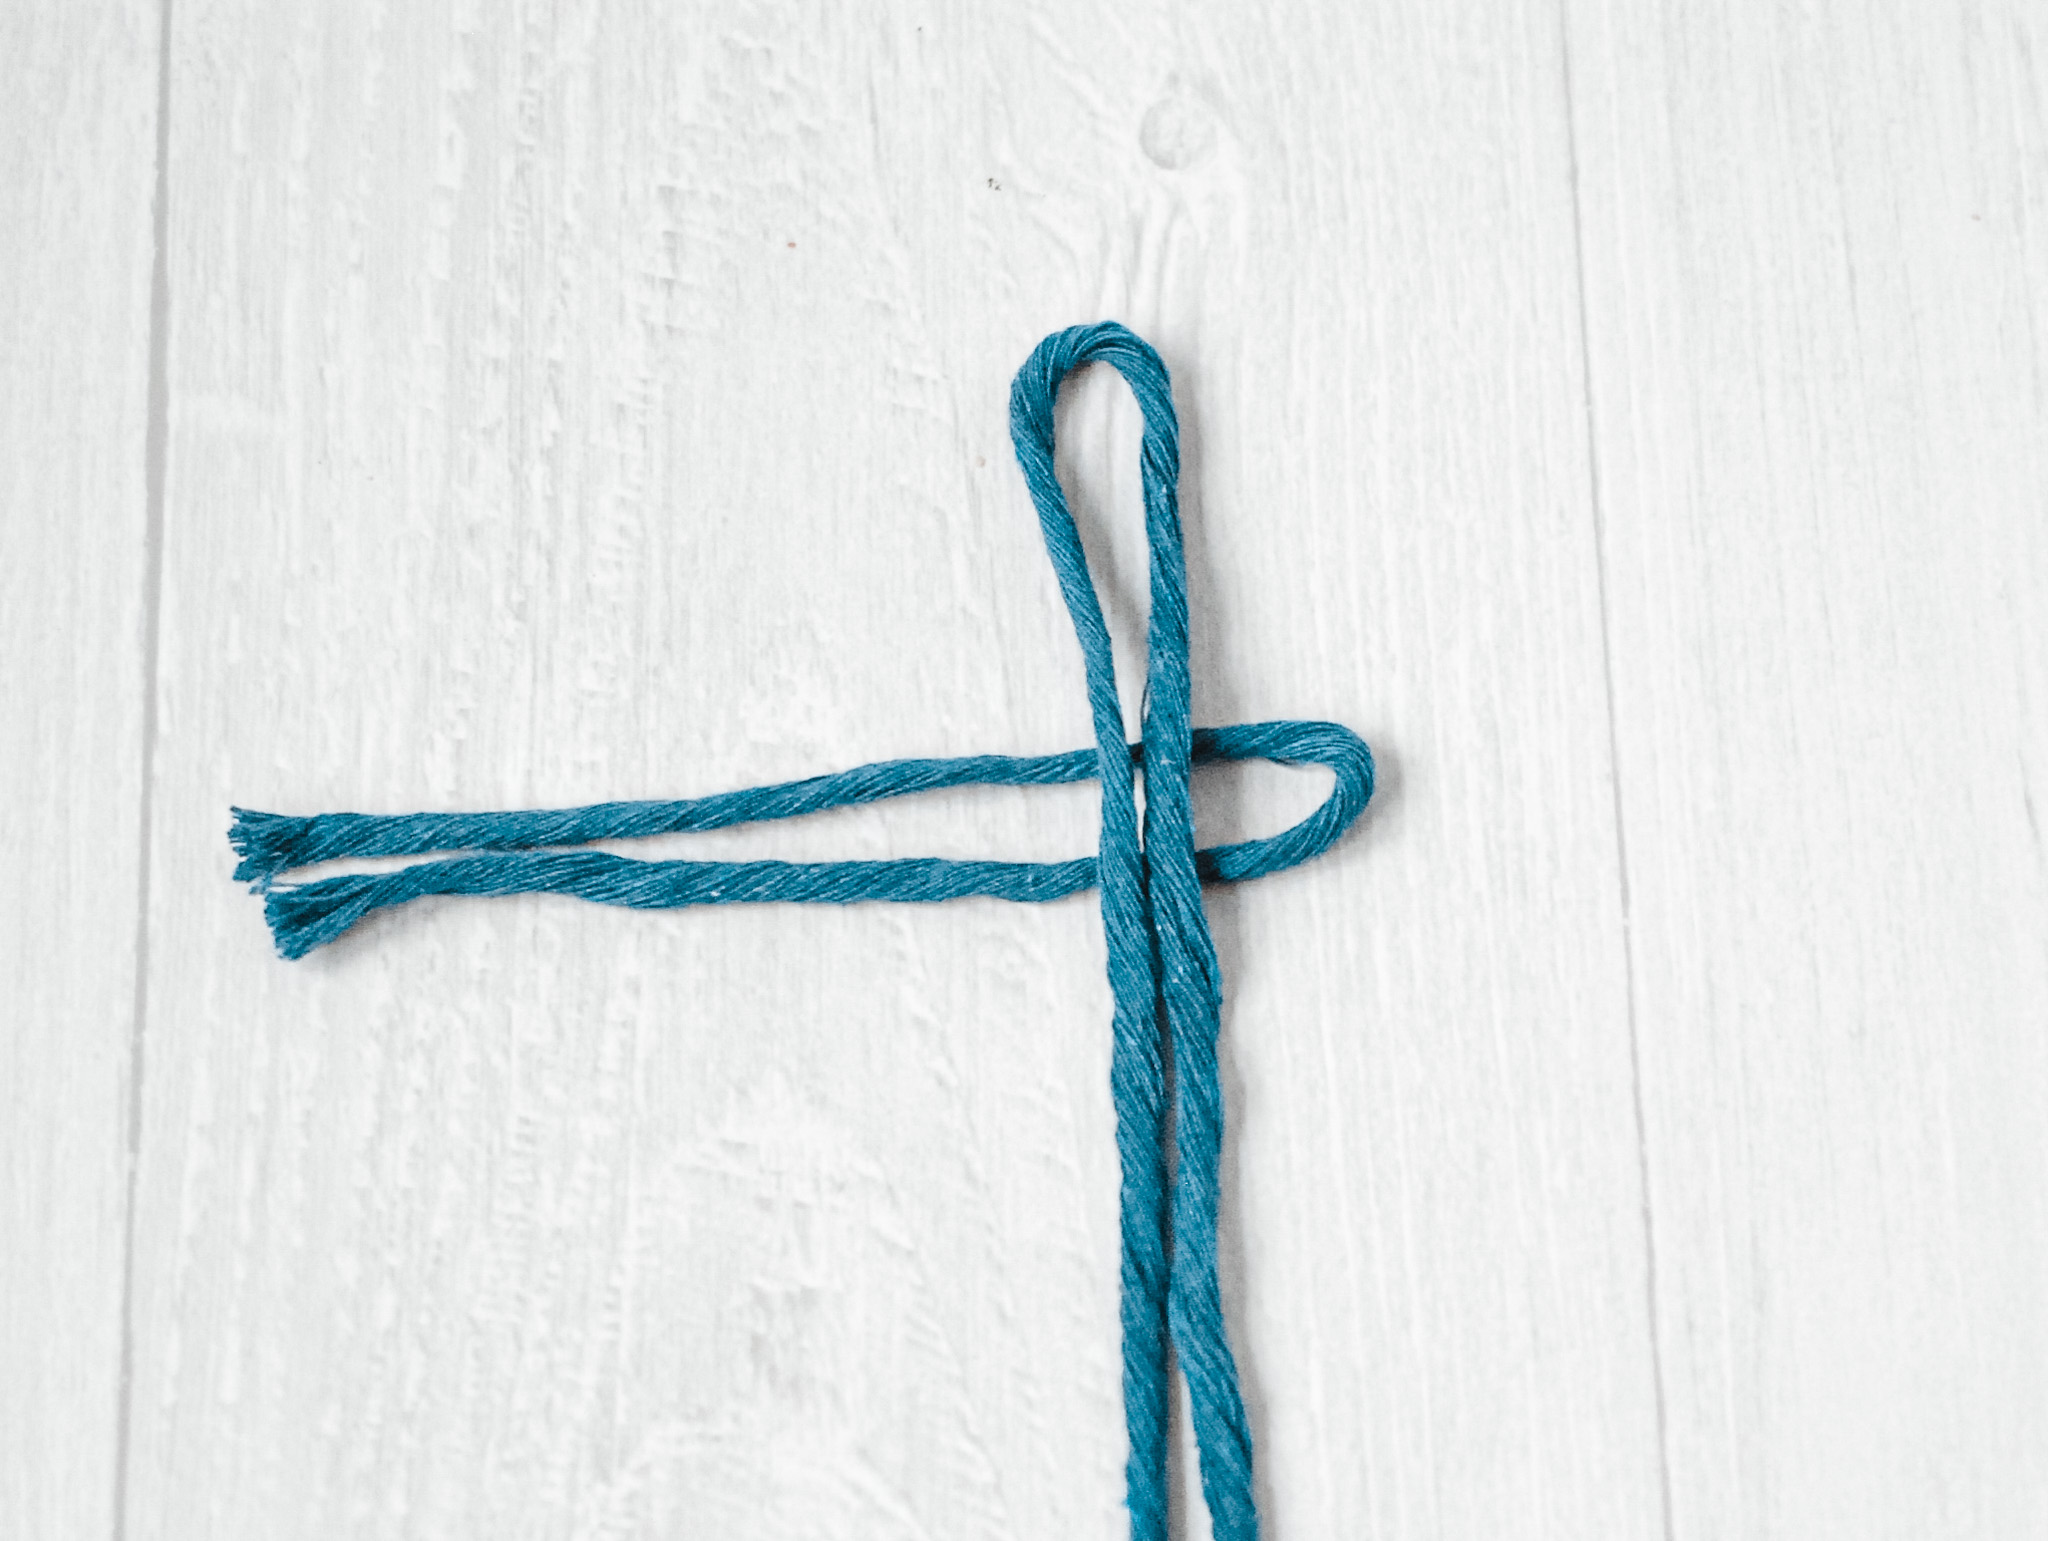
Take one of your edge pieces (if you are doing a tapered feather, start with your longest pieces at the top) and fold it in half. Place it underneath your center piece.
NOTE: If your center piece isn’t already attached to something, I would recommend leaving at least 4-5 inches above your first edge piece (not like I did here). That will give you plenty of room at the top if you decide to attach it to something later.
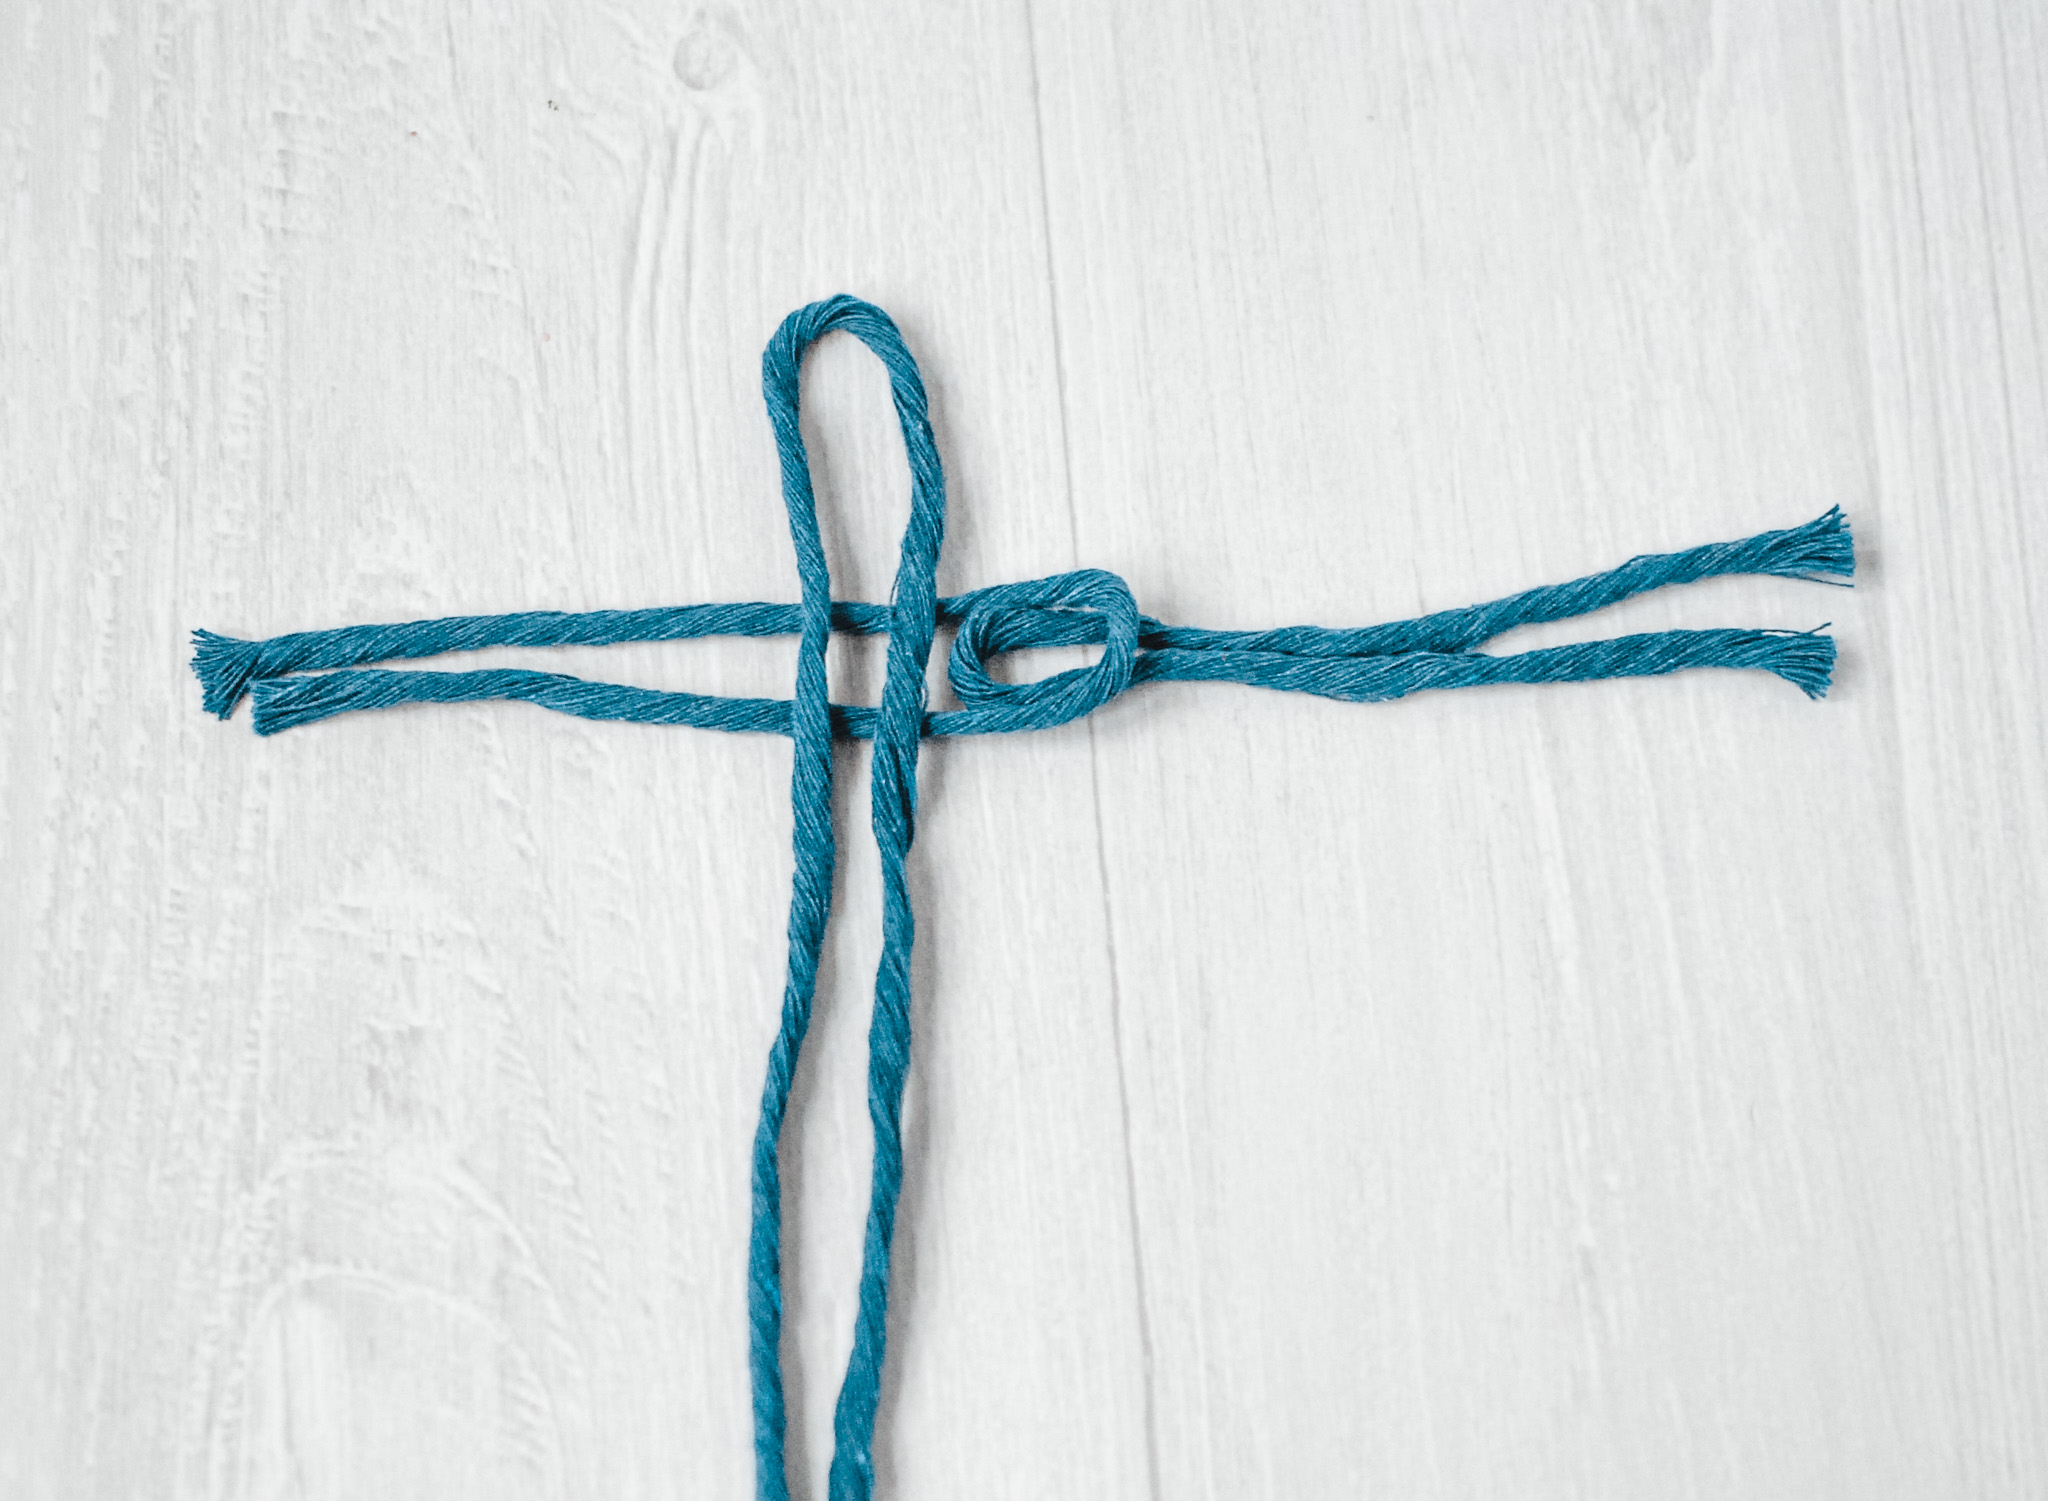
Take another of your longest edge pieces, fold it in half, and put it into the loop created by the first edge piece.
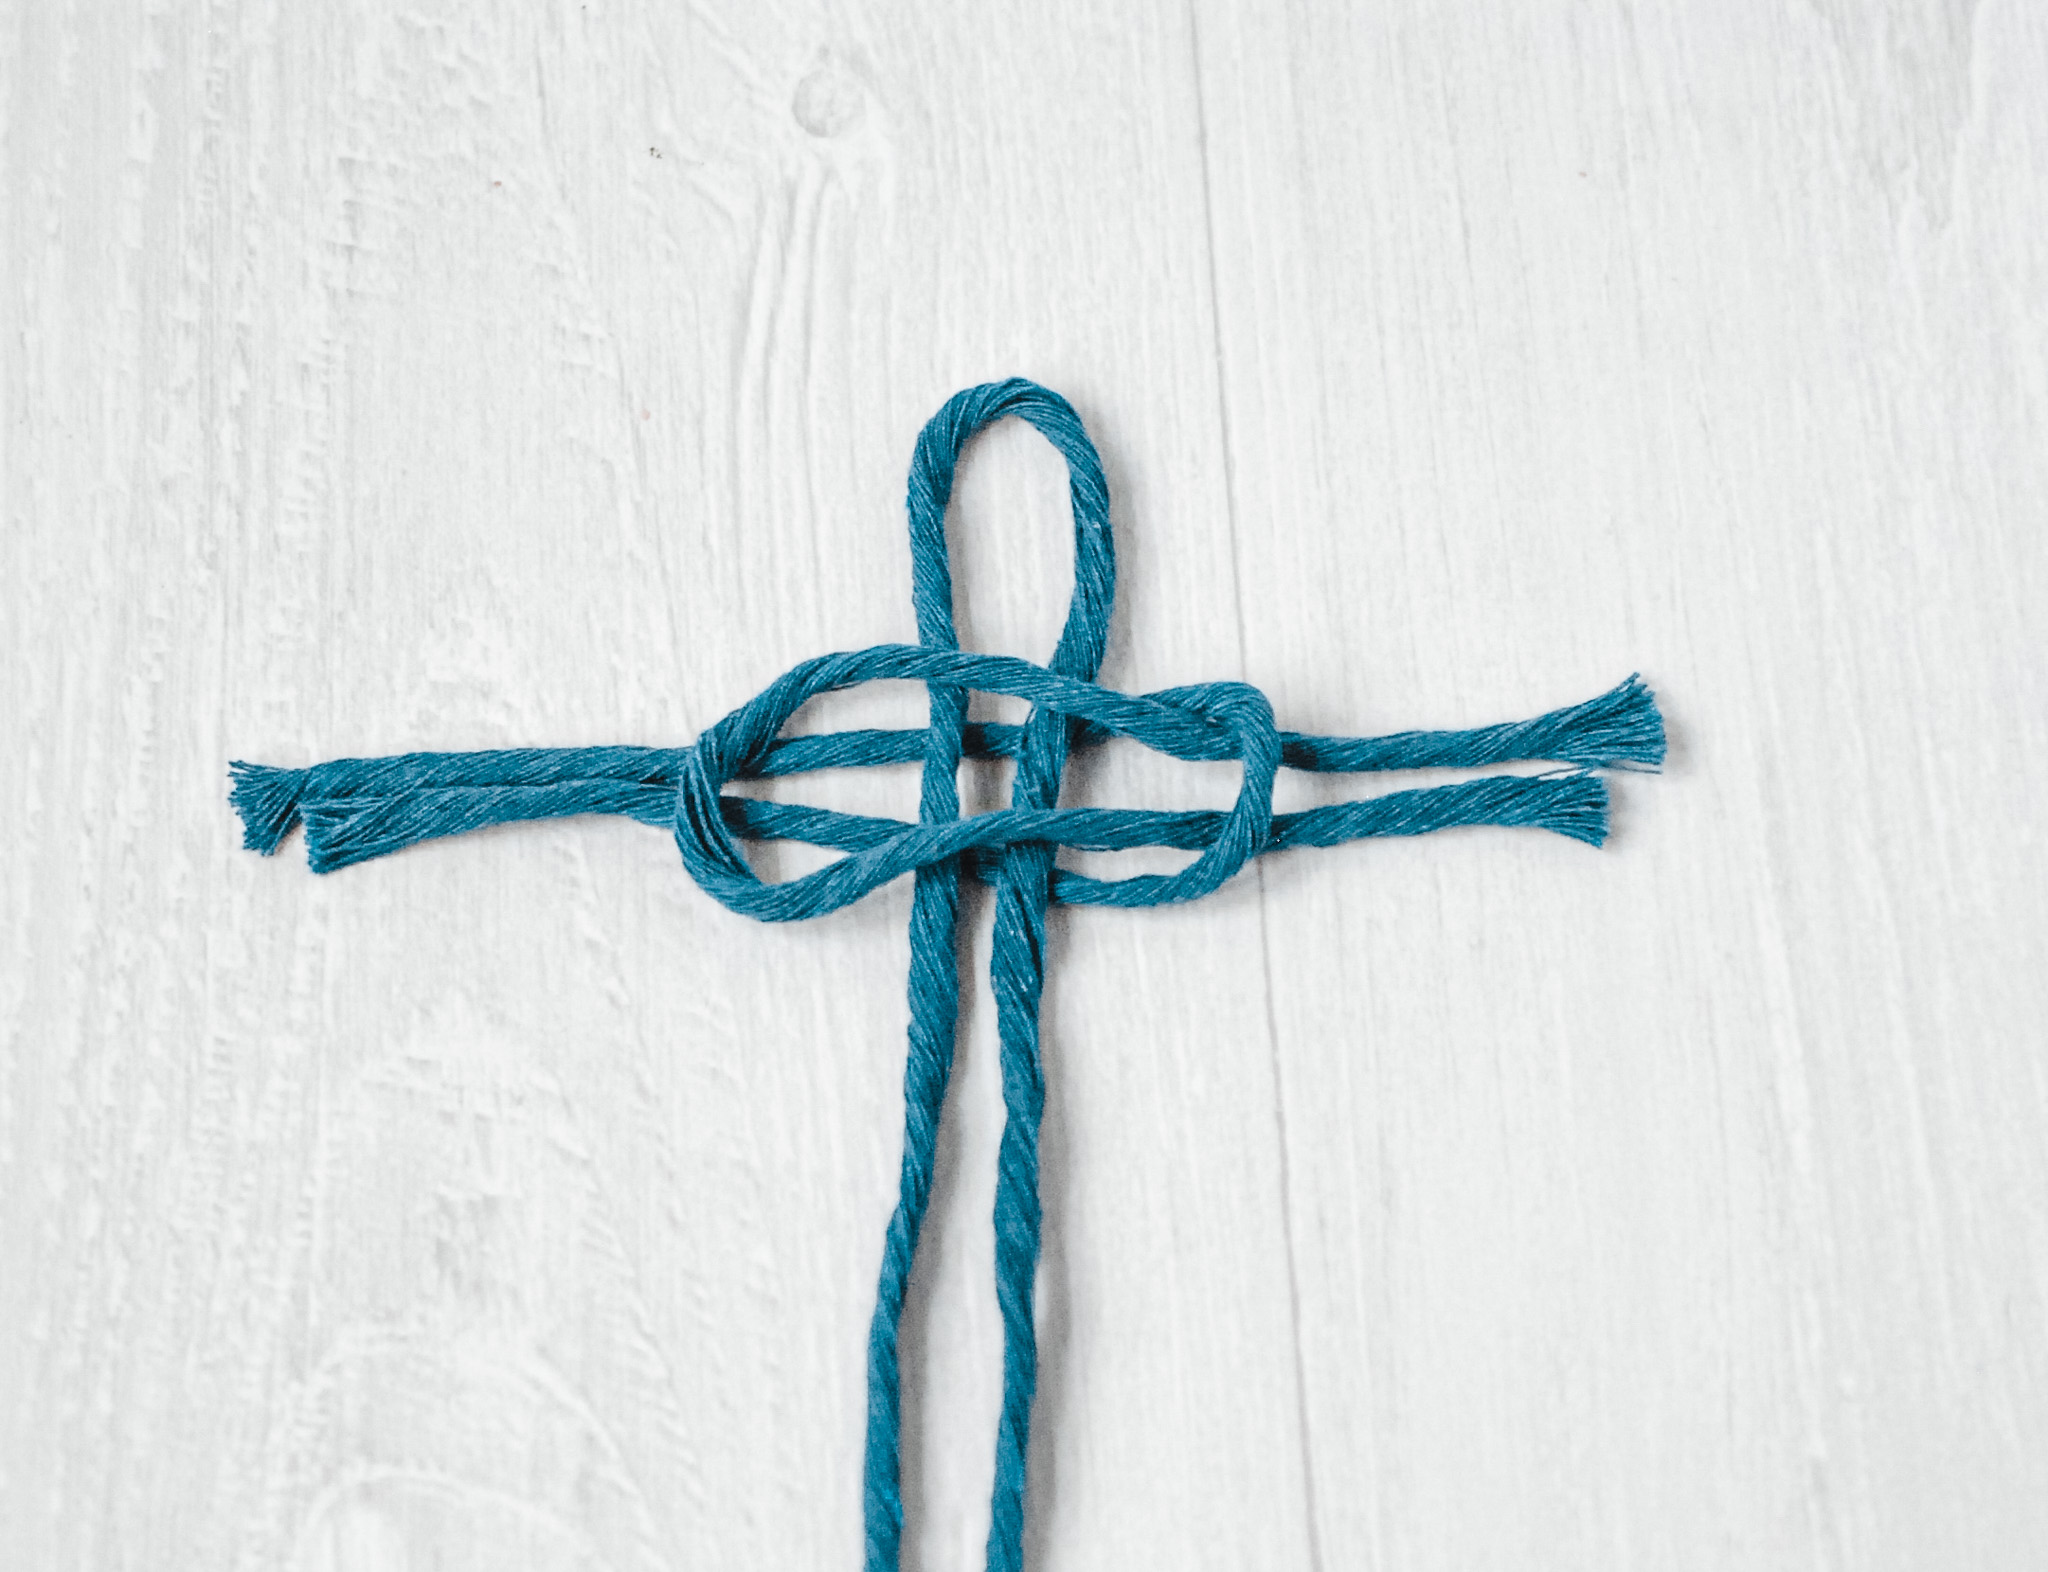
Pull it through and lay it on top of the first edge piece.
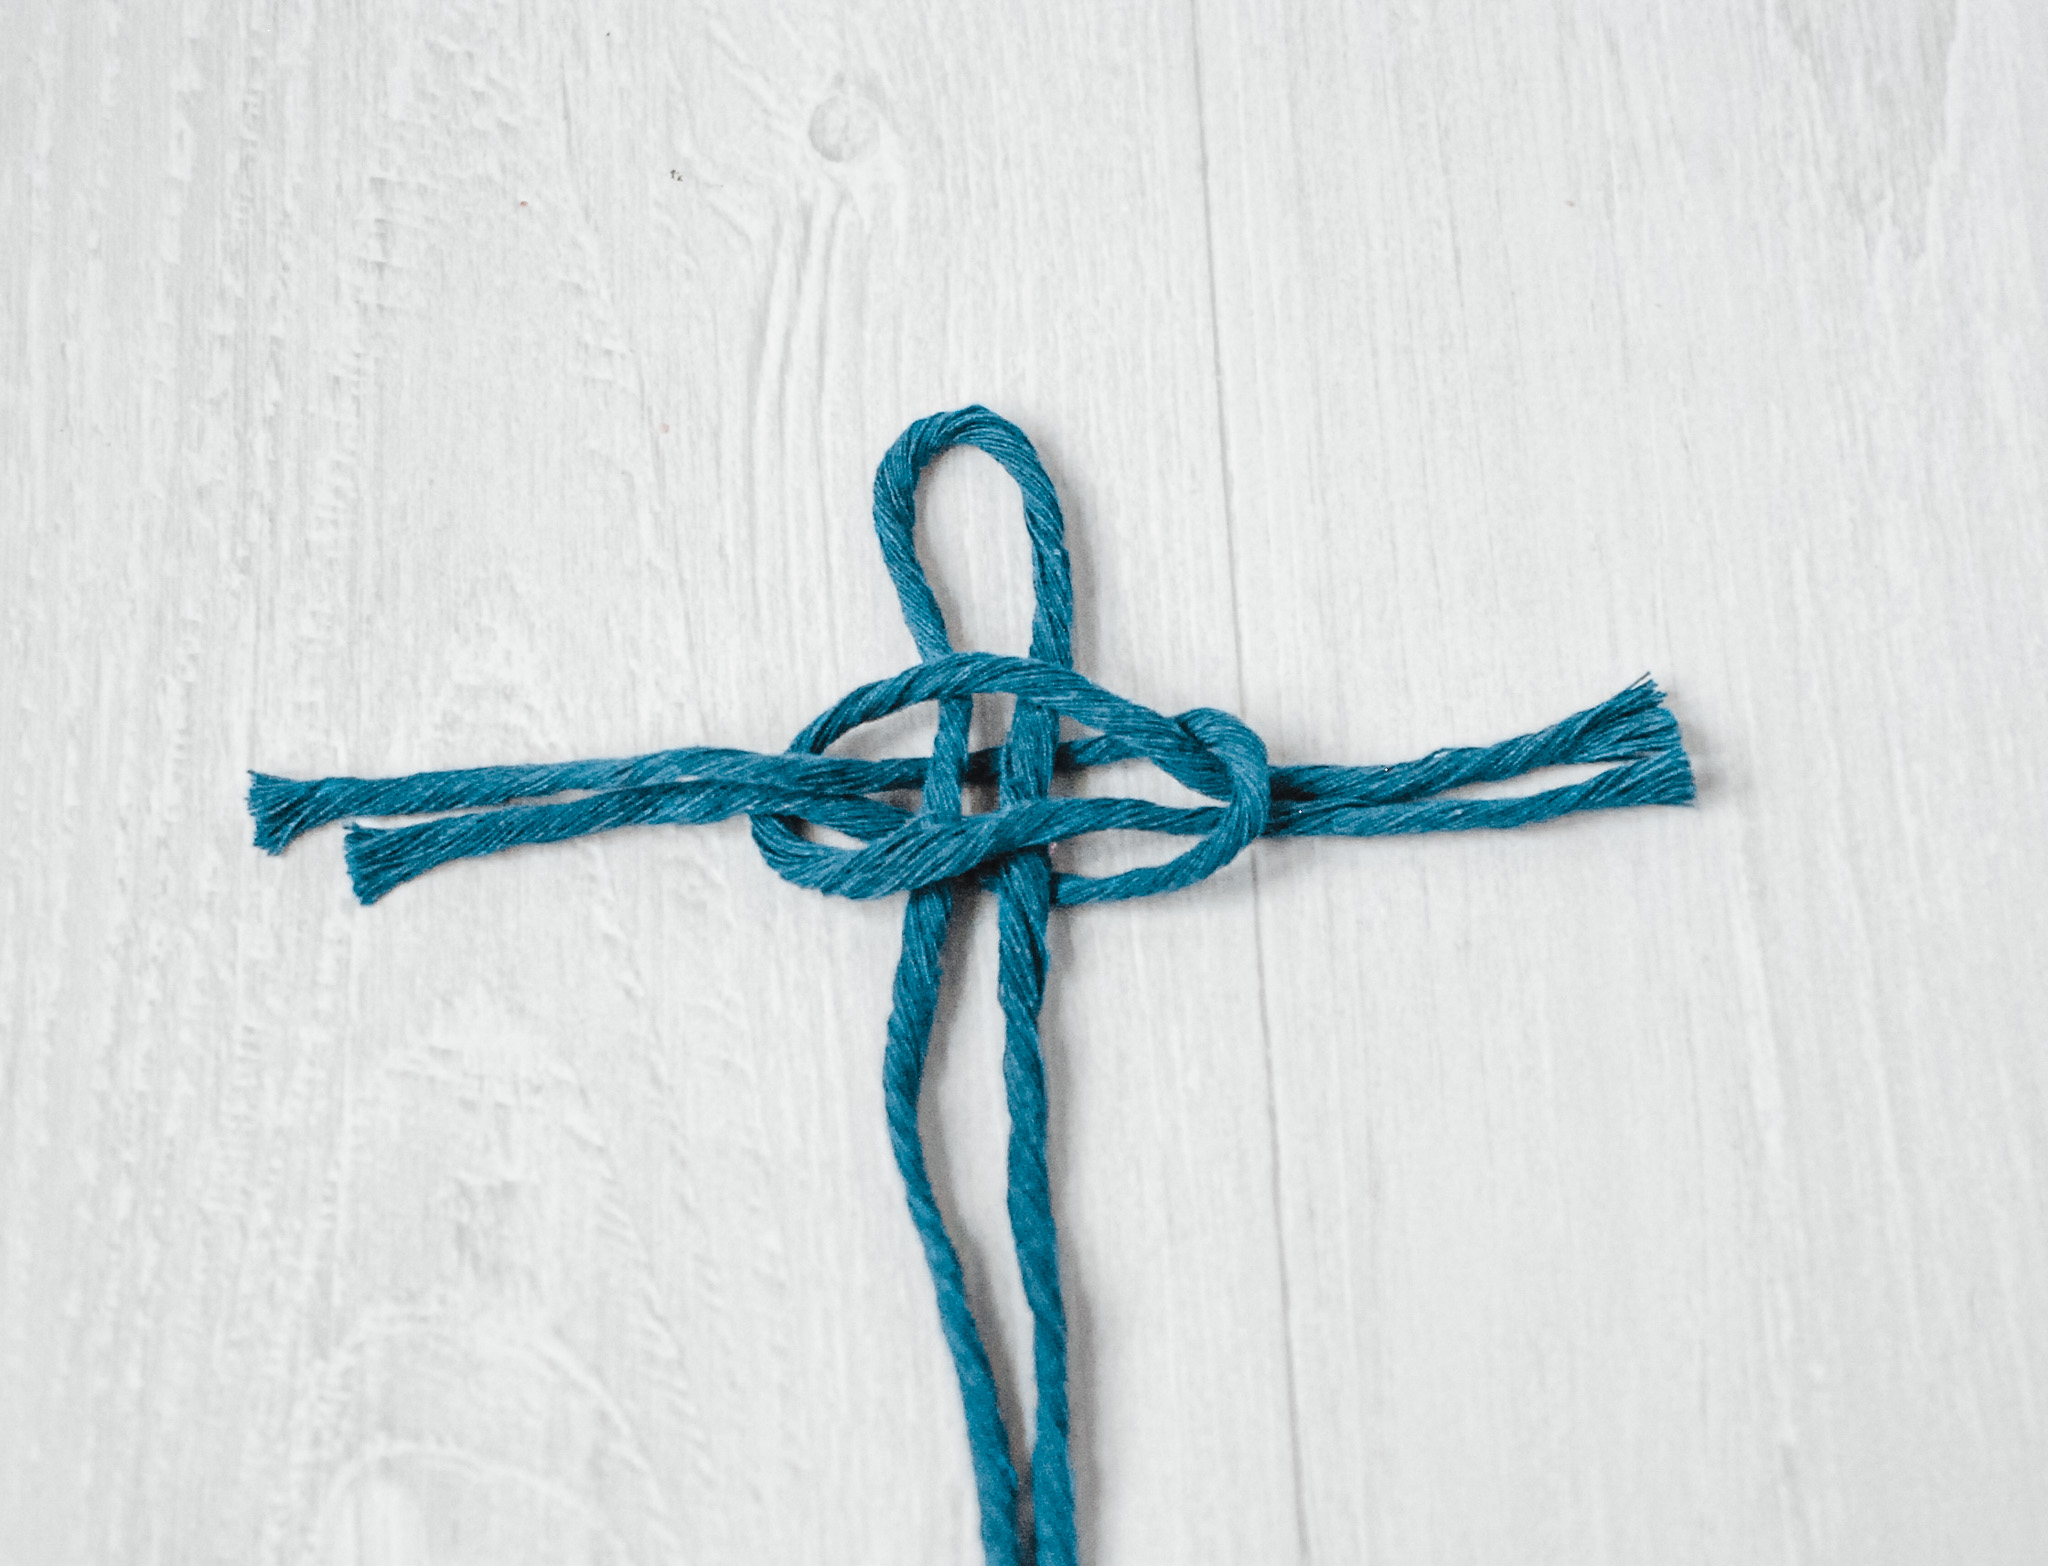
Place the ends of the first piece through the loop of the second piece.
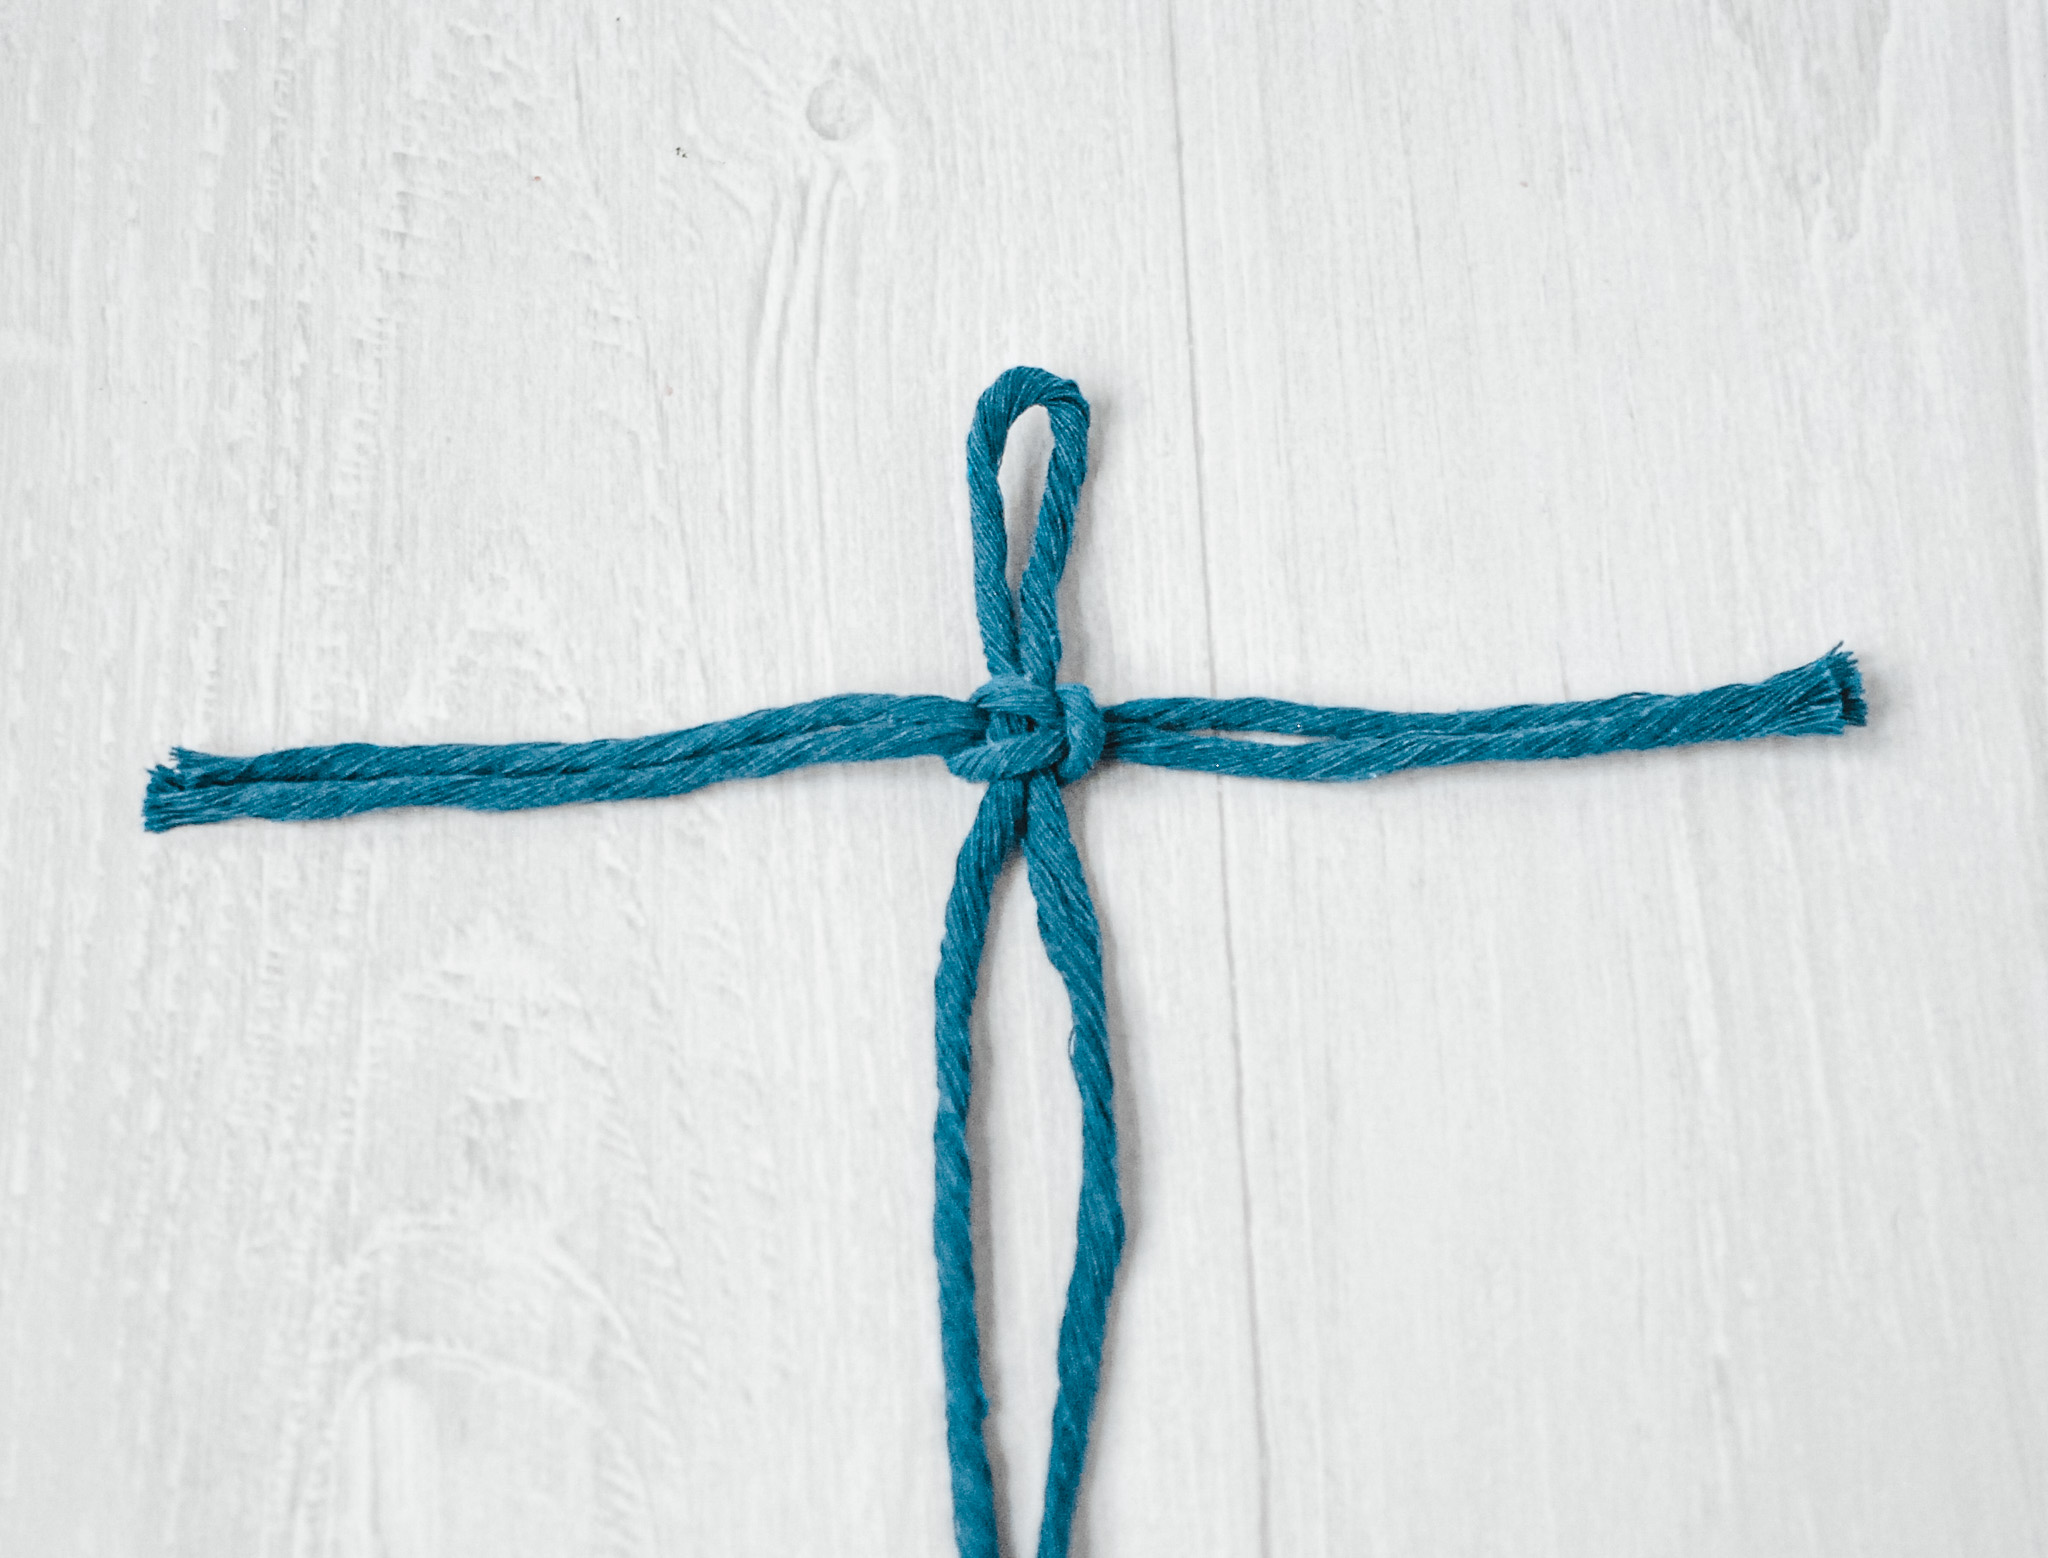
Pull both ends tight. You just tied your first knot!
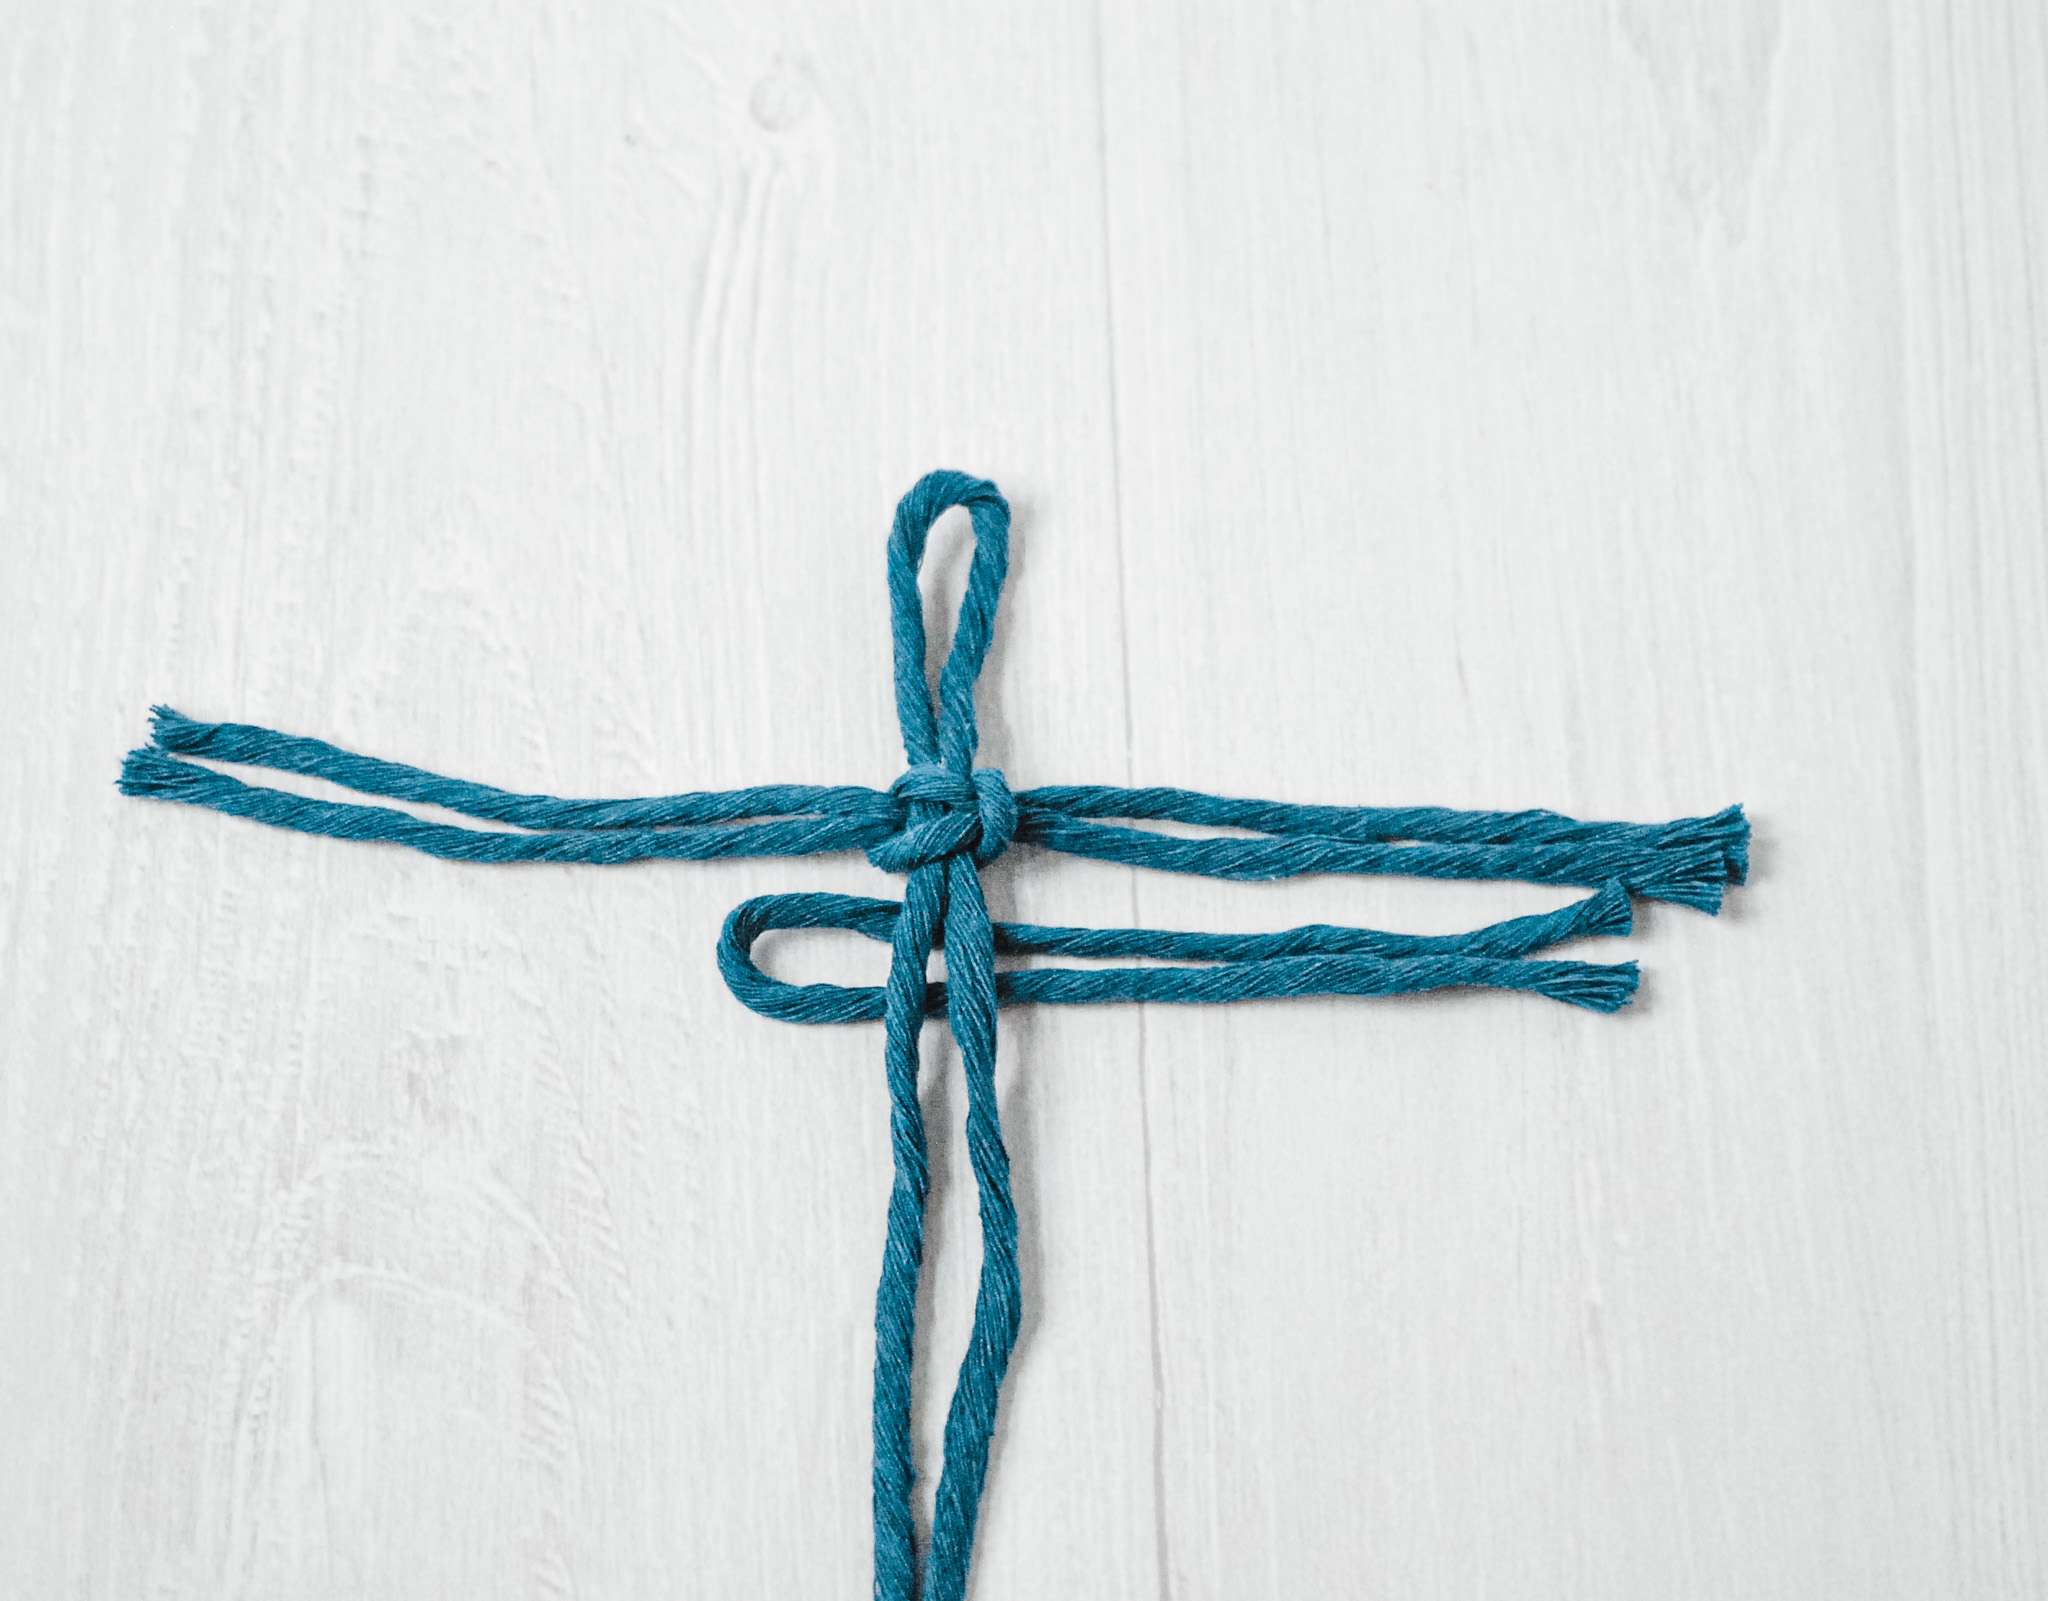
Begin your next knot the exact same way, just alternating the sides. So if your loop was on the right side of your center piece for the first knot, it needs to be on the left side this time.
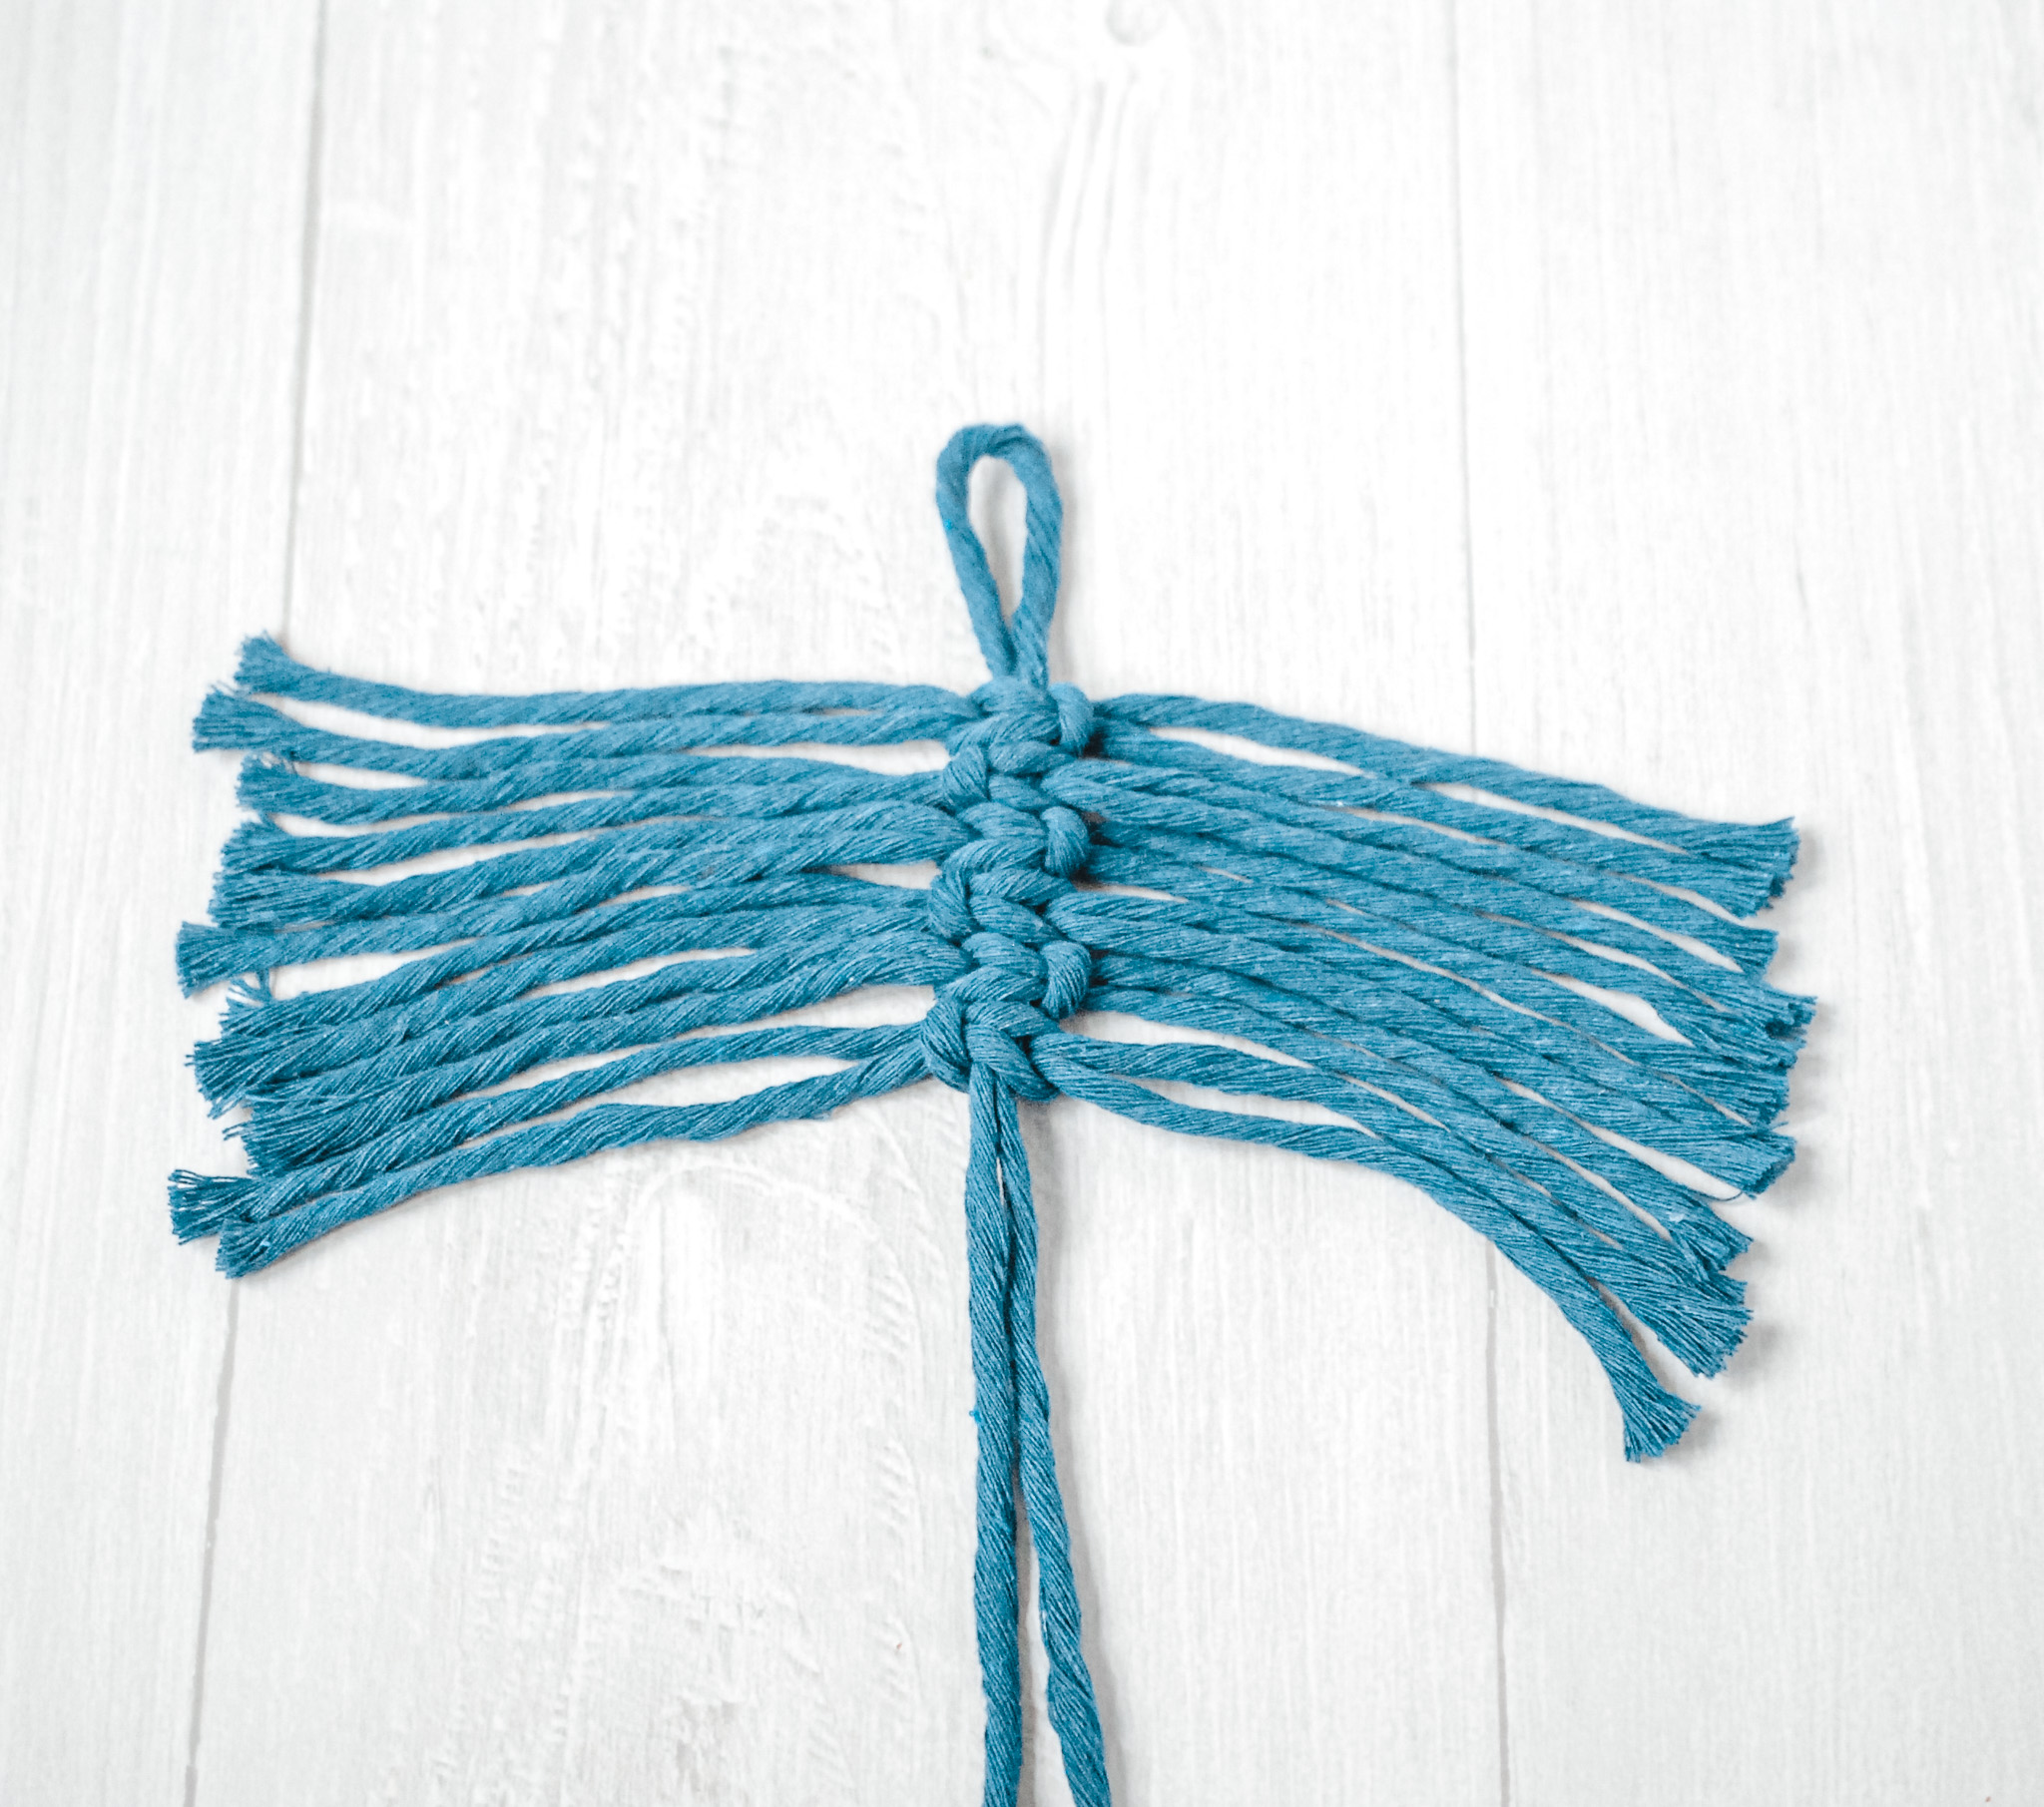
Continue making your knots this same way, alternating sides with each new row, until you’ve used up all your longest pieces.
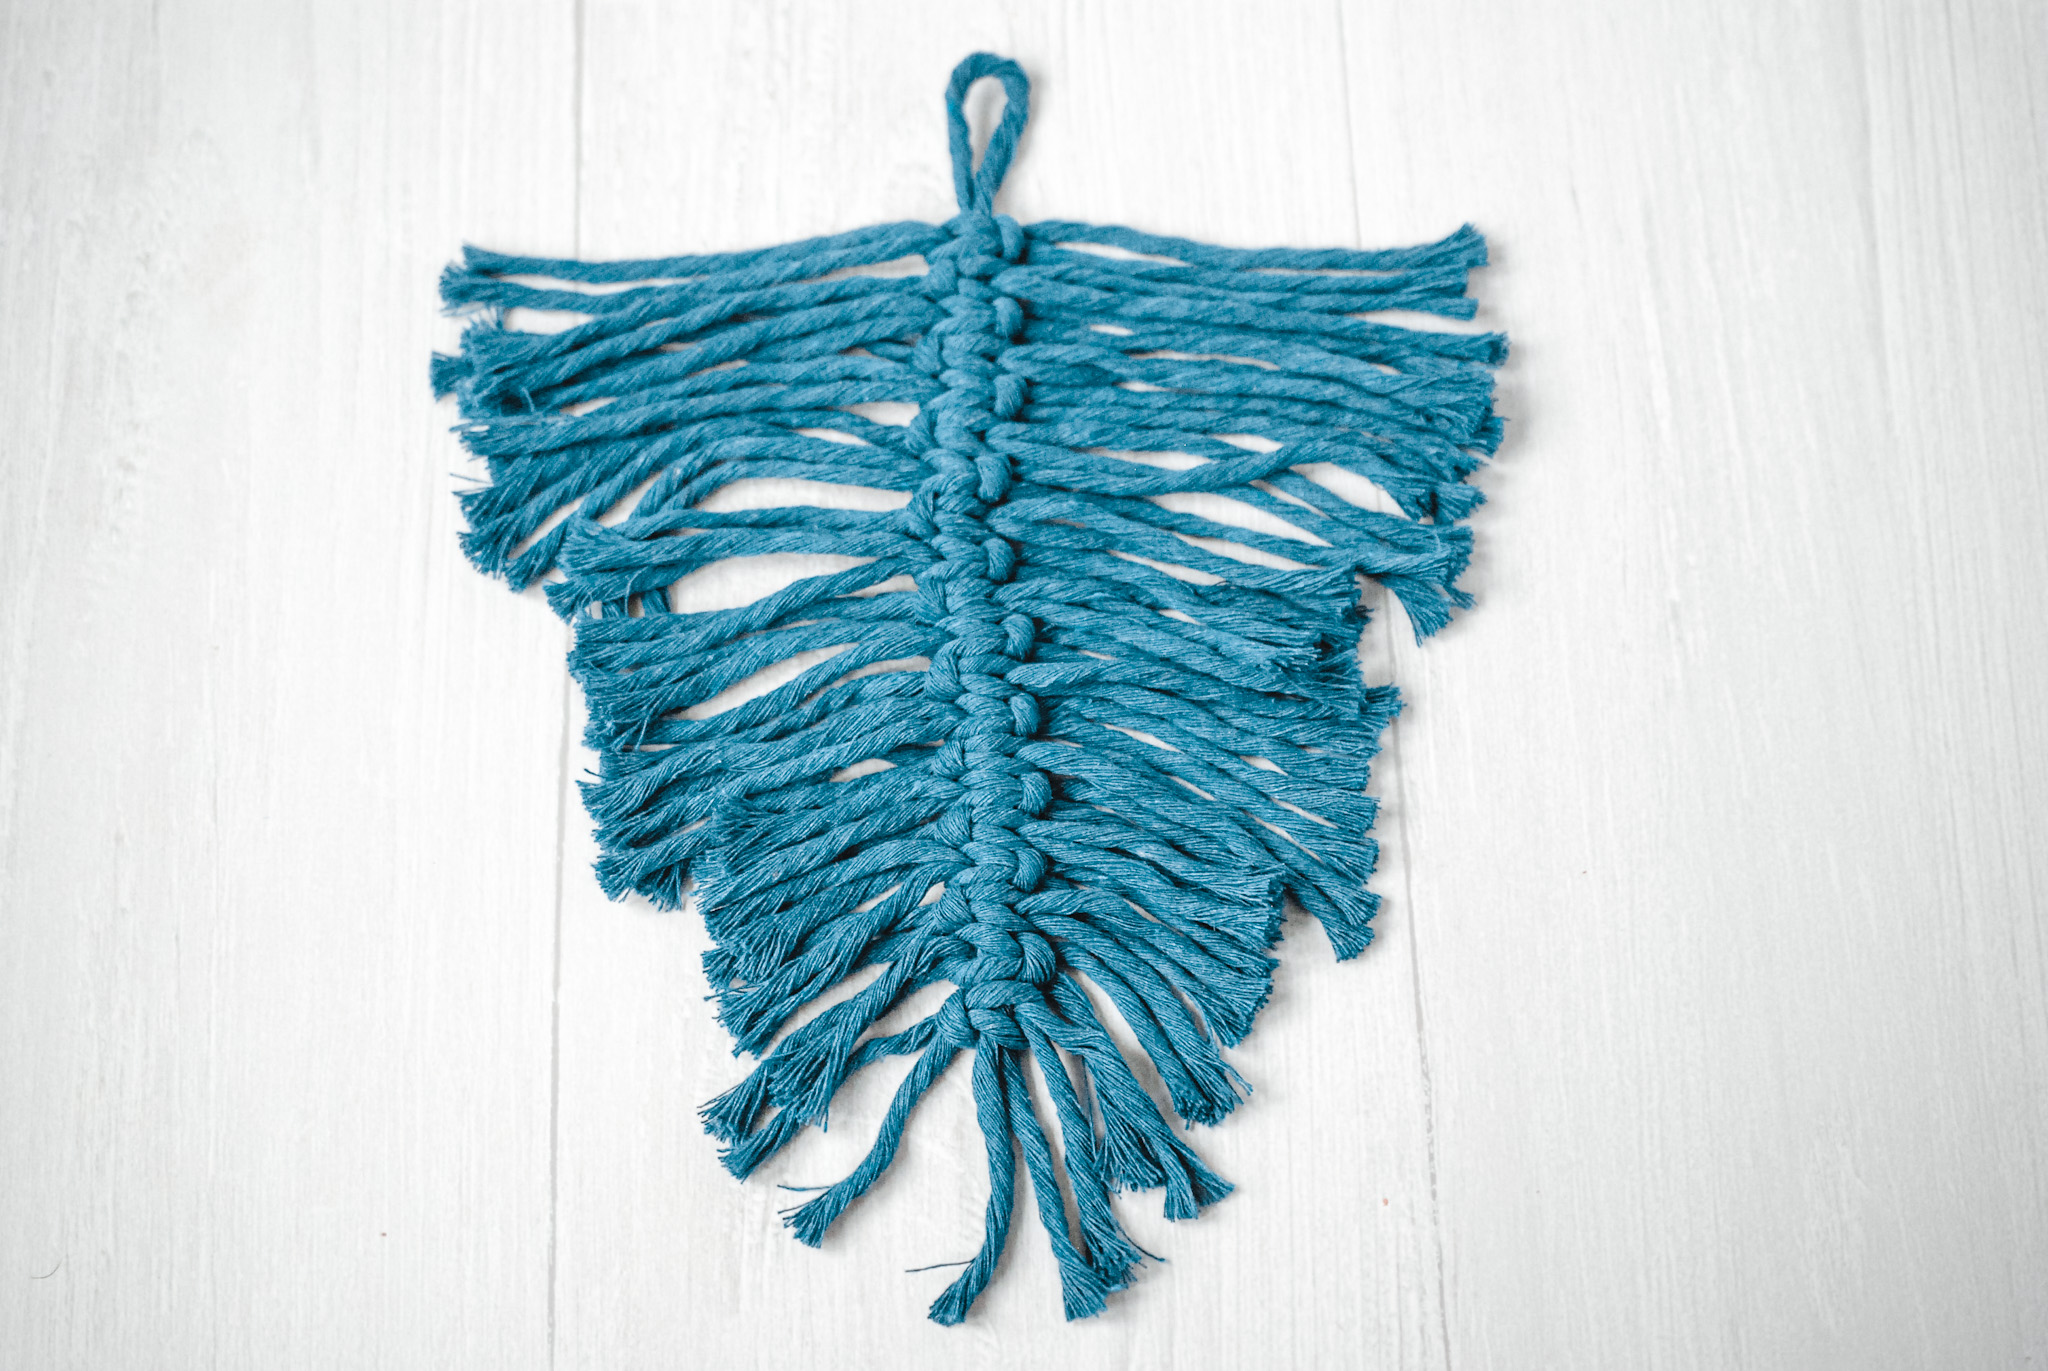
Then move on to your next shorter pieces and tie them on the same way, gradually working your way down in size. (If you are making a straight feather, just continue on until your feather reaches the desired length.)
Now, this is something I didn’t do with this first blue feather, but I have done with all of my subsequent feathers. I learned this tip from Nigora of ARTSY North East. (Here is an amazing macrame feather video tutorial from her YouTube channel.)
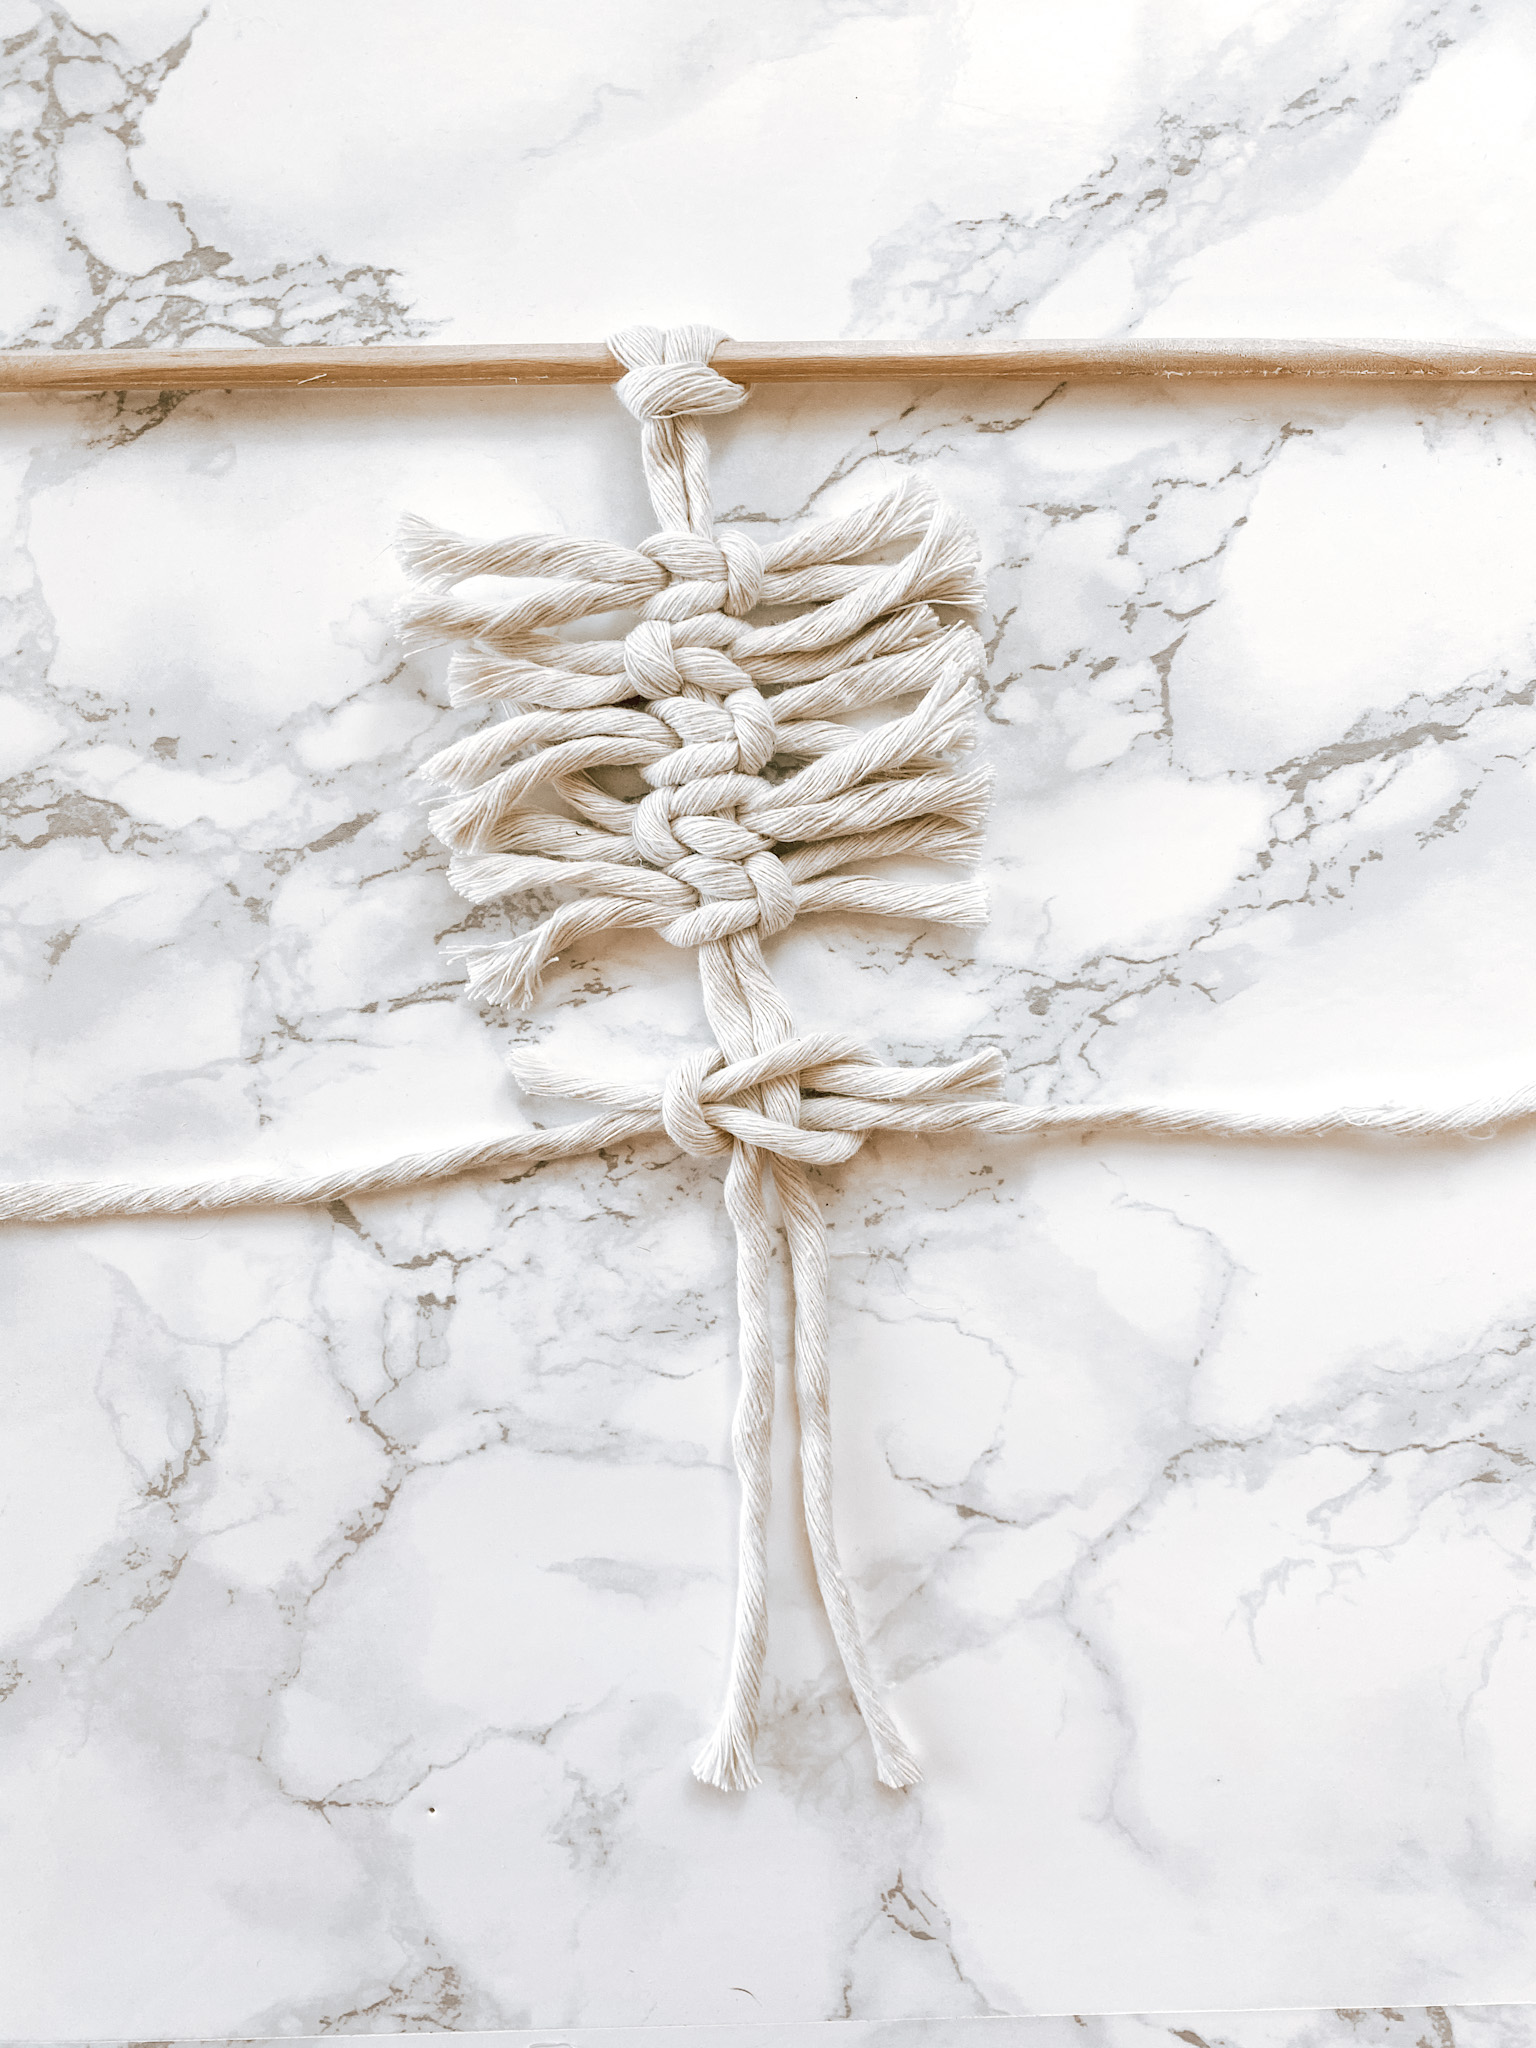
After you have all of your edge pieces tied on, take your final two 12″ end pieces and fold them so that one end is longer than the other. Tie them on just as you did all of your previous pieces, making sure that the longer end is on the bottom.

Pull the longer ends down so you now have four long cords hanging down.
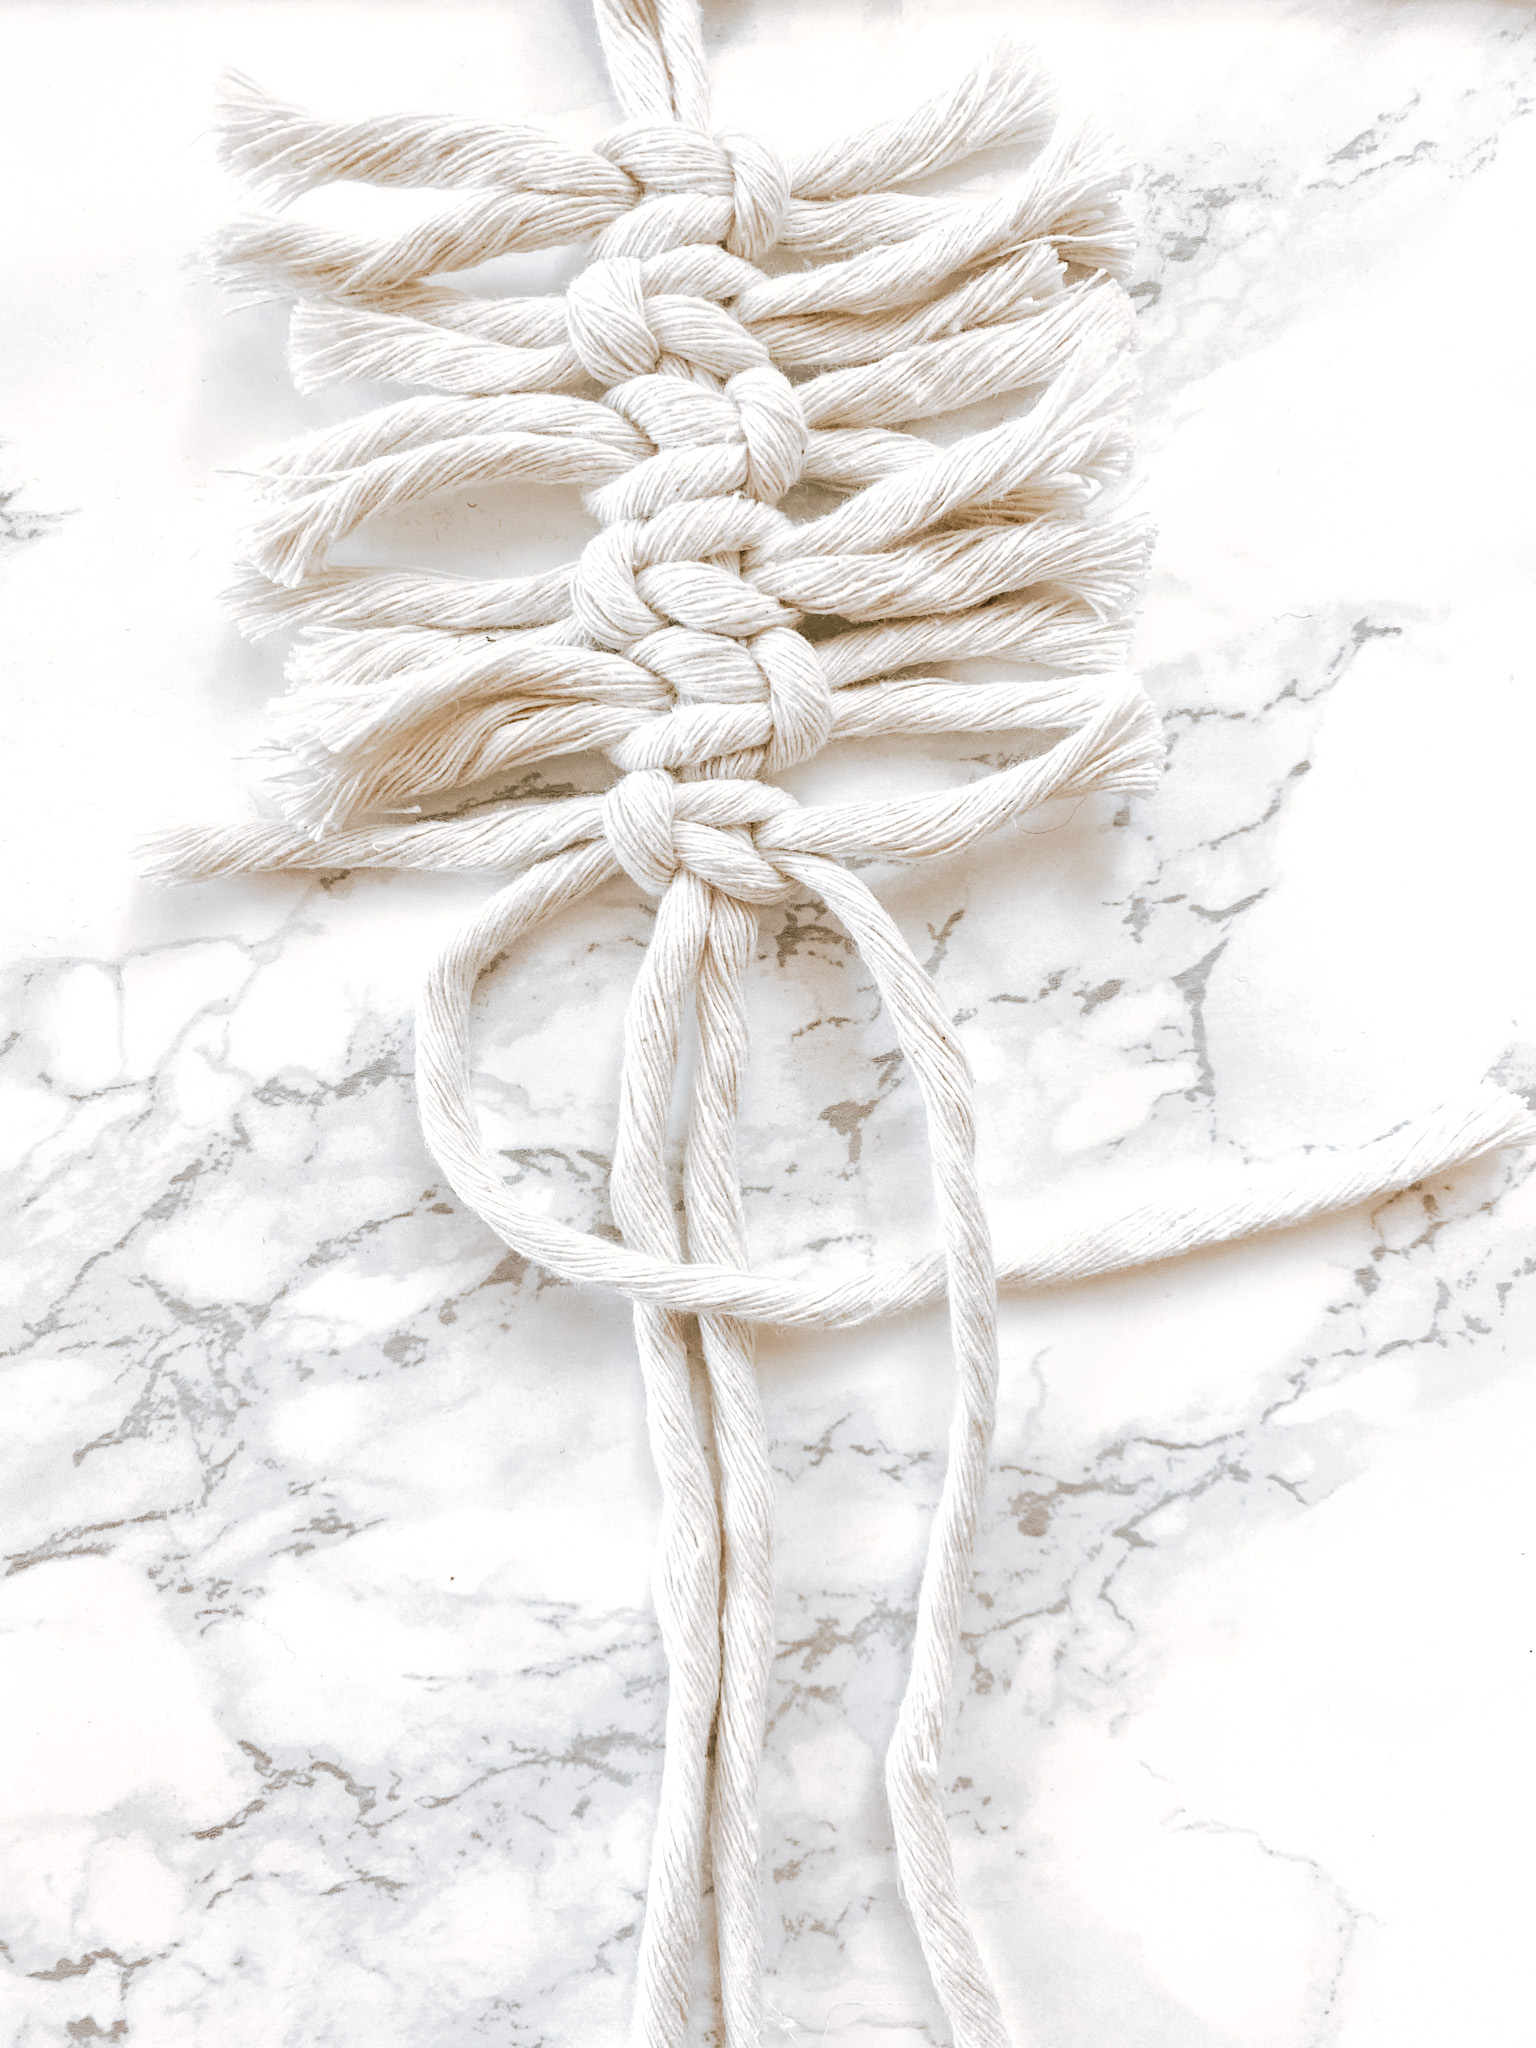
You are now going to tie a square knot. This will make sure that none of your edge pieces can slide off the bottom of the feather and will make brushing out the edges much easier.
Begin by bringing the left cord over the two middle cords. Place the right cord over the left cord.
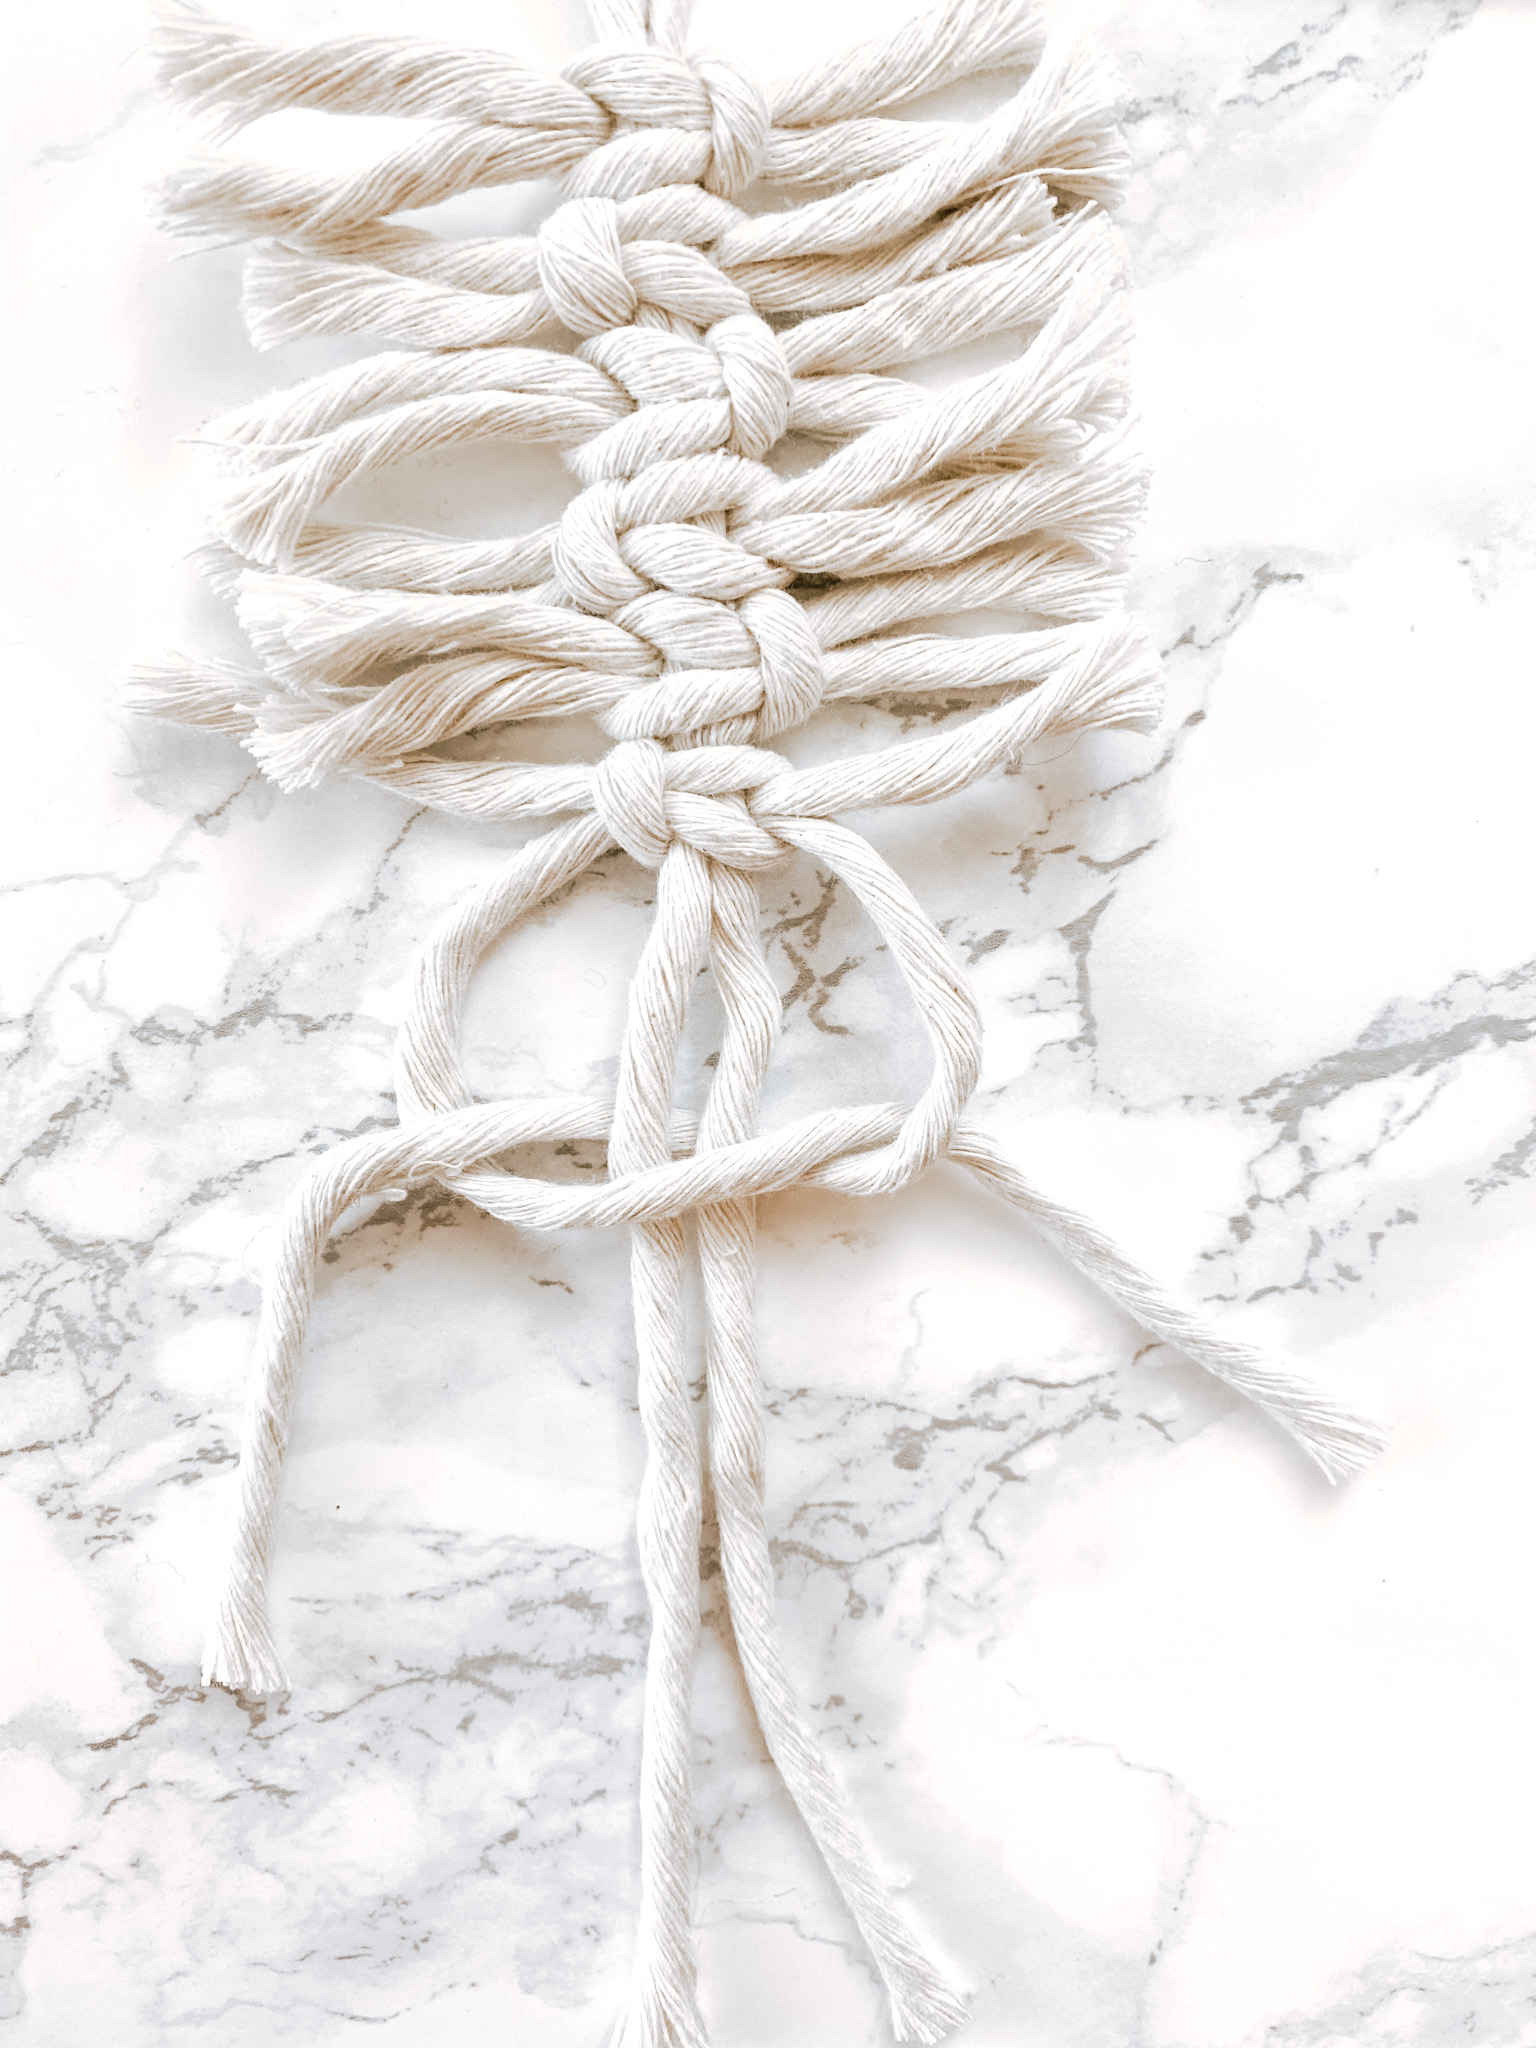
Now slide the right cord back behind the two middle cords and pull it through the loop made by the left cord. Pull it tight.
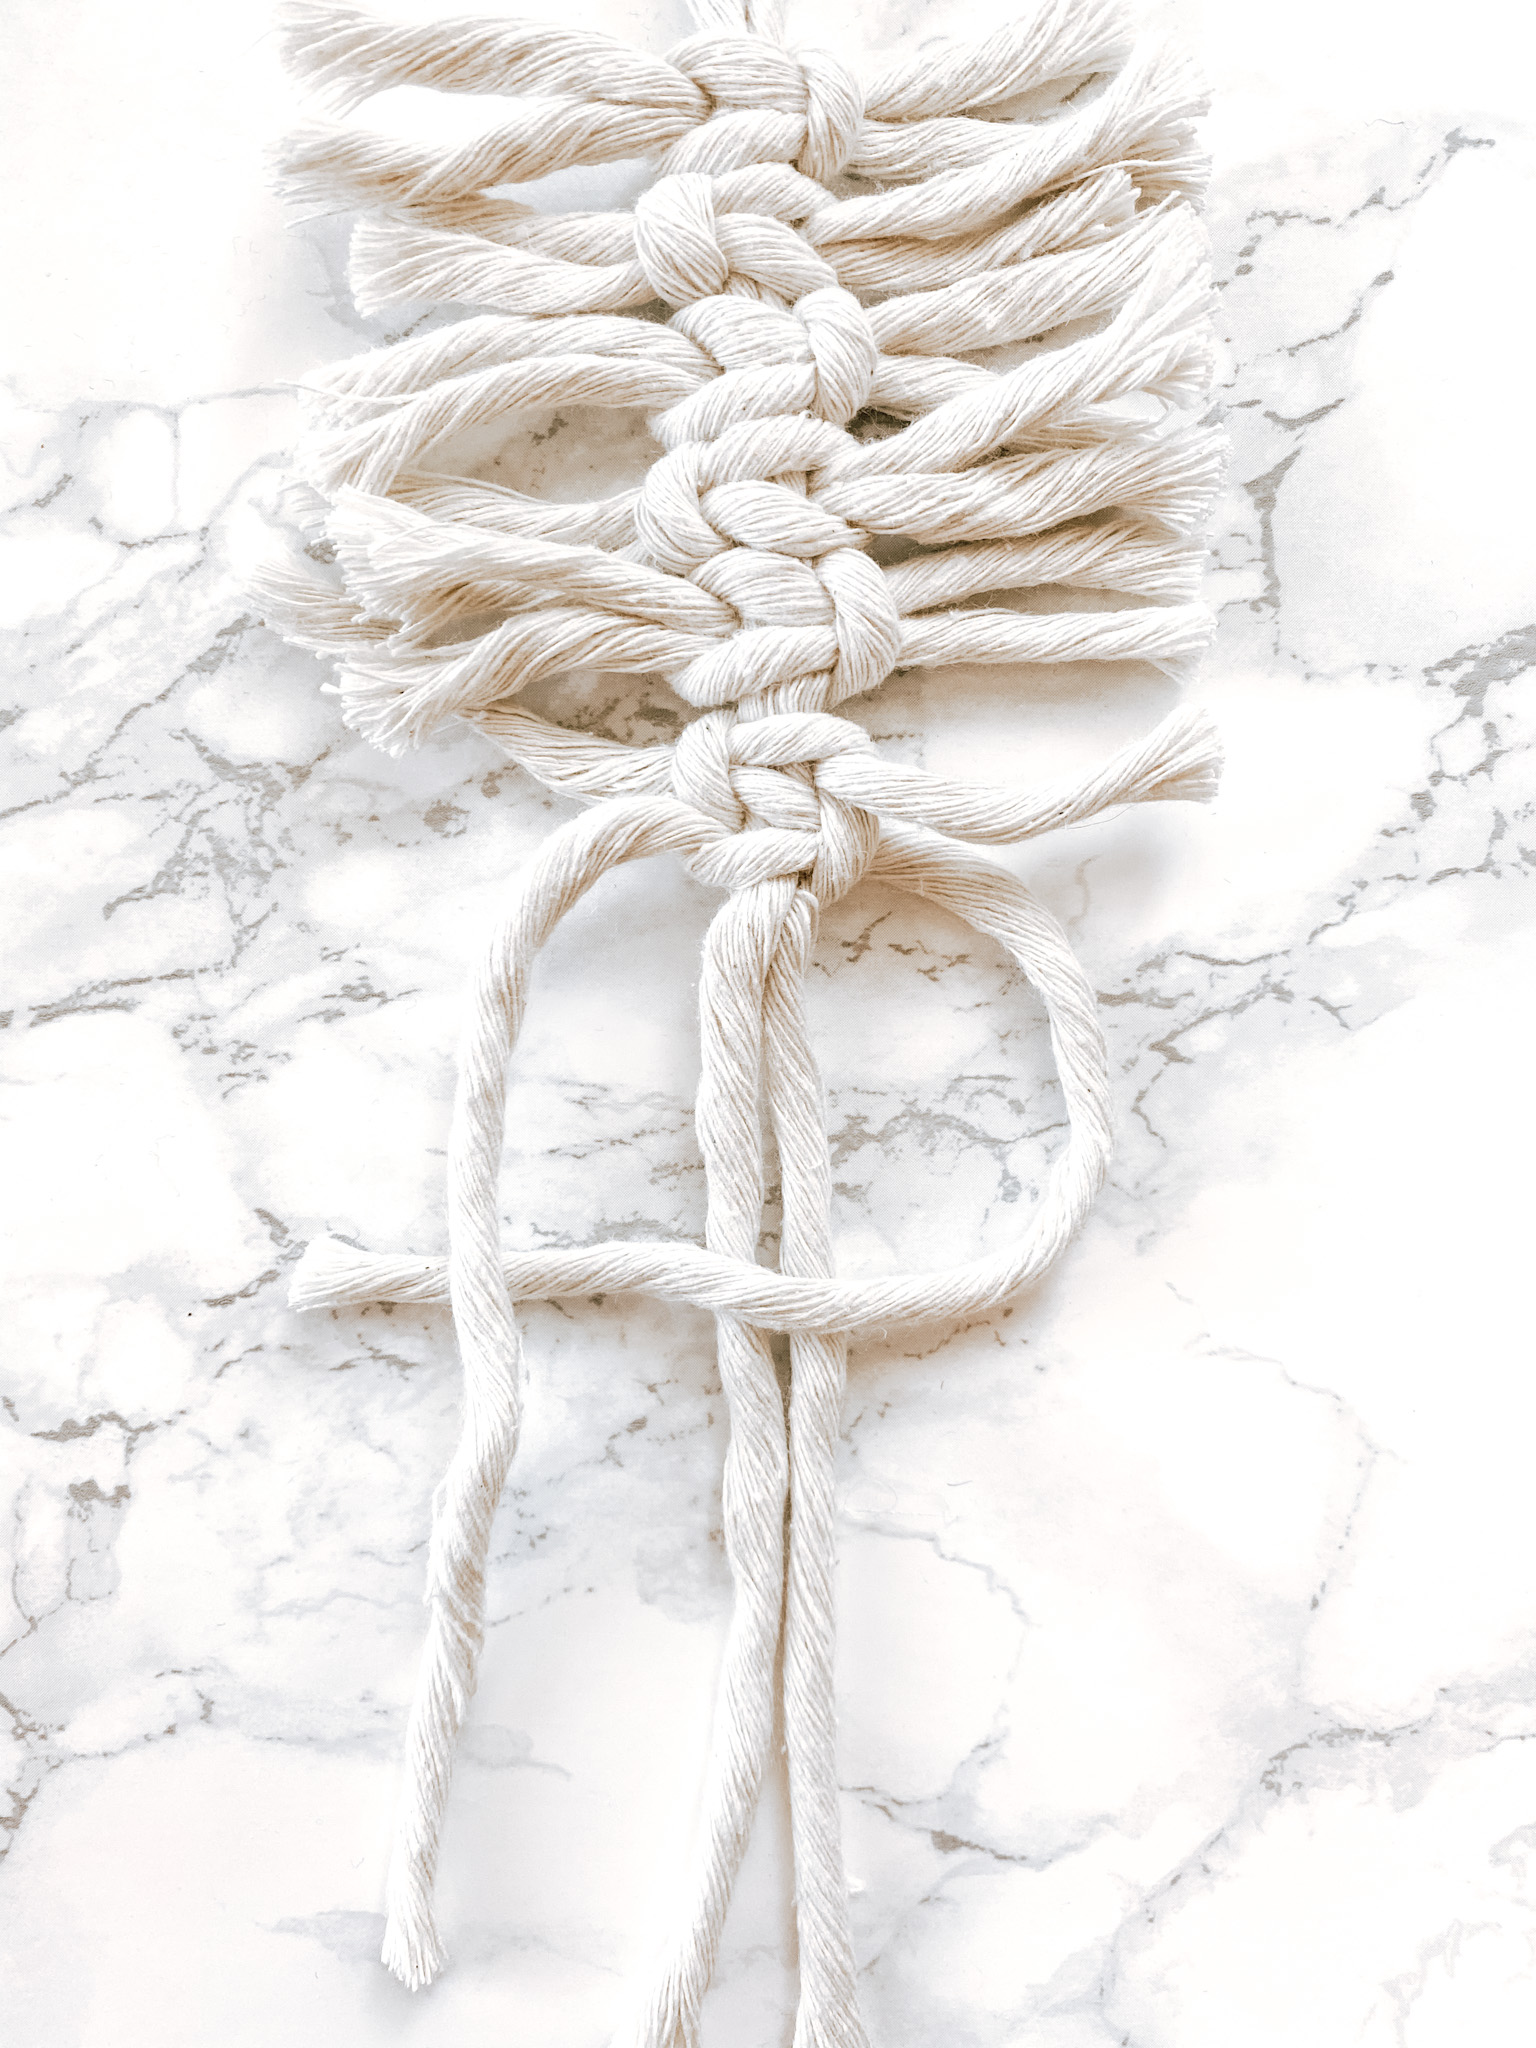
Now do the same thing on the other side. Bring the right cord over the middle cords, and place the left cord over the right one.
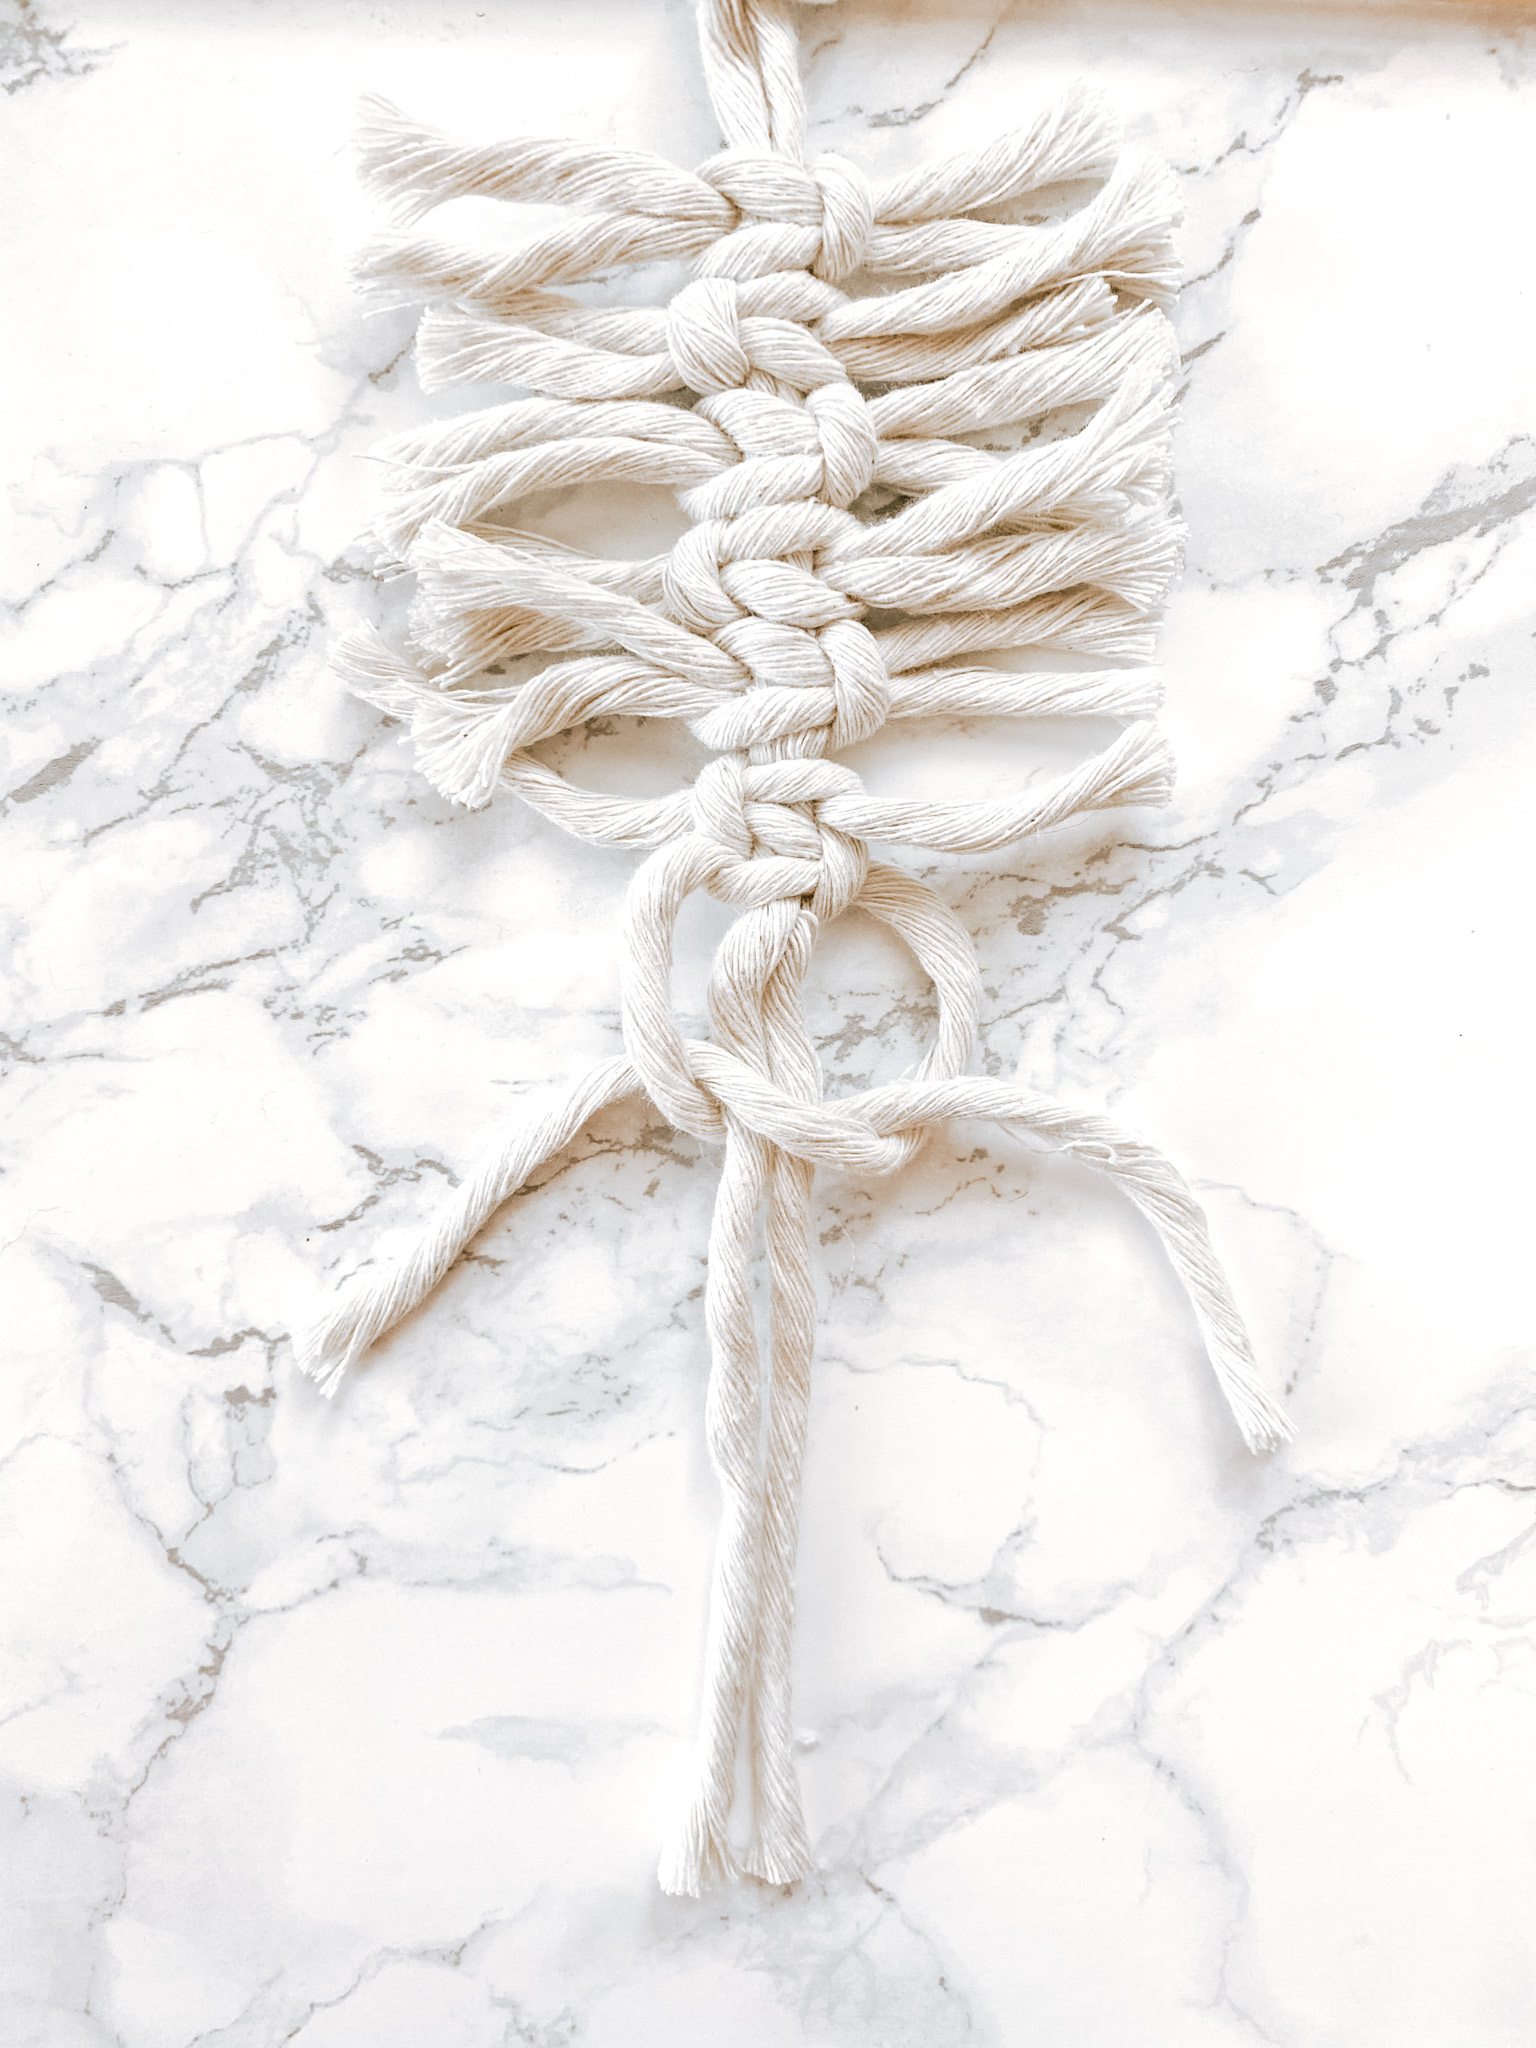
Now slide the left cord back behind the two middle cords and pull it through the loop made by the right cord. Pull it tight and trim off any excess.
Step 3: Brush out the Edges
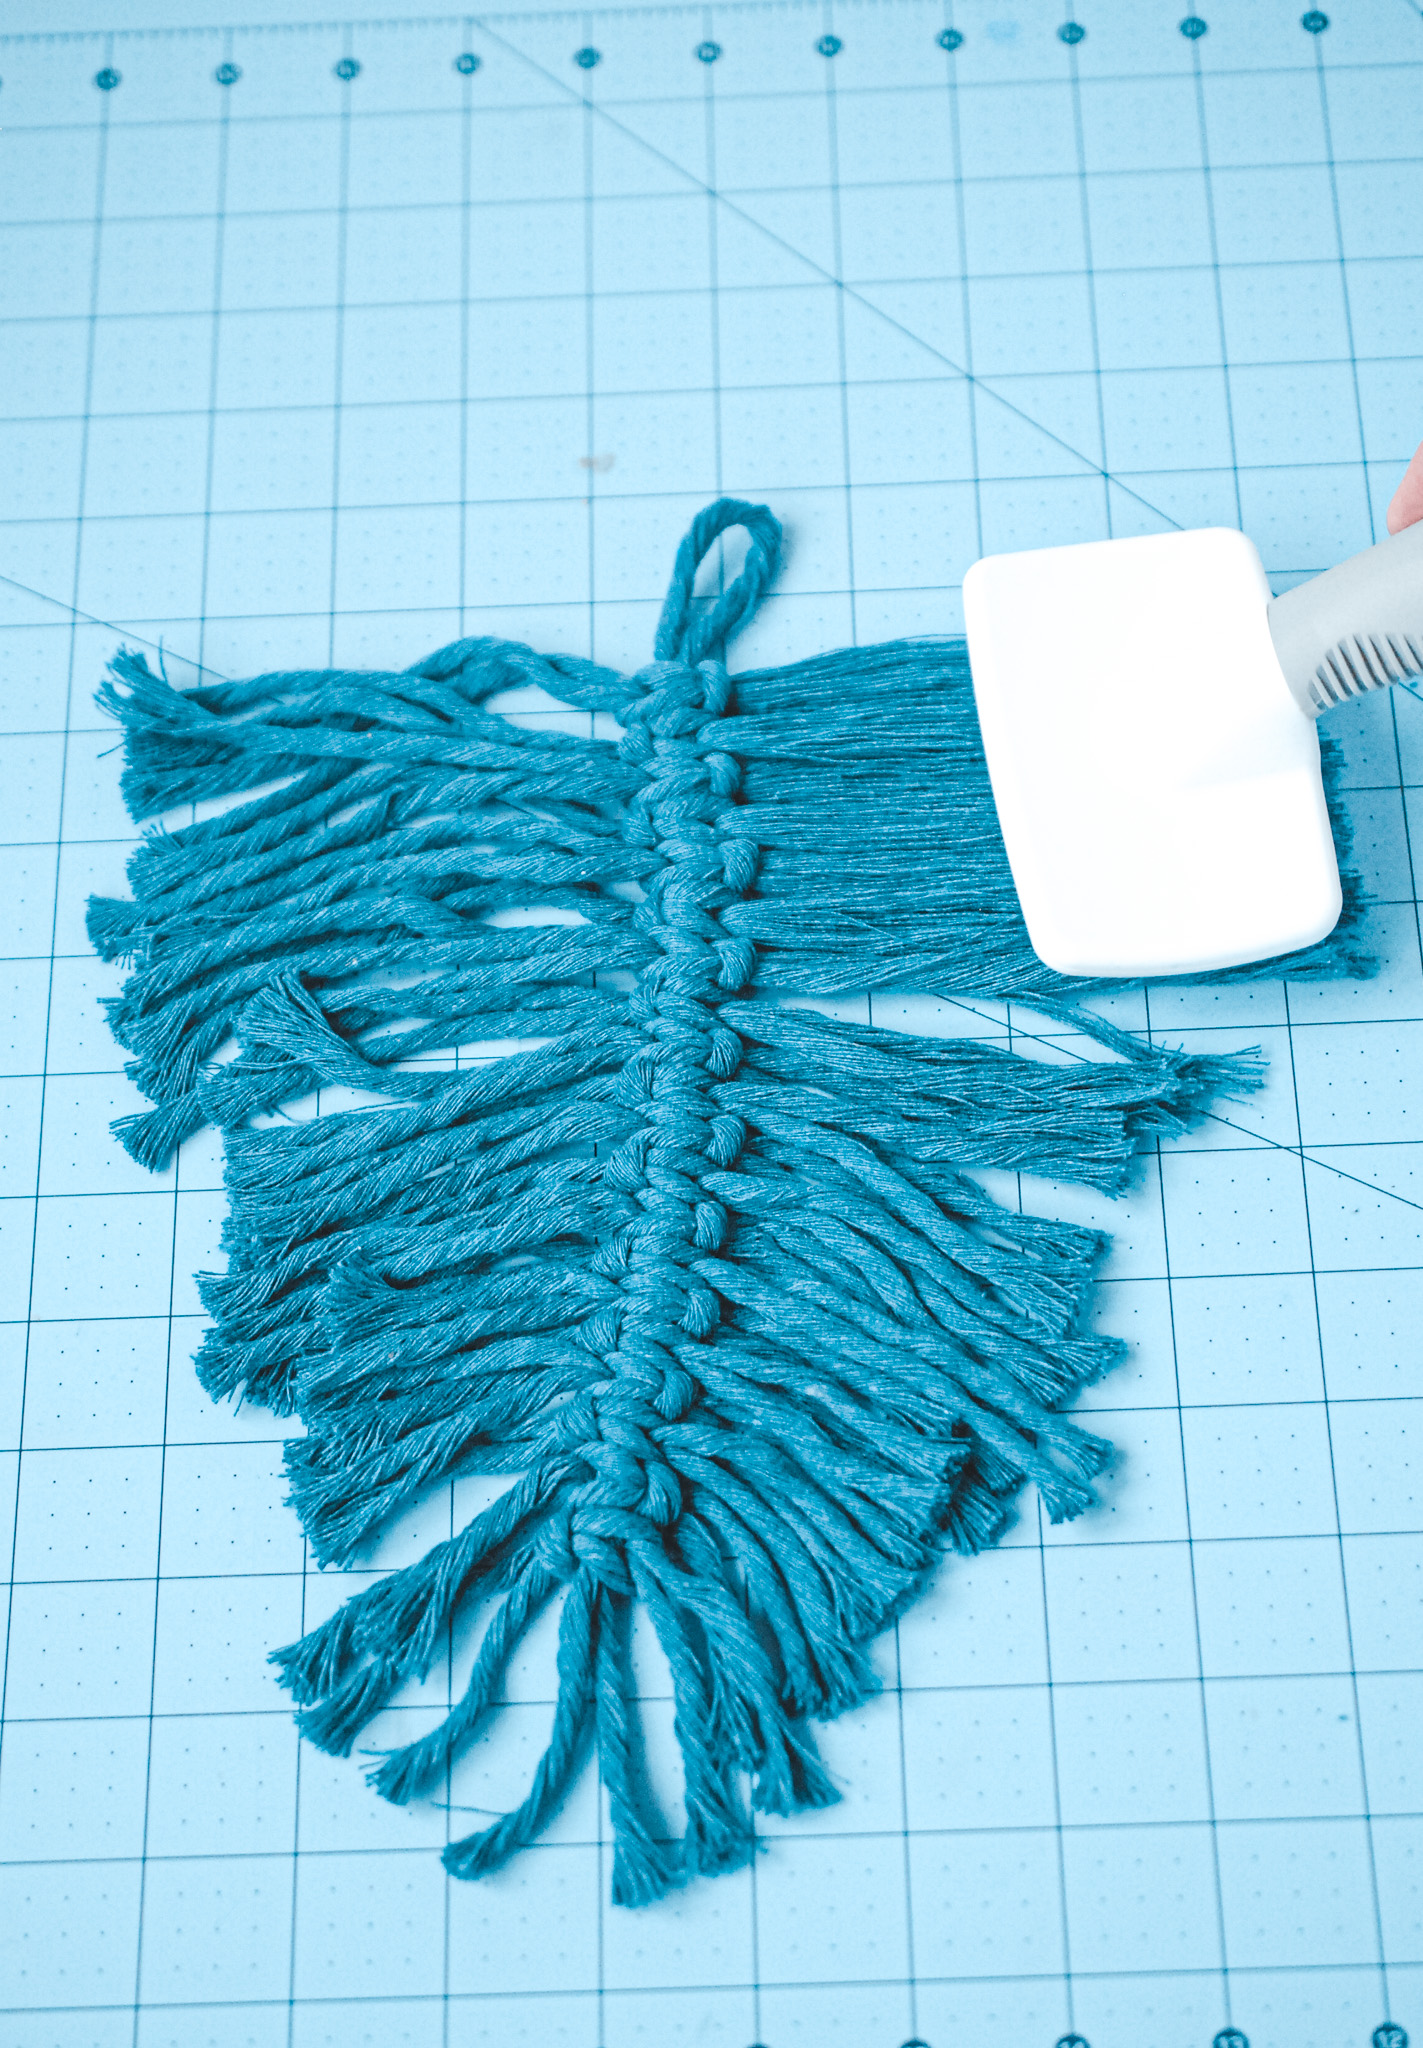
Now it’s time to brush out the edges. If you are using a slicker brush like I did, be sure to place your feather on a self-healing cutting mat or something similar, because the wires are sharp and will scratch up your work surface.
Just start at the center piece and run your brush through the edge pieces to unravel the strands. It will take several passes of the brush to full unravel the strands.
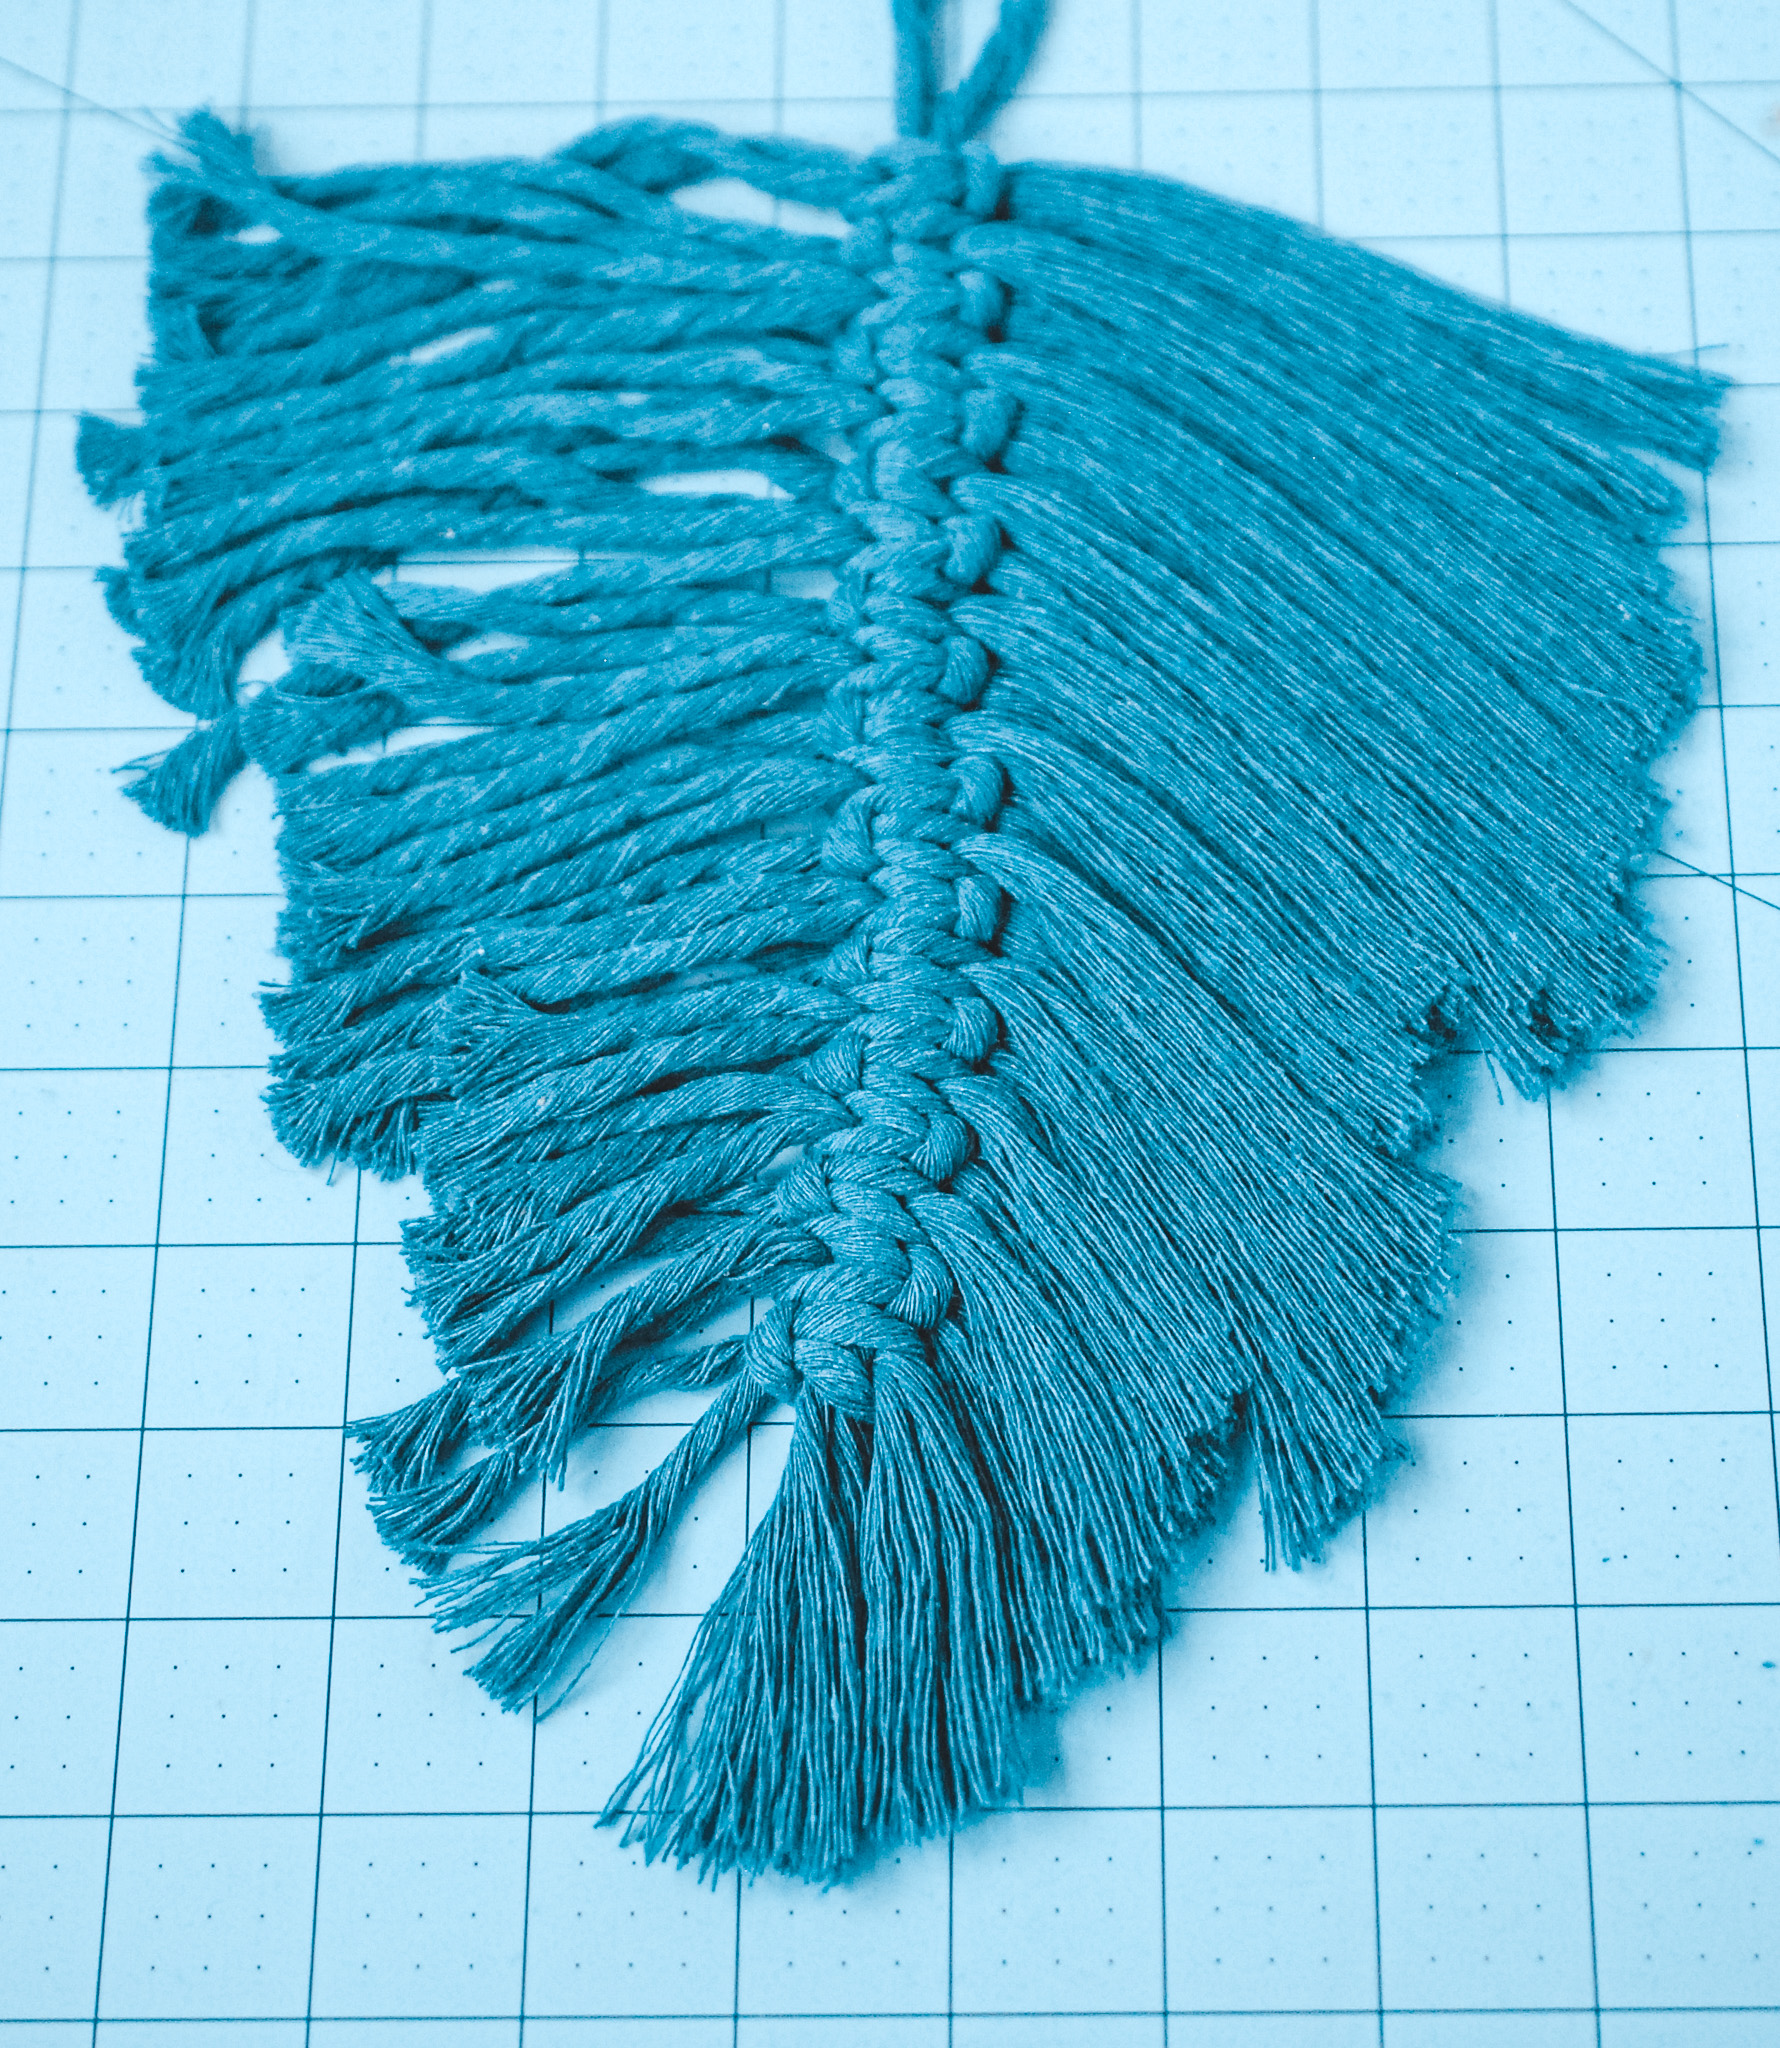
Work your way around the feather, brushing out all of the edge pieces.
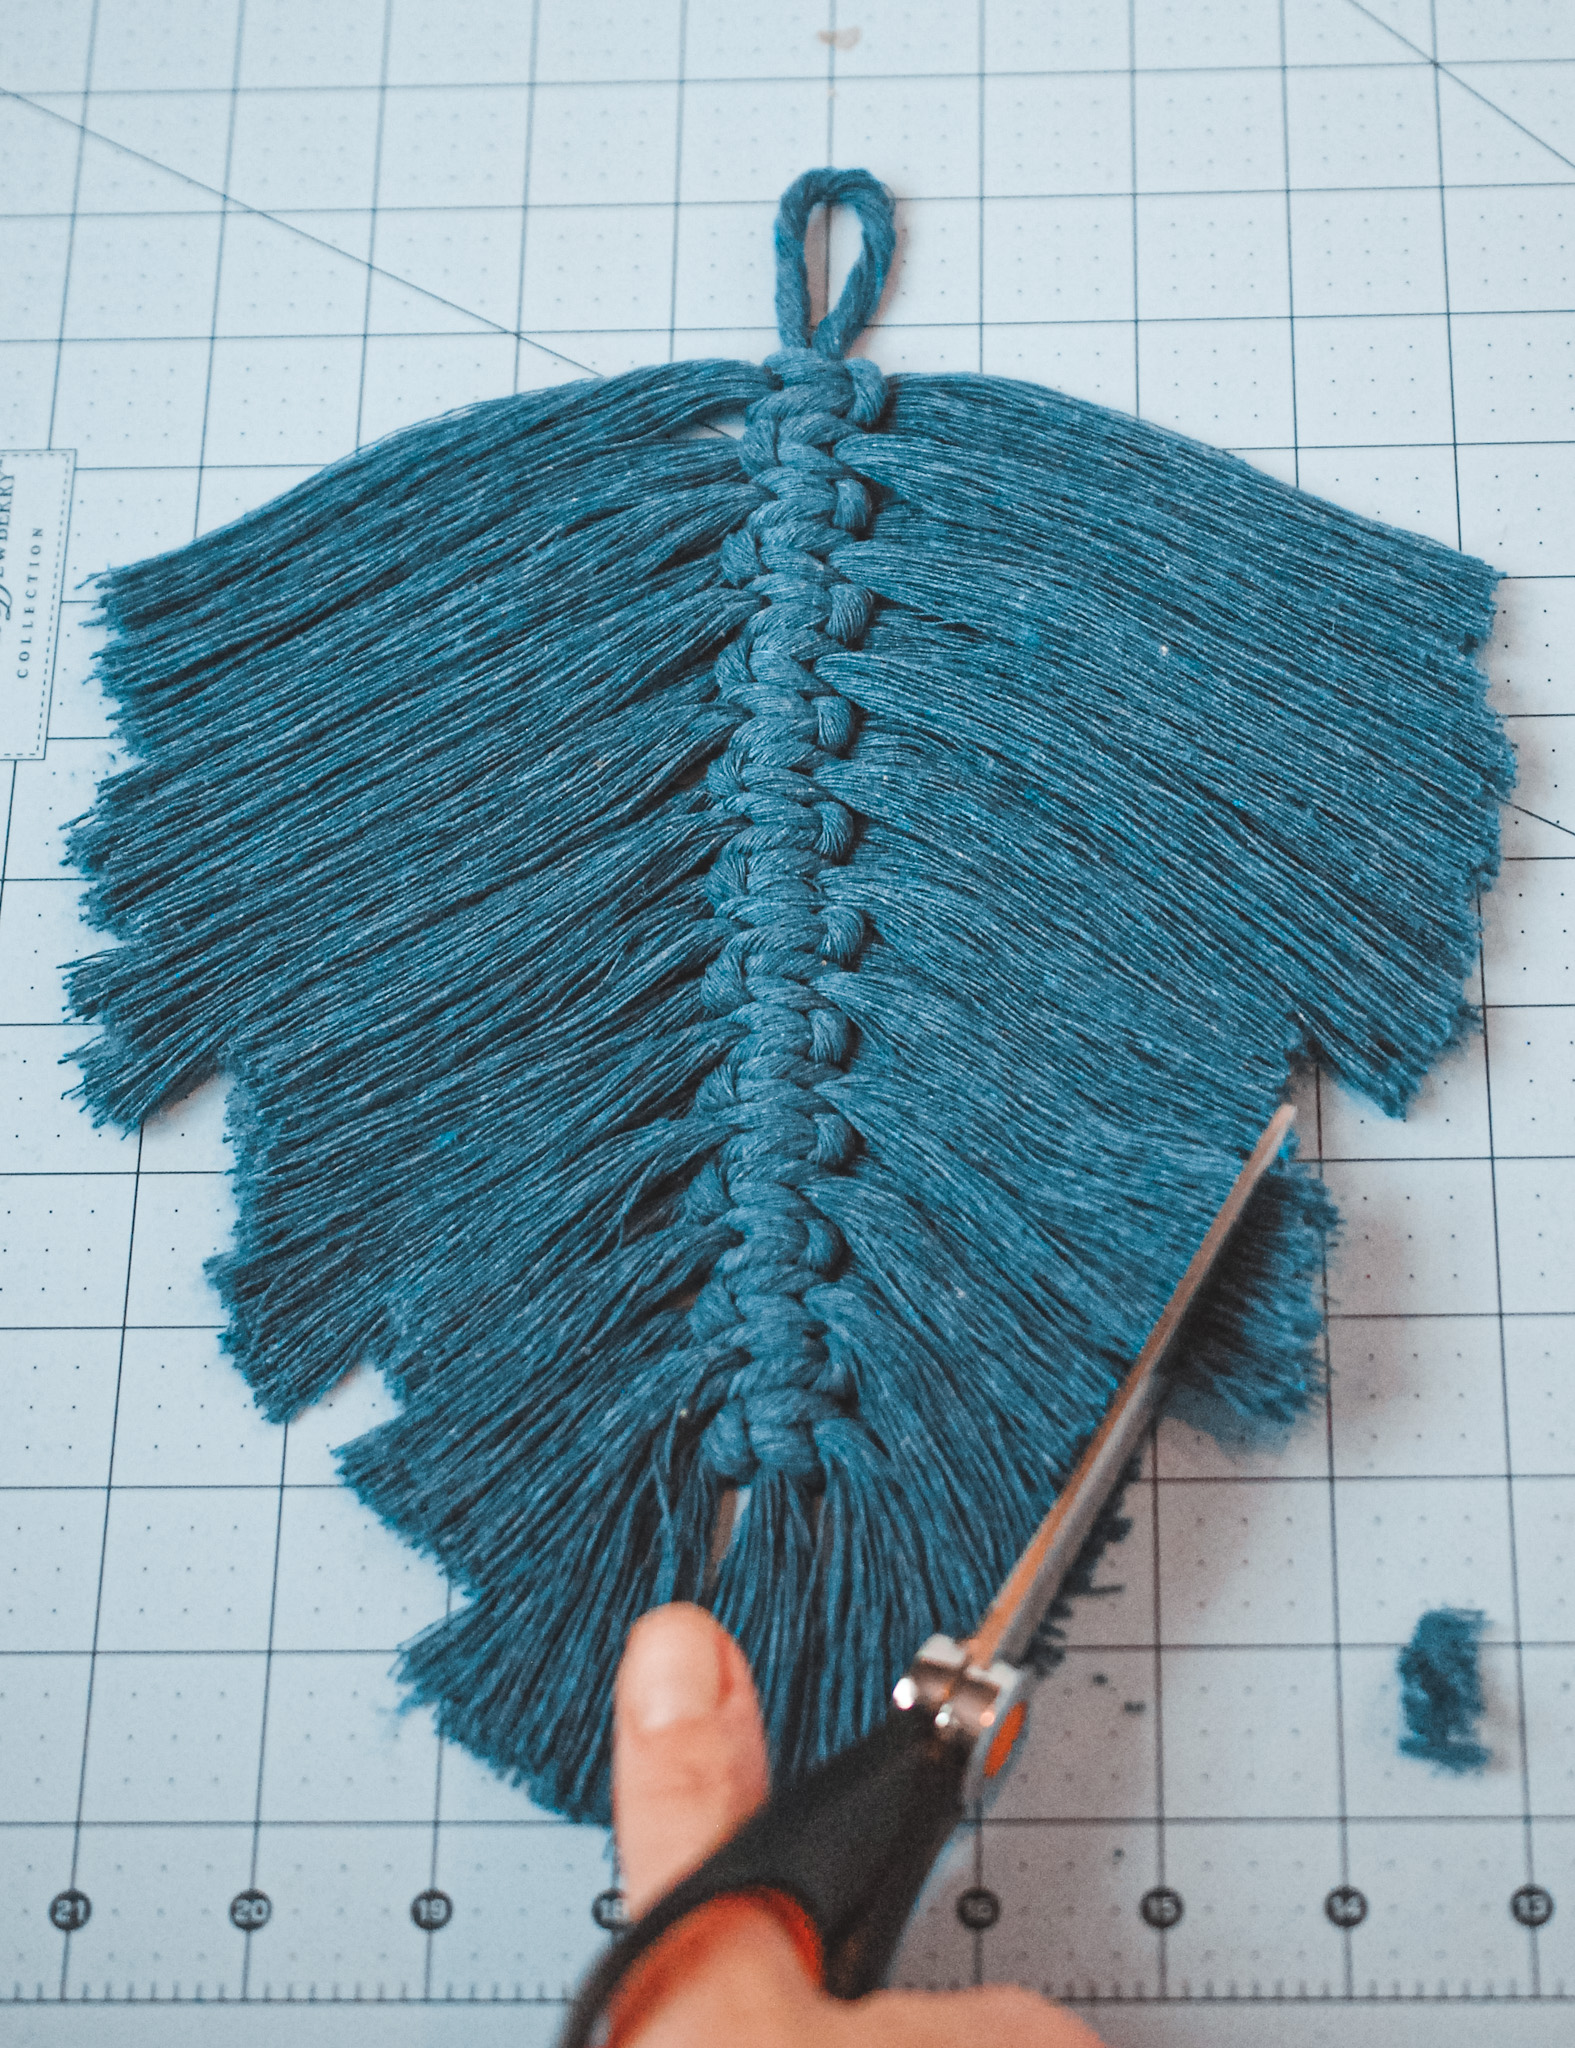
Once it’s all brushed out, it’s time to trim. If you are making a tapered feather, your edges are going to be all wonky from the different sized cords. Just take your scissors and cut off all the rough edges, shaping it into whatever shape you like.
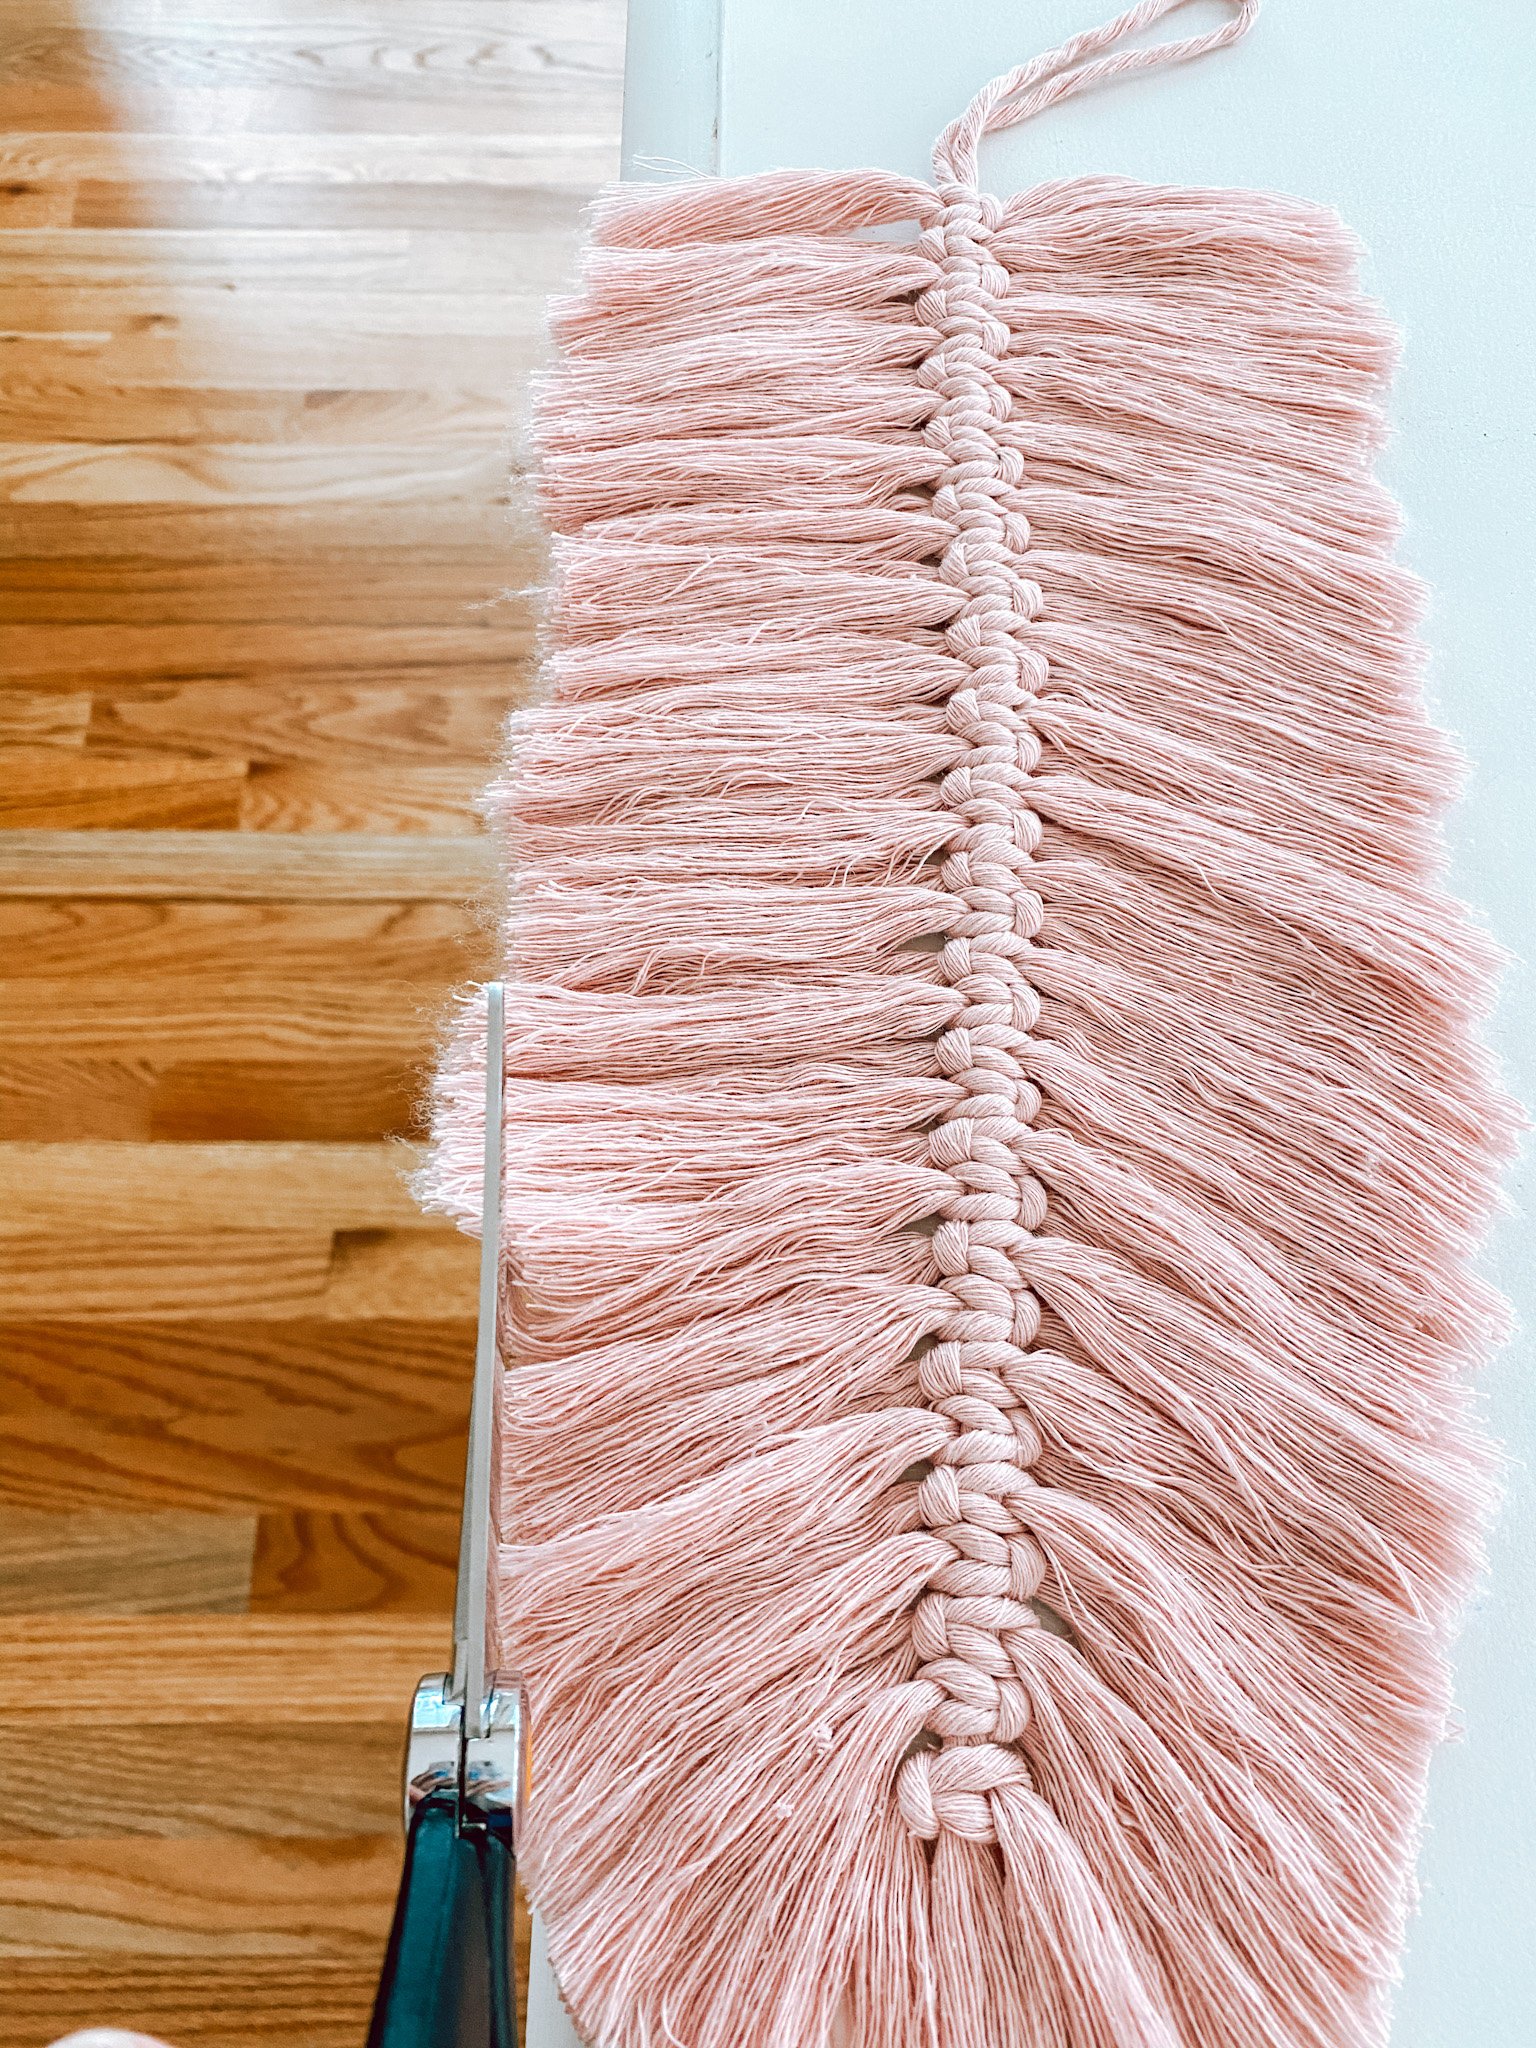
I have learned that the easiest way to trim feathers is by placing them right at the very edge of a table. This allows you to get your scissors underneath the sides and helps give you a guide.
Step 4: Stiffen the Feather (optional)
If you choose to stiffen your feather, now is the time to do it. Lay your completed feather on a covered surface and lightly spray it with the stiffener (according to the directions on the bottle). Let dry completely, flip the feather over, and repeat on the other side. Let dry again.
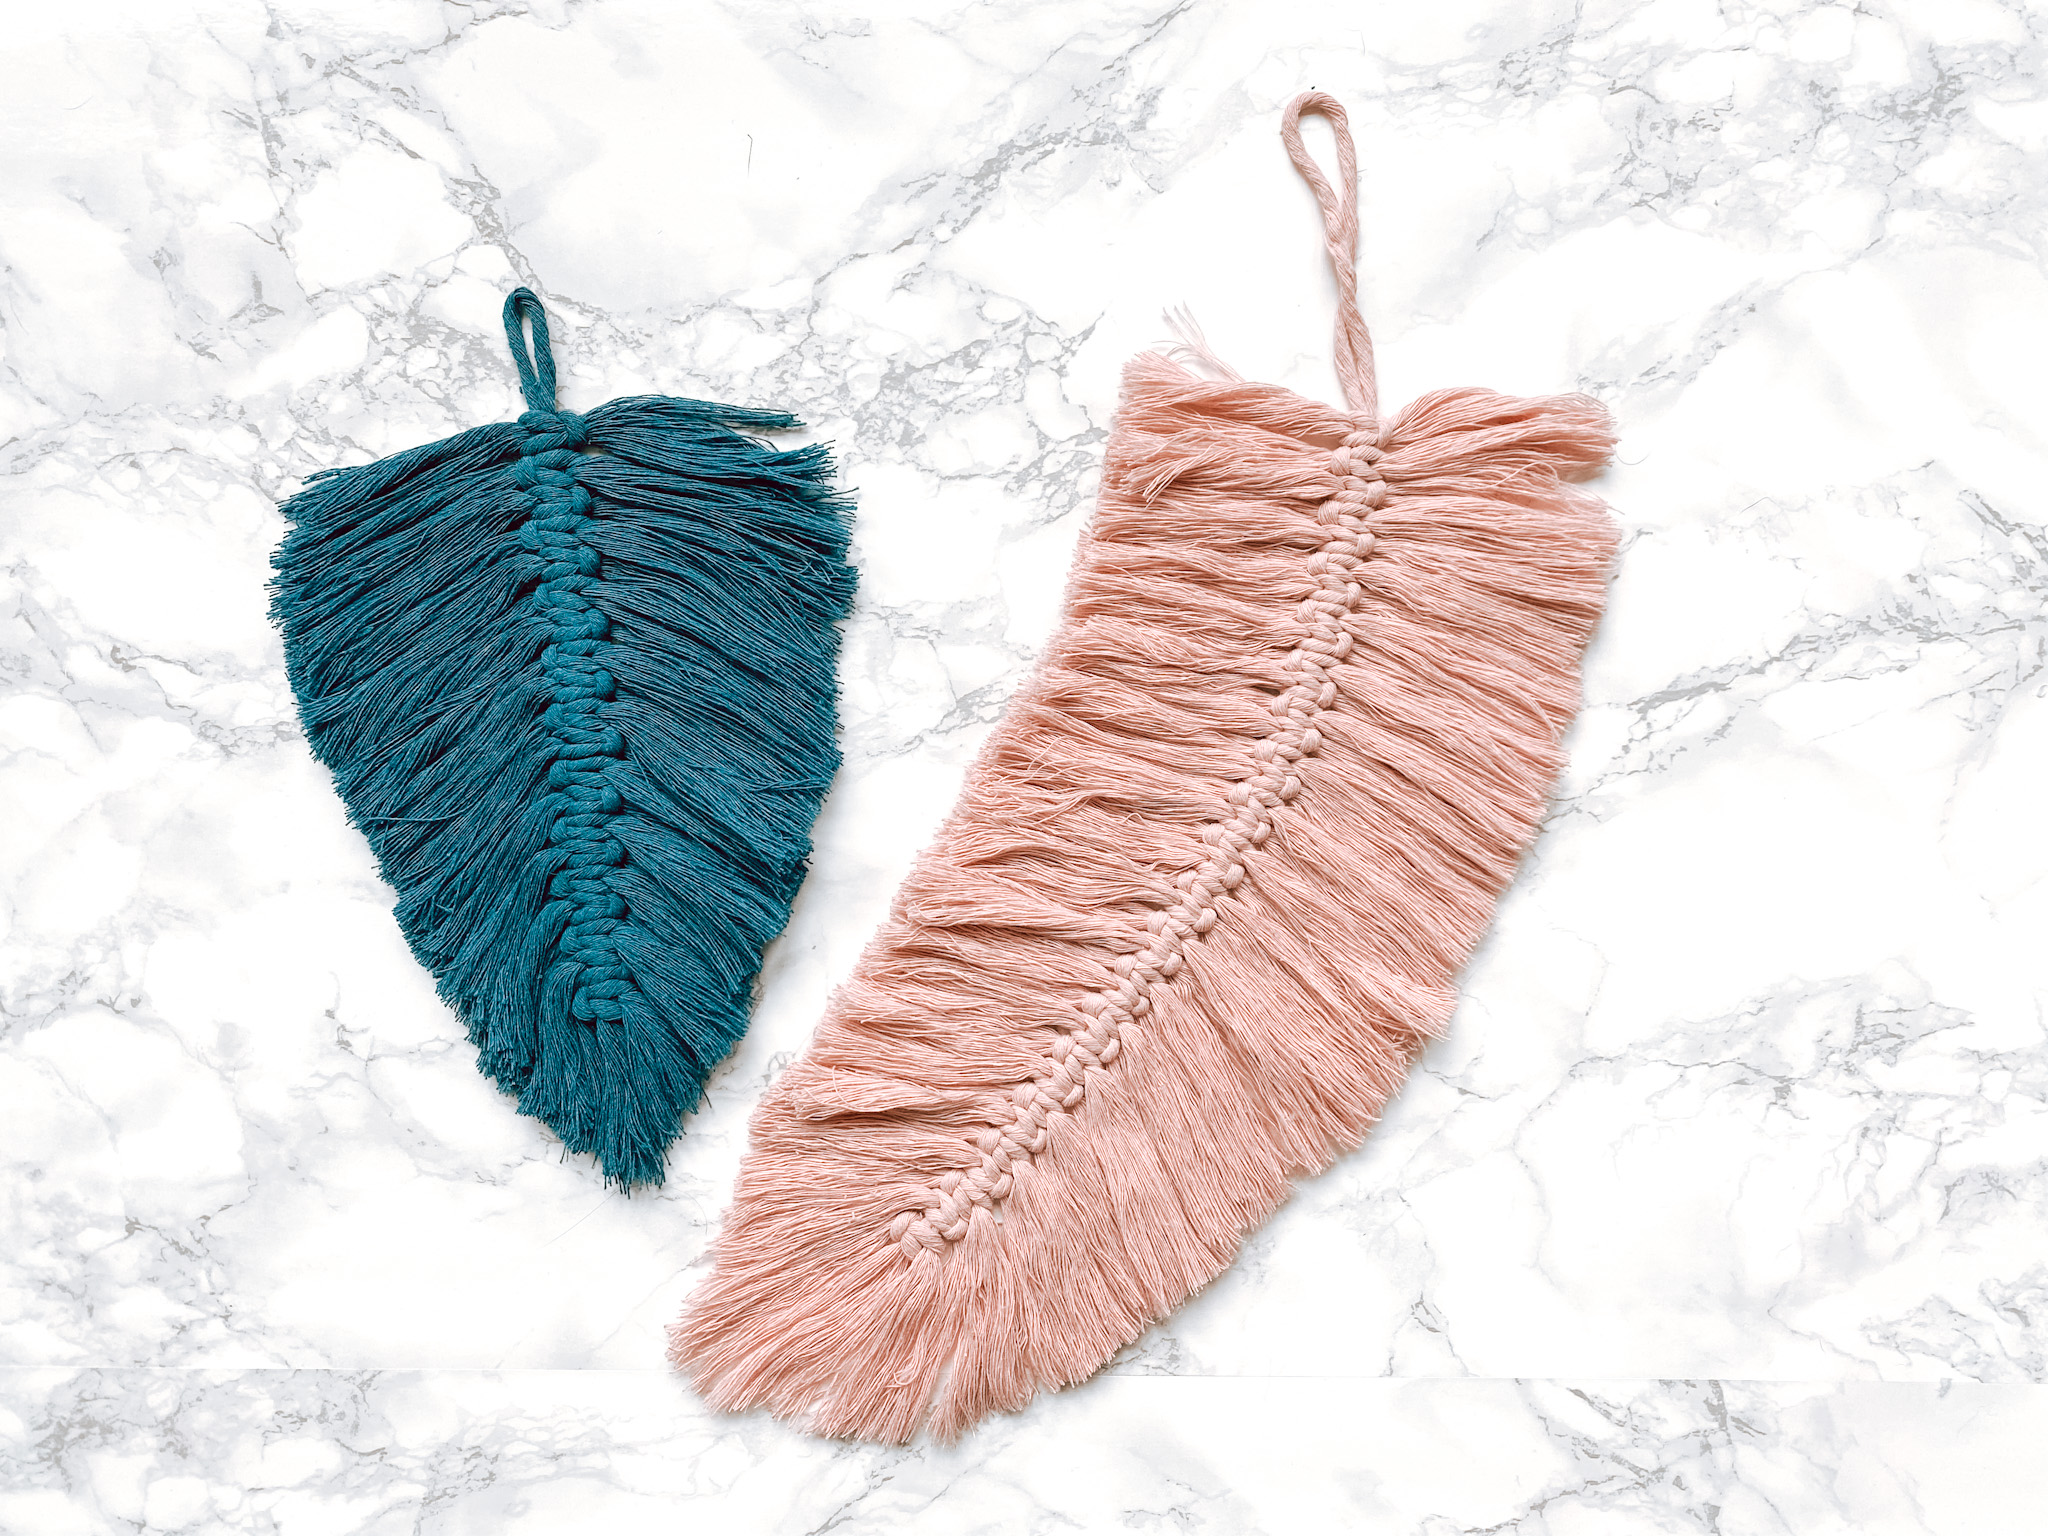
You just made yourself a macrame feather! There are so many things you can do with these feathers: Make tiny ones into earrings, place a number of them on a stick or a dowel to make a wall hanging, make a mobile, or just hang them up individually on your wall.
This post was all about how to make macrame feathers.
Disclosure of Material Connection: Some of the links in the post above may be affiliate links. Among others, we are a participant in the Amazon Services LLC Associates Program, an affiliate advertising program designed to provide a means for us to earn fees by linking to Amazon.com and affiliated sites. As an Amazon Associate I earn from qualifying purchases. This means if you click on the link and purchase the item, I will receive an affiliate commission. Regardless, I only recommend products or services I use personally and believe will add value to my readers. I am disclosing this in accordance with the Federal Trade Commission’s 16 CFR, Part 255: “Guides Concerning the Use of Endorsements and Testimonials in Advertising.”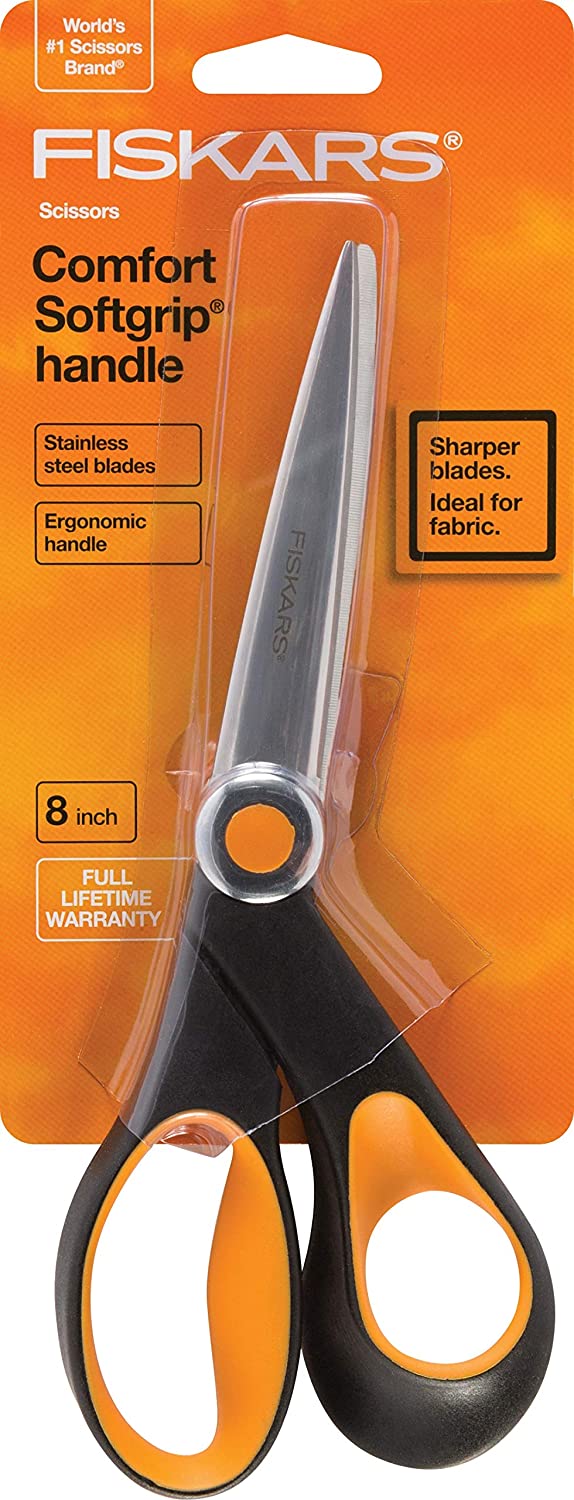


GREAT POST!
THANK YOU FOR SHARING…..