Remember when I was all excited about my new sewing machine? Well, I finally busted it out, and now I’m sewing like a maniac. It is SO much nicer than my old one, it’s kind of ridiculous.
Mason is suddenly and somewhat inexplicably obsessed with Mickey Mouse. Not sure where it came from, but Mickey Mouse Clubhouse has replaced Dinosaur Train and Thomas as his favorite show to watch, and he goes bananas if he sees anything with Mickey or any of his friends on it.
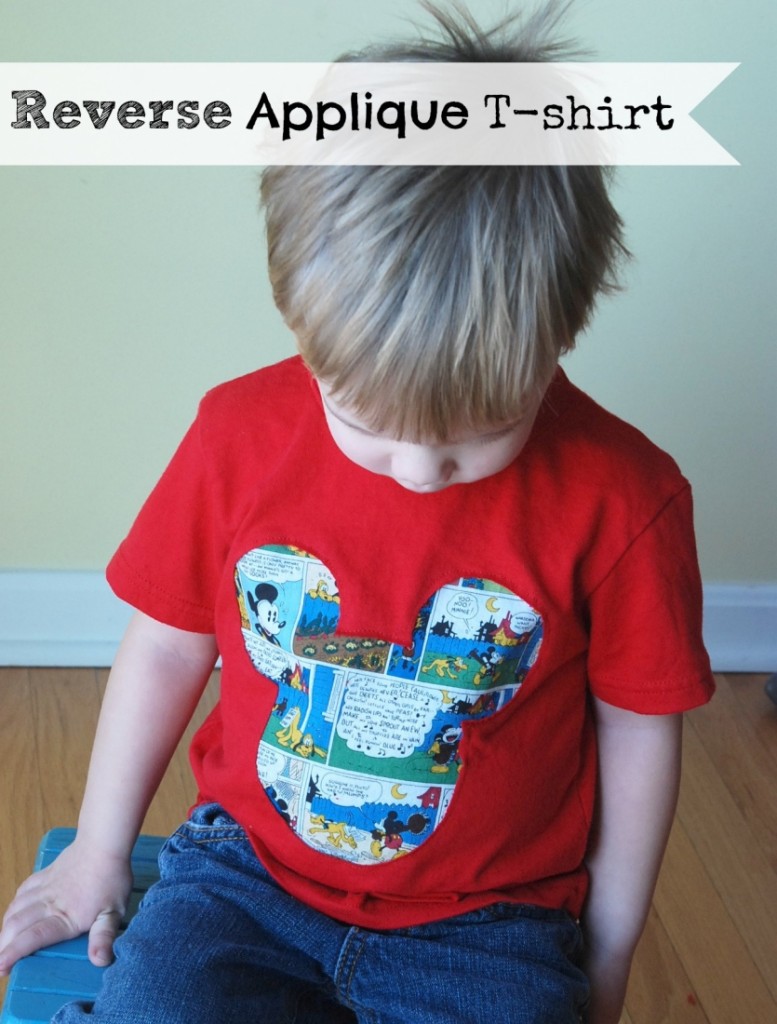
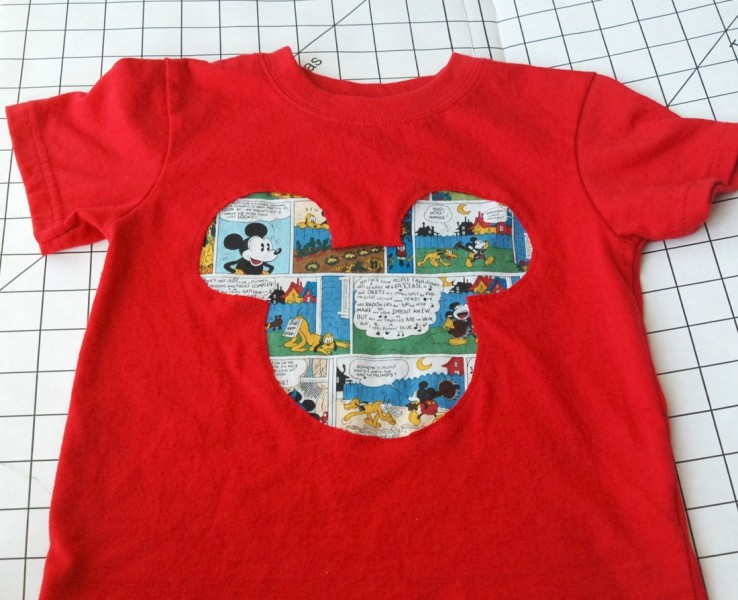
I saw this Mickey Mouse cartoon strip fabric at Joann Fabrics, and I knew I had to make him something. I decided to do a reverse applique t-shirt, which is one of the easiest sewing projects there is. Literally, if you can sew a sort-of-but-not-really straight line, you can make this.
Here’s what you need:
T-shirt – I got this one for about $3 at Walmart, but this is a great way to recycle an old t-shirt that might have some stains or holes on the front.
Fabric for the applique – I recommend cotton or flannel, just because it’s easiest to work with.
Thread in the same color as your t-shirt
Scissors
Pins
Pre-wash both your fabric and your shirt. I hate pre-washing stuff {because I have no patience}, but for this, you really need to. If one or the other of these items shrinks after you wash the completed project, it’s going to jack up your whole design. Iron the washed and dried fabric {and your shirt, if necessary}.
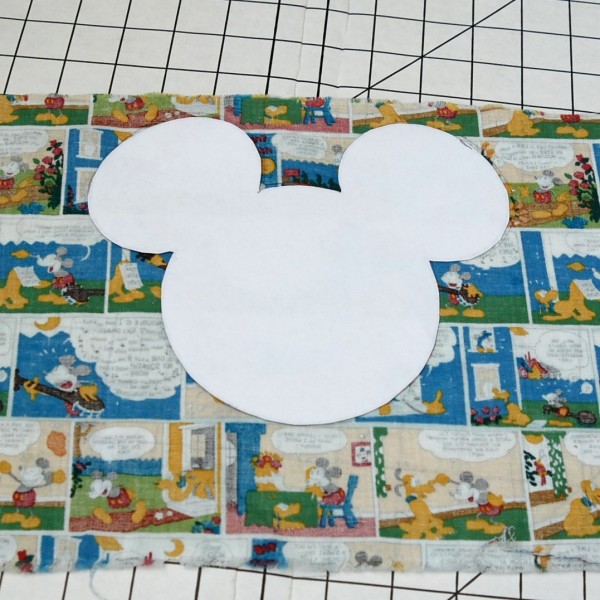
Decide what shape you want your applique to be. For this type of project, a somewhat simple design is better, especially if you’re a beginner when it comes to sewing. I chose a Mickey Mouse head, so I just found an outline on Google. Print and cut out your shape.
Trace around your shape on the back of your fabric with a pen or pencil. This will be your sewing line, so make sure it’s dark enough to be seen. If your fabric is dark, you can use a white transfer pencil {like this one or this one
}. My design was symmetrical, so it didn’t matter which way I put it, but if yours has to go a certain way {i.e., letters, numbers, etc.}, then you want to make sure you’re tracing a reversed image.
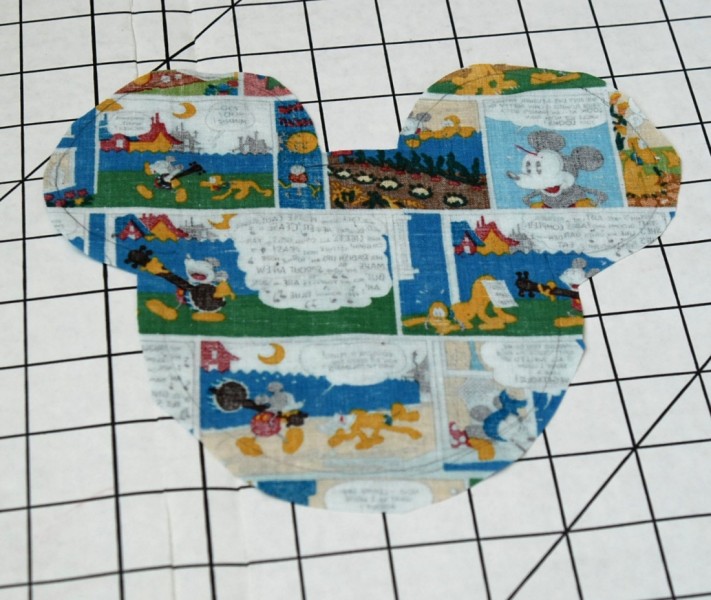
Cut around your fabric shape, leaving about 1/4″ outside your traced line.
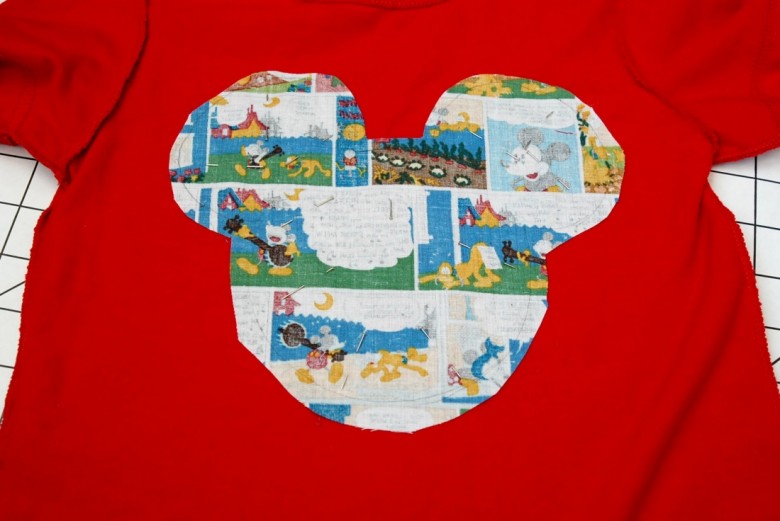
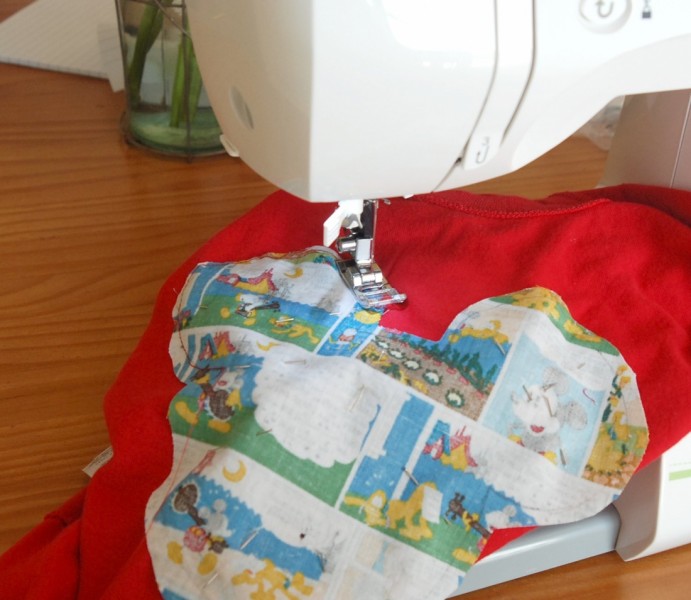
Turn your shirt inside out and place the fabric shape face down where you want it. Pin it in place, being careful to keep the design completely flat and making sure you’re only pinning it to one layer of the shirt.
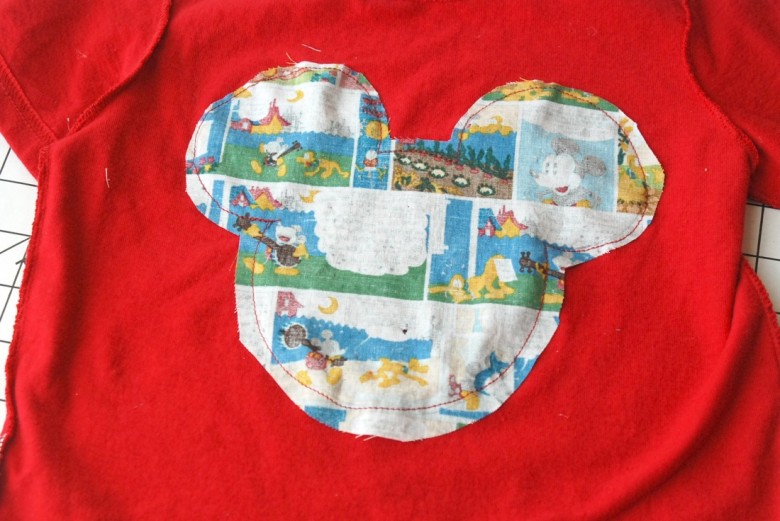
Carefully sew around the shape on the line you traced. Be sure to back stitch at the beginning and end of your seam, and make sure you don’t accidentally sew through both layers of the shirt. {Not that I’ve ever done anything like that, ever. Ahem.}
Clip all your excess threads.
Turn your shirt right side out.
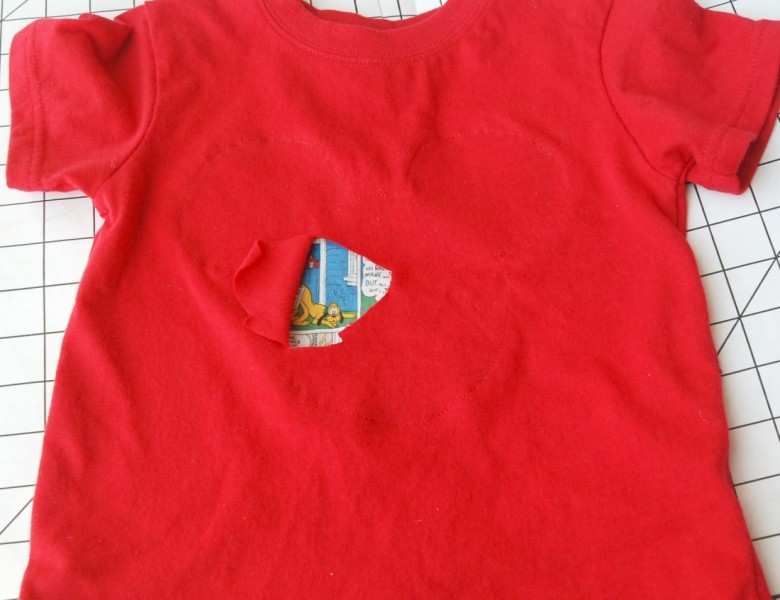
Now comes the fun part! You are going to cut away all of the shirt inside your sewing line and reveal the fabric underneath. The easiest way to start this is to put one hand inside the shirt and pinch in the middle of the fabric you just sewed, while using your other hand to pinch the front of the shirt, and pull the two layers apart. Start your cut in the middle of your design, and BE CAREFUL to only cut the shirt, not the fabric underneath.
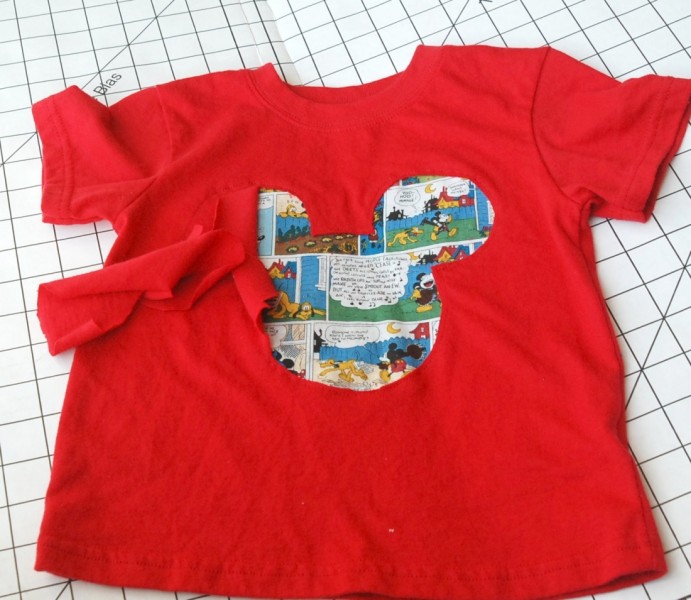
Carefully cut away all of the shirt inside your design. Mason and Connor LOVED watching this part. Connor kept saying, “Whoa!! It’s like magic!!” This project might be super easy, but it will make your kids think you’re a magician. Which is pretty cool.
Try to cut as close as you can to the line you sewed without cutting through it {probably somewhere between 1/8″ and 1/4″.}
That’s seriously all there is to it! The t-shirt fabric won’t fray, so you can wash it as you’d wash any other shirt.
My little buddy was so excited about his new shirt that he wore it for three straight days. {I did make him take it off at night so it wasn’t THAT gross.
Here’s another shirt I made for him for his 2nd birthday.

If you make one, I’d love to see it!
Disclosure of Material Connection: Some of the links in the post above may be affiliate links. Among others, we are a participant in the Amazon Services LLC Associates Program, an affiliate advertising program designed to provide a means for us to earn fees by linking to Amazon.com and affiliated sites. As an Amazon Associate I earn from qualifying purchases. This means if you click on the link and purchase the item, I will receive an affiliate commission. Regardless, I only recommend products or services I use personally and believe will add value to my readers. I am disclosing this in accordance with the Federal Trade Commission’s 16 CFR, Part 255: “Guides Concerning the Use of Endorsements and Testimonials in Advertising.”


I love your reverse applique tutorial, and so wish that I could sew so I could make way cool things like these for my kids!
My friend and I were just talking about this!! It seems to be pretty simple after looking at your tutorial… easy enough for a beginner do you think?! We just started a sewing party once a month where we get together and take on a project. I have to add this one to my list!! Thanks so much for sharing and I love the step by step! #SITSbloggin
Cool idea, I will most definitely be trying this. #SITSblogging
I have honestly stayed away from applique because I thought it would be too hard, but you made it look easy! I’m pretty sure I can handle that after all. 🙂
Hi Jenn, what a cute project. It would also be a nice way to use a favorite piece of fabric. that isn’t big enough for a larger project. Thanks so much for sharing your tutorial. I am pinning to my t-shirt transformation board. Have a wonderful weekend.
Hi, I tried to subscribe by email but this is the message I got, The feed does not have subscriptions by email enabled.